Generating UV Maps from Mental Ray
There are different ways to generate UV Maps (index into texture space) with Mental Ray, basically either by texture mapping an image or by setting the UV vector state as the color.
For such data we don't want to over or undersample too much ( for example, when generating UVs with Mental Ray, we don't want mip map ). The task is to simply generate texture representing UV values for someone to use later on (to apply texturing). Texture Mapping is described in RE:Map manual, here we only look into Mental Ray settings so the image data is actually usable for us.
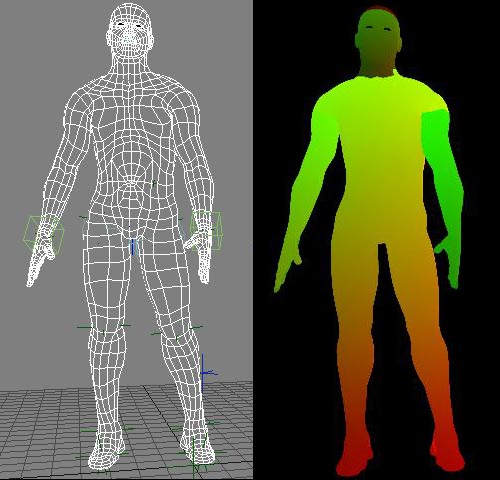
In Softimage XSI, Max and Maya (and other 3D apps that use Mental Ray) you want to use a simple ramp in the red and green channel as your texture map, with alpha set to be full on at each pixel. We apply that texture to a model that has been UV parametrized and we get a rendered UV Map we can use in post.
Mental Ray Sampling Settings
1) First, you want to turn Jitter Sampling to OFF.
2) You want to set MIN Sample to 0 (1 ray per pixel minimum) and Max Sample to an higher value so the edges of the objects are still anti-aliased. If your Min Sample is below 0 (eg -1 is a ray per block of 2x2 pixels) you will get blocky results.
Rendering Settings
Make sure your render is at least a 16 bit per channel format. We did encounter a few cases where float UVs were necessary but generally 16 bpc suffice. Remember if your result in RE:Map is blocky, then you probably rendered your maps at 8 bits. In general, there are not enough values in 256 levels to properly represent pixel coordinates for a useful texture map image.
Turn Alpha to on. Usually 16 bit per channel is enough. Internally a tool like RE:Map assume the UV Map is "straight", not premultiplied. If you don't know how to do that, don't worry, tools like After Effects have on import an option to interpret the Alpha. If you rendered "PreMult" then simply in AE select "PreMult" in the Interpret Footage panel. Remember RE:Map treats alpha in your UV map as transparency.
How do I make such a ramp? If you are not sure how you can always use RE:Map Displace with a scale of 0.0 and output mode Screen Coords. Make sure this ramp is output 16 bit or float.

Unit UV texture map to use to texture object. Note that the ramp in the red channel goes from 0 (no red) to 1 (full red) from left to right and that the ramp in the green channel goes from 0 to 1 from the bottom to the top.
Object rendered with UV ramp to be used with RE:Map UV and RE:Map Inverse UV.