Find a Tutorial
 Autograph
 DEFlicker
 RE:Fill
 RE:Grade
 RE:Lens
 REZup
REZup


-
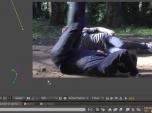
Twixtor Pro - Virtual Camera moves - multi-view interpolation
See TutorialDescription
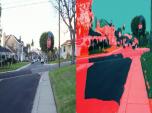
This tutorial covers some advanced tools in Twixtor Pro including Masks & Splines and also, RE:Match Stereo was used to remove a water spot from the footage.Special Thanks to William Watling for providing the footage in this tutorial:http://www.illuminessence.co.uk/In this tutorial, we interpolate between different still camera views. We review some advanced techniques (mattes and splines) to help the frame interpolation. RE:Match Stereo was used to remove a water spot from the footage.
This Tutorial Includes
- Video
-
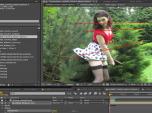
Twixtor Pro Advanced Tools - Masks & Splines
See TutorialDescription
This tutorial covers some advanced tools in Twixtor Pro including Masks & Splines and also, Smart blend usage and tips on Roto'ing to improve final results.
This Tutorial Includes
- Video
-
Using Reel Smart Motion Blur with modo 701 outputs in Nuke & After Effects
See TutorialDescription
the use of motion vectors which modo can output at render time.You can access the sample files including the Nuke and After Effects files here9bstudios.com/modo70x/CrazyChicken.zipA video covering the use of Reel Smart Motion Blur to add motion blur to your images in the post process via the use of motion vectors which modo can output at render time.You can access the sample files including the Nuke and After Effects files here 9bstudios.com/modo70x/CrazyChicken.zip
Special Thanks to Yazan Malkosh 9bstudios.com for providing us with this tutorial. The 3D renderer is Modo luxology.com
This Tutorial Includes
- Video
-
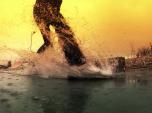
Advanced Twixtor Pro: better results using mattes and splines in After Effects
See TutorialDescription
Flashback Japan's tutorial series "Creators' View" features a Japanese video director Koutaro Takano to provide in-depth review and explanation of Twixtor. This is our adaptation of their tutorial on how to utilize the Twixtor Pro features to create speed changes in footage.Special Thanks to Flashback Japan for creating the Original version.Adapted by: Lori FreitagCompany: RE:Vision Effectslink: http://revisionfx.com/products/twixtor/Flashback Japan's tutorial series "Creators' View" features a Japanese video director Koutaro Takano to provide in-depth review and explanation of Twixtor. This is our adaptation of their tutorial on how to utilize the Twixtor Pro features to create speed changes in footage.
Special Thanks to Flashback Japan for creating the Original version.This Tutorial Includes
- Video
-
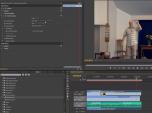
RE:Match Non-matching Cameras in Premiere Pro
See TutorialDescription
In this tutorial, Andrew Devis demonstrates a relatively new plug-in by RE:Vision Effects called RE:Match and how it can very quickly and accurately deal with the very common problem of non-matching cameras in Premiere Pro.
This Tutorial Includes
- Video
-
Exporting 3D Renders out of C4D for our plugins: Part 2 - More Passes
See TutorialDescription
This tutorial shows how how to set up a project in Cinema 4D to get the best results for use with RE:Map UV and RSMB Pro Vectors, Smoothkit ZBlur, RE:Fill and Shade Shape in After Effects (although you can use other host applications for compositing and some of this will apply to other plugins).Special Thanks to Patrick Goski at Maxon.net for creating & providing the C4D sample project and for his support 24/7.This tutorial shows how how to set up a project in Cinema 4D to get the best results for use with RE:Map UV and RSMB Pro Vectors, Smoothkit ZBlur, RE:Fill and Shade Shape in After Effects (although you can use other host applications for compositing and some of this will apply to other plugins).
Special Thanks to Patrick Goski at Maxon.net for creating & providing the C4D sample project and for his support 24/7.
This Tutorial Includes
- Video
-
Introduction to RE:Match Stereo
See TutorialDescription
Description:This tutorial covers the basic concepts and use for RE:Match Stereo
Credits:We would like to thank the following for providing footage:
Jaime Fernández Miranda - jim-box.com.Some material was licensed from Mammoth HD - mammothhd-3d.com/
Thank you to Werner Bloos info@digi-dat.de for providingFootage
OriginalMusic by Bob Bralove, bobbralove.comAlso, thanks to Anthony Magliocco additional footage.
This Tutorial Includes
- Video
-
Introduction to RE:Match Color
See TutorialDescription
This tutorial covers the basic concepts and use for RE:Match MulticamCredits:We would like to thank the following for providing footage:Some material was licensed from Mammoth HD - mammothhd-3d.com/The horses are from Trey Ratcliff of stuckincustoms.comAnd also, thanks to Ami Sun for additional footage.Author: Lori FreitagCompany: RE:Vision Effectslink: http://revisionfx.com/products/rematch/This tutorial covers the basic concepts and use for RE:Match Color.
Credits:We would like to thank the following for providing footage:Some material was licensed from Mammoth HD - mammothhd-3d.com/The horses are from Trey Ratcliff of stuckincustoms.com
Also, thanks to Ami Sun for additional footage.
This Tutorial Includes
- Video
-
RE:Map UVW Multipass
See TutorialDescription
Joren Kandel (http://www.thepixellab.net/blog) has provided a Cinema 4D and After Effects tutorial where he shows you how to use RE:Map UV to replace a C4D UV pass with a 2D texture in After Effects.
This Tutorial Includes
- Video
-
Twixtor: When and How to use Tracking Points
See TutorialDescription
This Tutorial shows how to get better results using Tracking Points for more complex shots and to help get rid of warping or ghosting. Tracking Points are available in Twixtor Pro for AE, FCP (pre-FCPX), Premiere Pro, Nuke & OFX hosts such as Scratch & Composite.
This Tutorial Includes
- Video