
Find a Tutorial
 Autograph
 DEFlicker
 RE:Fill
 RE:Grade
 RE:Lens
 REZup
REZup


- Page:
- 1

-
Instancer: Creating an Animated Rainbow Transition
See TutorialDescription
This tutorial follows our first Instancer generator video, which goes over basic principles and concepts: https://youtu.be/krqa6o4eyYk
In this tutorial, we’ll use the Instancer generator again with a Stroke generator as a Template to create dozens of colored bands:
0:00 Intro
0:23 Animating the initial stroke
1:58 Connecting to the Instancer
2:55 Stroke distribution
3:44 Color variation
4:24 Rotating instances
4:50 Time offset
5:40 Animating strokes
6:52 Adding animated text
8:55 Blending modes
9:19 Conclusion
This Tutorial Includes
- Video
-
Autograph: Getting Started
See TutorialDescription
In this first tutorial, we'll go over Autograph's interface and main principles:
0:00 Intro
0:28 Interface
1:03 Importing graphic elements
2:12 Adding a composition and managing the format
3:41 How to use the Viewer
6:08 Adding layers in the Stack and managing parameters
7:45 Autograph's coordinate system
8:25 Transformation Widget
12:30 Reformatting using the Reader
14:06 Display mode of multidimensional parameters
15:58 Inspecting channels
17:00 Visual Stack and overlays
18:03 Animating layers with keyframes
21:34 Copying keyframes and links between parameters
23:12 Adding Modifiers
24:21 Graph Editor and interpolation types
25:36 Linking parameters
26:45 Layer motion blur
29:00 Replacing a Source
30:44 Adding a generator
32:09 Navigating the Properties Panel
32:44 Gradient parameters
33:40 Adding an image Modifier
35:32 Other types of Modifiers
37:10 Infinite space and time
37:42 Opacity and blending modes
38:40 Animating using the Animator modifier
40:30 Managing Time Offset
42:00 Conclusion
This Tutorial Includes
- Video
-
Instancer: Basic Principles and Concepts
See TutorialDescription
In this tutorial, we'll go over the basic principles of Autograph's Instancer generator. The purpose of the Instancer is to quickly populate a composition with one or more graphic sources, whether they be vector or raster images, still or animated, and to apply several variations to each of the instances:
0:00 Intro
0:26 Template
0:53 Dimension Size
1:24 Instance Transform
3:34 Animating a Template source
4:40 Instance Time offset
5:36 Varying instances
6:56 Replacing the source with an image
8:56 Instancing with multiple dimensions
10:04 Conclusion
This Tutorial Includes
- Video
-
REZup Overview - Resize & Enhance Product: REZup
See TutorialDescription
Timestamps:0:14 What is REZup?0:52 REZup Resize Workflow in After Effects.1:07 Example #1 - Scaling HD to UHD using REZup Resize.5:07 Example #2 - OFX Workflow using Autograph.6:56 Example #3 - REZup Enhance in After Effects.Description:In this tutorial, we will see two of our plugins, REZup Resize and Enhance. We see workflow examples in After Effects and in an OFX host, Autograph.REZup Enhance will increase your image quality. See new details that you did not know were available. REZup Resize will allow you to upscale your video without loss of quality.*To see Before/After results in detail please check the gallery https://revisionfx.com/gallery/#rezupTimestamps:
0:14 What is REZup?
0:52 REZup Resize Workflow in After Effects.
1:07 Example #1 - Scaling HD to UHD using REZup Resize.
5:07 Example #2 - OFX Workflow using Autograph.
6:56 Example #3 - REZup Enhance in After Effects.
Description:In this tutorial, we will see two of our plugins, REZup Resize and Enhance. We see workflow examples in After Effects and in an OFX host, Autograph.REZup Enhance will increase your image quality. See new details that you did not know were available. REZup Resize will allow you to upscale your video without loss of quality.
*To see Before/After results in detail please check the gallery https://revisionfx.com/gallery/#rezupThis Tutorial Includes
- Video
-
Twixtor in Autograph
See TutorialDescription
In this tutorial, you will see an example of speeding up and slowing down footage using Twixtor in Autograph.
This Tutorial Includes
- Video
-
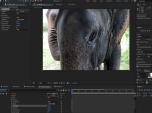
Getting started in Autograph-Using our plugins
See TutorialDescription
In this tutorial, you will see a brief overview of the Autograph interface and how to add a "modifier" (plugin) to your footage. We are using an example that utilizes our DEFlicker plugin.Thank you to www.markefxs.com for the footage in this tutorial.In this tutorial, you will see a brief overview of the Autograph interface and how to add a "modifier" (plugin) to your footage. We are using an example that utilizes our DEFlicker plugin.
Thank you to www.markefxs.com for the footage in this tutorial.This Tutorial Includes
- Video

- Page:
- 1