Find a Tutorial
 Autograph
 DEFlicker
 RE:Fill
 RE:Grade
 RE:Lens
 REZup
REZup


-
DEFlicker for FCP X
See albumDescription
Tutorials for FCP X using the DE:Flicker plug-in
Tutorials
This Album Includes
- Videos

-
Fieldskit in Premiere Pro - 3:2 pulldown & Converting Interlaced to Progressive
See TutorialDescription
In this tutorial, we will see four examples using Fieldskit to handle 3:2 pulldown and for converting Interlaced to Progressive footage in Premiere Pro.Thank you to Travis Scott for the footage used for 3:2 Pulldown example and to Doug Palmer (www.PalmerMedia.net) for the footage used for the Interlaced to Progressive footage examples.In this tutorial, we will see four examples using Fieldskit to handle 3:2 pulldown and for converting Interlaced to Progressive footage in Premiere Pro.
Thank you to Travis Scott for the footage used for 3:2 Pulldown example and to Doug Palmer (www.PalmerMedia.net) for the footage used for the Interlaced to Progressive footage examples.
This Tutorial Includes
- Video
-
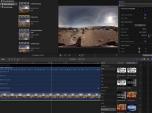
REZup - Resize workflow in FCP
See TutorialDescription
In this tutorial, we will see an example of our plugin, REZup Resize in FCP We see a workflow example since it is slightly different than the OFX example we saw in the first tutorial. This is an addendum to the REZup Overview tutorial, so make sure to watch that one first. https://www.youtube.com/channel/UCxAL4y8T3ZD13eeXvo30ntgREZup Resize will allow you to upscale your video without loss of quality.*To see Before/After results in detail please check the gallery https://revisionfx.com/gallery/#rezupIn this tutorial, we will see an example of our plugin, REZup Resize in FCP.
We see a workflow example since it is slightly different than the OFX example we saw in the first tutorial. This is an addendum to the REZup Overview tutorial, so make sure to watch that one first.
REZup Resize will allow you to upscale your video without loss of quality.
*To see Before/After results in detail please check the gallery.This Tutorial Includes
- Video
-
Twixtor, Time Remapping and Excel
See TutorialDescription
In this tutorial, you will see two different methods used to remap time, as well as a shortcut using an Excel spreadsheet. We also see a frame rate conversion.In this tutorial, you will see two different methods used to remap time, as well as a shortcut using an Excel spreadsheet. We also see a frame rate conversion.This Tutorial Includes
- Video
-
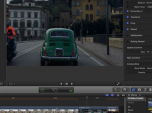
Unwrapping iZugar MKX200 3.8mm fisheye with RE:Lens
See TutorialDescription
RE:Lens tutorial using Izugar 200 mm fisheye - MKX200 is very distortion free
https://www.izugar.com/shop/product/mkx200/Compatible with ZCAM E2, and can also be used on Sony E-Mount and Nikon Z mounts with adapter ringsThis Tutorial Includes
- Video
-
How to make a perfect stabilization VR 360 Hyperlapse video
See TutorialDescription
Andrii Shramko demos a useful feature in RE:Lens spherical stabilizer allowing you to handle real hard shots by masking areas of the source. You can also use this feature on fisheye stabilization where there is moving junk (light flares and leaks) outside of the image circle that affects the tracking, as well as in stitched videos where a camera is moving indepedently from the rest of the rig (which confuses any tracker).
https://www.facebook.com/shramko360/This Tutorial Includes
- Video
-
Saving Effects Presets in FCPX
See TutorialDescription
In this tutorial, you will learn the basics for saving effects presets in FCPX. For more detailed info:https://support.apple.com/kb/PH20831?locale=en_USIn this tutorial, you will learn the basics for saving effects presets in FCPX. For more detailed info:Effects PresetsThis Tutorial Includes
- Video
-
RE:Lens - Stabilizing 360 VR in FCPX tutorial
See TutorialDescription
In this tutorial, you will learn the basics of how to use the "Spherical Stabilization" feature within RE:Lens in FCP X.In this tutorial, you will learn the basics of how to use the "Spherical Stabilization" feature within RE:Lens in FCP X.
This Tutorial Includes
- Video
-
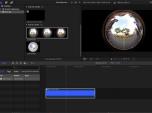
RE:Lens for FCPX - Converting fisheye footage to 360
See TutorialDescription
In this tutorial, we will use RE:Lens in FCP X to directly convert 280 degree fisheye footage, to latitude longitude panoramic format suitable for 360 video viewers.In this tutorial, we will use RE:Lens in FCP X to directly convert 280 degree fisheye footage, to latitude longitude panoramic format suitable for 360 video viewers.
This Tutorial Includes
- Video
-
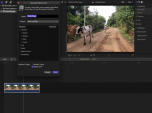
DEFlicker for FCP X - Best practices
See TutorialDescription
This tutorial covers the best practices and tips for using DE:Flicker in FCP X to get the best results. This complements our other tutorials about specific features of the product that work the same in all applications.This tutorial covers the best practices and tips for using DEFlicker in FCP X to get the best results. This complements our other tutorials about specific features of the product that work the same in all applications.
This Tutorial Includes
- Video