
Find a Tutorial
 RE:Fill
 Autograph
 Color Genius
 DEFlicker
 RE:Grade
 RE:Lens
 REZup
REZup


- Page:
- 1
-
RE:Fill in AE and Premiere
See albumDescription
A series of tutorials using RE:Fill in After Effects and Premiere
Tutorials
This Album Includes
- Videos

-
RE:Fill Added Features
See TutorialDescription
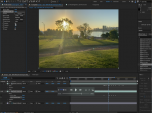
In this tutorial, we will see some new features in RE:Fill version 3.0. We will see one example using RE:Fill Offset and a second example using the RE:Fill Seamless Blend. In this version of RE:Fill we have added support for M1, Multi-Frame Rendering, added new features for RE:Fill Offset as well as a new plug-in called RE:Fill Seamless Blend.*Note: You need to be on RE:Fill v3 for this tutorialIn this tutorial, we will see some new features in RE:Fill version 3.0. We will see one example using RE:Fill Offset and a second example using the RE:Fill Seamless Blend. In this version of RE:Fill we have added support for M1, Multi-Frame Rendering, added new features for RE:Fill Offset as well as a new plug-in called RE:Fill Seamless Blend.
*Note: You need to be on RE:Fill v3 for this tutorial
This Tutorial Includes
- Video
-
RE:Fill for Better Composites
See TutorialDescription
In this tutorial, you will see how to use RE:Fill Area Fill, Grow/Shrink, Choke and RE:Fill Alpha to create a better composite. You will see examples of how these RE:Fill plugins work together to give you better results.In this tutorial, you will see how to use RE:Fill Area Fill, Grow/Shrink, Choke and RE:Fill Alpha to create a better composite. You will see examples of how these RE:Fill plugins work together to give you better results.
Music: YouTube Audio Library
This Tutorial Includes
- Video
-
Dead pixel, Hot pixel, Stuck pixel removal with RE:Fill
See TutorialDescription
In this tutorial, you will see how to use RE:Fill Area Fill to get rid of Dead, Hot or Stuck pixels. This is just one use for RE:Fill Area Fill. You can check our documentation and other tutorials for other uses.In this tutorial, you will see how to use RE:Fill Area Fill to get rid of Dead, Hot or Stuck pixels. This is just one use for RE:Fill Area Fill. You can check our documentation and other tutorials for other uses.This Tutorial Includes
- Video
-
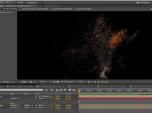
Twixtor, Particular and RE:Fill create a unique motion-based particle effect
See TutorialDescription
This tutorial will show how to use Twixtor Pro and RE:Fill and Trapcode’s Particular to turn a real-world person (or any object) into what looks like the person is made out of particles. We will be using the motion calculated from the object to throw the particles off the person, which provides more interaction between the person and the particles. You will need Twixtor Pro and RE:Fill by RE:Vision Effects and Particular (by Trapecode for Red Giant) for this tutorial.This tutorial will show how to use Twixtor Pro and RE:Fill and Trapcode’s Particular to turn a real-world person (or any object) into what looks like the person is made out of particles. We will be using the motion calculated from the object to throw the particles off the person, which provides more interaction between the person and the particles. You will need Twixtor Pro and RE:Fill by RE:Vision Effects and Particular (by Trapecode for Red Giant) for this tutorial.
This Tutorial Includes
- Video
-
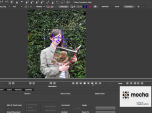
Our tools with Mocha - Guest appearance by Mask Avenger
See TutorialDescription
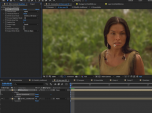
In this tutorial, we show how to integrate Mocha tools with our plugins since many of our tools support mattes, points, and masks from other software, we will see examples of this integration using Mocha to export mattes, masks, corner pin, stabilization and transform data.credits: picture set used here is of "Madison" (daughter of william @ illuminessence.co.uk)In this tutorial, we show how to integrate Mocha tools with our plugins since many of our tools support mattes, points, and masks from other software, we will see examples of this integration using Mocha to export mattes, masks, corner pin, stabilization and transform data.
01:11 Import Shape - example uses PV Feather
02:45 Open Shapes with Mask Avenger - example uses SmoothKit Directional With Splines
06:56 Import Corner Pin and Stabilization transform - into RE:Map Planar / Corner Pin (using expressions)
10:30 Import Matte - clean with RE:Fill
Credits: picture set used here is of "Madison" (daughter of william @ illuminessence.co.uk)
This Tutorial Includes
- Video
-
Exporting 3D Renders out of C4D for our plugins: Part 2 - More Passes
See TutorialDescription
This tutorial shows how how to set up a project in Cinema 4D to get the best results for use with RE:Map UV and RSMB Pro Vectors, Smoothkit ZBlur, RE:Fill and Shade Shape in After Effects (although you can use other host applications for compositing and some of this will apply to other plugins).Special Thanks to Patrick Goski at Maxon.net for creating & providing the C4D sample project and for his support 24/7.This tutorial shows how how to set up a project in Cinema 4D to get the best results for use with RE:Map UV and RSMB Pro Vectors, Smoothkit ZBlur, RE:Fill and Shade Shape in After Effects (although you can use other host applications for compositing and some of this will apply to other plugins).
Special Thanks to Patrick Goski at Maxon.net for creating & providing the C4D sample project and for his support 24/7.
This Tutorial Includes
- Video
-
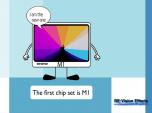
M1 and Rosetta 2
See TutorialDescription
This is a Sales support tutorial explaining M1 and Rosetta 2.*Note: There is a small typo at 00:20. It is x86-64 not x64-86Author: Lori FreitagCompany: RE:Vision EffectsThis is a Sales support tutorial explaining M1 and Rosetta 2.
*Note: There is a small typo at 00:20. It is x86-64 not x64-86This Tutorial Includes
- Video

- Page:
- 1