Find a Tutorial
-
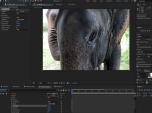
REZup Overview - Resize & Enhance Product: REZup
See TutorialDescription
Timestamps:0:14 What is REZup?0:52 REZup Resize Workflow in After Effects.1:07 Example #1 - Scaling HD to UHD using REZup Resize.5:07 Example #2 - OFX Workflow using Autograph.6:56 Example #3 - REZup Enhance in After Effects.Description:In this tutorial, we will see two of our plugins, REZup Resize and Enhance. We see workflow examples in After Effects and in an OFX host, Autograph.REZup Enhance will increase your image quality. See new details that you did not know were available. REZup Resize will allow you to upscale your video without loss of quality.*To see Before/After results in detail please check the gallery https://revisionfx.com/gallery/#rezupTimestamps:
0:14 What is REZup?
0:52 REZup Resize Workflow in After Effects.
1:07 Example #1 - Scaling HD to UHD using REZup Resize.
5:07 Example #2 - OFX Workflow using Autograph.
6:56 Example #3 - REZup Enhance in After Effects.
Description:In this tutorial, we will see two of our plugins, REZup Resize and Enhance. We see workflow examples in After Effects and in an OFX host, Autograph.REZup Enhance will increase your image quality. See new details that you did not know were available. REZup Resize will allow you to upscale your video without loss of quality.
*To see Before/After results in detail please check the gallery https://revisionfx.com/gallery/#rezupThis Tutorial Includes
- Video
-
Twixtor in Autograph
See TutorialDescription
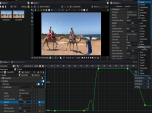
In this tutorial, you will see an example of speeding up and slowing down footage using Twixtor in Autograph.
This Tutorial Includes
- Video
-
Getting started in Autograph-Using our plugins
See TutorialDescription
In this tutorial, you will see a brief overview of the Autograph interface and how to add a "modifier" (plugin) to your footage. We are using an example that utilizes our DEFlicker plugin.Thank you to www.markefxs.com for the footage in this tutorial.In this tutorial, you will see a brief overview of the Autograph interface and how to add a "modifier" (plugin) to your footage. We are using an example that utilizes our DEFlicker plugin.
Thank you to www.markefxs.com for the footage in this tutorial.This Tutorial Includes
- Video
-
RSMB Pro - Mattes and Track Points
See TutorialDescription
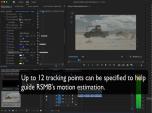
Description:In this tutorial, we will see two examples showing some advanced features for RSMB Pro. You will see an example using a matte to separate foreground from background and also how to use point tracking to guide RSMB's image tracking on problematic footage.Up to 12 tracking points can be specified to help guide RSMB Pro's motion estimation.Credits:Thank you to Mark Tekushan for the use of theNYC footage we used for the first example.www.mfxs.comThank you to Avi Cohen for the use of thefootage for the second example.www.AviCohen.tvIn this tutorial, we will see two examples showing some advanced features for RSMB Pro. You will see an example using a matte to separate foreground from background and also how to use point tracking to guide RSMB's image tracking on problematic footage.Up to 12 tracking points can be specified to help guide RSMB Pro's motion estimation.
Credits:
Thank you to Mark Tekushan for the use of theNYC footage we used for the first example. www.mfxs.com
Thank you to Avi Cohen for the use of the footage for the second example. www.AviCohen.tvThis Tutorial Includes
- Video
-
RE: Vision plugins in Resolve - Workarounds
See TutorialDescription
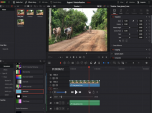
In this tutorial, we will see two new workarounds for using our OFX plug-ins with Resolve/Fusion. One of our workarounds is not working anymore in Fusion, so we will start with what “not to do”, and then show you the workarounds that do currently work.In this tutorial, we will see two new workarounds for using our OFX plug-ins with Resolve/Fusion. One of our workarounds is not working anymore in Fusion, so we will start with what “not to do”, and then show you the workarounds that do currently work.
This Tutorial Includes
- Video
-
AE and MFR - Check your memory
See TutorialDescription
Timestamps: 00:05 Check your memory. 02:06 Memory preferences inside of AE.
In this Mini tutorial, we will see how to check your memory and how to tell AE that you have less memory than you actually have. These suggestions are offered to make After Effects v22 (and over) and MFR more robust when any temporal processing effect requesting multiple input frames is used. There are some known issues with caching in AE for this scenario at this time. Due to these issues in AE 22, we will offer you some less drastic suggestions, than turning off MFR, although… each mini tutorial will address a specific issue.
*Note: Issue with Analysis and Preview Cache when Idle fixed in AE 22.1.1 public beta
This Tutorial Includes
- Video
-
AE and MFR - Real Basics
See TutorialDescription
In this mini tutorial, we will see a quick suggestion to make After Effects v22 (and over) and MFR more robust when any temporal processing effect requesting multiple input frames is used. There are some known issues with caching in AE for this scenario at this time. Due to these issues in AE 22, we will offer you some less drastic suggestions, than turning off MFR, although…
*Note: Issue with Analysis and Preview Cache when Idle fixed in AE 22.1.1 public beta.
This Tutorial Includes
- Video
-
How to use V-Ray Velocity pass with RSMB
See TutorialDescription
Tutorial describing how to set up V-Ray Velocity pass with RSMB in After Effects and Nuke.
Thank you to Aleksandar Kasabov at Chaos Group for this tutorial.
This Tutorial Includes
- Web Pages
-
RE:Fill Added Features
See TutorialDescription
In this tutorial, we will see some new features in RE:Fill version 3.0. We will see one example using RE:Fill Offset and a second example using the RE:Fill Seamless Blend. In this version of RE:Fill we have added support for M1, Multi-Frame Rendering, added new features for RE:Fill Offset as well as a new plug-in called RE:Fill Seamless Blend.*Note: You need to be on RE:Fill v3 for this tutorialIn this tutorial, we will see some new features in RE:Fill version 3.0. We will see one example using RE:Fill Offset and a second example using the RE:Fill Seamless Blend. In this version of RE:Fill we have added support for M1, Multi-Frame Rendering, added new features for RE:Fill Offset as well as a new plug-in called RE:Fill Seamless Blend.
*Note: You need to be on RE:Fill v3 for this tutorial
This Tutorial Includes
- Video
-
Arnold Motion Vectors Settings
See TutorialDescription
Arnold Motion Vectors settings for our tools with example using After Effects.
This was done with Arnold in Maya but settings should be the same with Arnold in C4D, 3DS Max, Houdini etc...This Tutorial Includes
- Web Pages

 All Products
 Autograph
 DE:Noise
 DEFlicker
 Effections
 FieldsKit
 PV Feather
 RE:Fill
 RE:Flex
 RE:Grade
 RE:Lens
 RE:Map
 RE:Match
 REZup
REZup RSMB
RSMB Shade/Shape
 SmoothKit
 Twixtor
 Video Gogh


