Find a Tutorial
 Autograph
 Color Genius
 DEFlicker
 RE:Fill
 RE:Grade
 RE:Lens
 REZup
REZup


-
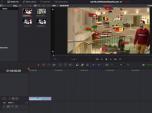
Scratch - Setting up an effect in Scratch 9 and over - with different input/output resolutions
See TutorialDescription
In this tutorial, you will learn the basic steps needed to use RE:Lens in Scratch by assimilate when the input and output have different resolutions.*Note: This tutorial is for Scratch version 9 and higher. For earlier versions of Scratch, please watch this tutorial. https://www.youtube.com/watch?v=YNGI2t0ieAs&list=PLJZE0COAfWUWCBFFdWbEyV1YIgZr9jiu3&index=5&t=2sIn this tutorial, you will learn the basic steps needed to use RE:Lens in Scratch by assimilate when the input and output have different resolutions.*Note: This tutorial is for Scratch version 9 and higher. For earlier versions of Scratch, please watch this tutorial. Earlier versions
This Tutorial Includes
- Video
-
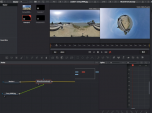
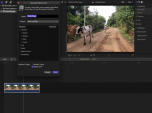
Resolve - Handling Clips with different Input and Output size
See TutorialDescription
In this tutorial we will see two examples of how to input footage at one size and output at another size in Resolve with the RE:Vision Effects RE:Lens plugin.
This Tutorial Includes
- Video
-
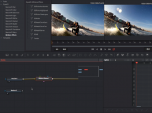
Resolve Tutorial 3 - Handling Multiple Clips
See TutorialDescription
In this tutorial, you will see six examples using REMatch with multiple clips. In addition, you will see how to apply presets to clips (in this case we used RSMB and DE:Noise but you can use any plugins).Author: Lori FreitagCompany: RE:Vision Effectslink: http://revisionfx.com/products/REMatch/Music: Awaken by Mrpetelee Rzd5 | https://soundcloud.com/mrpeteleerzd5officialMusic promoted by https://www.free-stock-music.comSurfer footage by: Jaime Fernández Miranda. http://jim-box.com/In this tutorial, you will see six examples using REMatch with multiple clips. In addition, you will see how to apply presets to clips (in this case we used RSMB and DE:Noise but you can use any plugins).
Music: Awaken by Mrpetelee Rzd5 | https://soundcloud.com/mrpeteleerzd5officialMusic promoted by https://www.free-stock-music.com
Surfer footage by: Jaime Fernández Miranda.This Tutorial Includes
- Video
-
RE:Vision plugins in Resolve 2: Twixtor
See TutorialDescription
In this tutorial, you will learn the basics of how to use the Twixtor plugin within Resolve. You will see when to use which page for which effect.
This Tutorial Includes
- Video
-
RE:Vision plugins in Resolve 1: DEFlicker
See TutorialDescription
In this tutorial, you will learn the basics of how to use the DEFlicker plugin within Resolve. You will see how to use all three tools inside of all three pages.In this tutorial, you will learn the basics of how to use the DEFlicker plugin within Resolve. You will see how to use all three tools inside of all three pages.
This Tutorial Includes
- Video
-
Saving Effects Presets in FCPX
See TutorialDescription
In this tutorial, you will learn the basics for saving effects presets in FCPX. For more detailed info:https://support.apple.com/kb/PH20831?locale=en_USIn this tutorial, you will learn the basics for saving effects presets in FCPX. For more detailed info:Effects PresetsThis Tutorial Includes
- Video
-
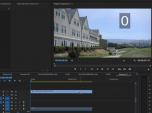
Premiere Pro to After Effects Workflow
See TutorialDescription
In this tutorial, we will see three examples showing the workflow from Premiere Pro to After Effects using Dynamic link. Examples include use of Twixtor, RE:Match and RE:Lens plugins.In this tutorial, we will see three examples showing the workflow from Premiere Pro to After Effects using Dynamic link. Examples include use of Twixtor, RE:Match and RE:Lens plugins.
This Tutorial Includes
- Video
-
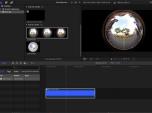
RE:Lens - Stabilizing 360 VR in FCPX tutorial
See TutorialDescription
In this tutorial, you will learn the basics of how to use the "Spherical Stabilization" feature within RE:Lens in FCP X.In this tutorial, you will learn the basics of how to use the "Spherical Stabilization" feature within RE:Lens in FCP X.
This Tutorial Includes
- Video
-
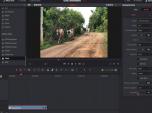
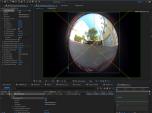
RE:Lens for FCPX - Converting fisheye footage to 360
See TutorialDescription
In this tutorial, we will use RE:Lens in FCP X to directly convert 280 degree fisheye footage, to latitude longitude panoramic format suitable for 360 video viewers.In this tutorial, we will use RE:Lens in FCP X to directly convert 280 degree fisheye footage, to latitude longitude panoramic format suitable for 360 video viewers.
This Tutorial Includes
- Video
-
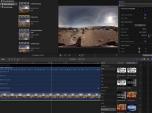
RE:Lens - Shoot now, do the camera work later
See TutorialDescription
In this tutorial, we will use the RE:Lens Superfish plugin, to animate the camera in post and show two examples.camera used: Modified GoPro camera with the Entanyia fisheye lens by EntapanoIn this tutorial, we will use the RE:Lens Superfish and the From Latlong plugin, to animate the camera in post and show two examples.
camera used: Modified GoPro camera with the Entanyia fisheye lens by EntapanoThis Tutorial Includes
- Video