Find a Tutorial
 ARRI Film Lab
 Autograph
 Color Genius
 DEFlicker
 RE:Fill
 RE:Grade
 RE:Lens
 REZup
REZup


-
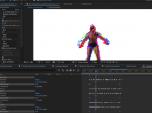
RE:Flex for AE - Moving Morph using per-spline blending and warping controls
See TutorialDescription
This screencast takes the Moving Morph a step further, explaining how to vary the splines dissolve rates and also how to use the Control Image to fine tune your results.Special Thanks to credit Amy Seiwert's Imagery ( http://www.asimagery.org ) for providing footage for this tutorial.This screencast takes the Moving Morph a step further, explaining how to vary the splines dissolve rates and also how to use the Control Image to fine tune your results.
Special Thanks to credit Amy Seiwert's Imagery ( http://www.asimagery.org ) for providing footage for this tutorial.This Tutorial Includes
- Video
-
RE:Flex - Moving Morph:Morphing between Moving Images - ex.2
See TutorialDescription
In this tutorial, you will learn the basic steps needed to create a morph between moving images.
Special Thanks to credit Amy Seiwert's Imagery ( http://www.asimagery.org ) for providing footage for this tutorial.Special Thanks to credit Amy Seiwert's Imagery ( http://www.asimagery.org ) for providing footage for this tutorial.
This Tutorial Includes
- Video
- ZIP File
-
Setting up our plug-ins in Scratch when input and output resolution are different
See TutorialDescription
In this tutorial, you will learn the basic steps needed to use RE:Lens in Scratch by assimilate when the input and output have different resolutions.In this tutorial, you will learn the basic steps needed to use RE:Lens in Scratch by assimilate when the input and output have different resolutions.This Tutorial Includes
- Video
-
RE:Lens - Advanced Stabilization Tips
See TutorialDescription
In this tutorial, you will see some advanced tips and tricks for using the Spherical Stabilizer within RE:Lens ToLatLong.Special thanks to Kevin Cruz & KODAK PIXPRO for the use of the Camel footageIn this tutorial, you will see some advanced tips and tricks for using the Spherical Stabilizer within RE:Lens ToLatLong.
Special thanks to Kevin Cruz & KODAK PIXPRO for the use of the Camel footageThis Tutorial Includes
- Video
-
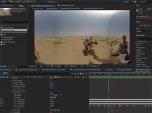
RE:Lens Project Example - Tips and Tricks
See TutorialDescription
In this tutorial, you will see the workflow of a RE:Lens project utilizing Superfish and the "Spherical Stabilization" feature.Special thanks to JK Imaging Ltd. for the use of the Camel footage.In this tutorial, you will see the workflow of a RE:Lens project utilizing Superfish and the "Spherical Stabilization" feature.
Special thanks to JK Imaging Ltd. for the use of the Camel footage.This Tutorial Includes
- Video
-
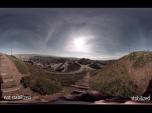
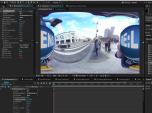
RE:Lens - Stabilizing 360 VR footage
See TutorialDescription
In this tutorial, you will learn the basics of how to use the "Spherical Stabilization" feature within RE:Lens Superfish, ToLatLong and FromLatLong.In this tutorial, you will learn the basics of how to use the "Spherical Stabilization" feature within RE:Lens Superfish, ToLatLong and FromLatLong.
This Tutorial Includes
- Video
-
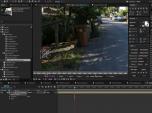
Tracking, Fisheye lenses and RE:Lens
See TutorialDescription
Description:In this tutorial, you will see a workflow example of tracking a flat graphic to footage that was shot using a Full Frame Fisheye Lens. Lens used: Panasonic Lumix 8mm fisheye on GH4 Full Frame Fisheye and RE:Lens DEFishAuthor: Lori FreitagCompany: RE:Vision Effectslink: http://revisionfx.com/products/RELens/Description:In this tutorial, you will see a workflow example of tracking a flat graphic to footage that was shot using a Full Frame Fisheye Lens. Lens used: Panasonic Lumix 8mm fisheye on GH4 Full Frame Fisheye and RE:Lens DEFish
This Tutorial Includes
- Video
-
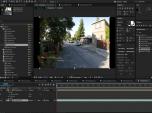
RE:Lens Defish and Superfish
See TutorialDescription
In this tutorial, you will see several examples where you will see different kinds of lens and which RE:Lens tool to use for what purpose.
Cameras and lenses used:
Ex. 1) - (00:15) Wide-angle lens used on GH4: Panasonic 7-14mm f/4
Beating the edge of frame over-stretching with Defish
Ex. 2) - (01:29) Anamorphic Lens used on GH 4: SLR Magic Anamorphic-Cine 2X 50mm T2.8 MFT
Non-Square Pixel Aspect Ratio, Anamorphic process
Ex. 2.A) - GoPro Hero 4 Black Superview Mode
Ex. 3) - (06:05) Full Frame Fisheye project-Lens used: Panasonic Lumix 8mm fisheye on GH4
Full Frame Fisheye and RE:Lens Defish
Ex. 4) - (07:06) Circular Fisheye - Lens: Sigma 4.5mm f 2.8 DC HSM Fisheye for Canon
Circular Fisheye lenses and RE:Lens Superfish
Ex. 4.A) - With Kipon Adapter
Ex. 4.B) - With Metabones Adapter
Ex. 5) - (11:10) Super Fisheye Lenses - Lens: Superfish lens by Entanya Entapano 280deg. on Back-Bone Ribcage
- Superfish Lenses
This Tutorial Includes
- Video
-
Motion Graphics and RE:Lens
See TutorialDescription
In this tutorial, we will see how to use motion graphics, text and AE Paint with RE:Lens.
This Tutorial Includes
- Video
-
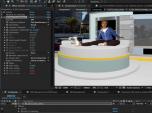
RE:Lens Working with 360 Virtual Sets
See TutorialDescription
In this tutorial, we will see how to use your virtual set and re-use it with RE:Lens.13 layers composited in equirectangular space with RE:Lens "To LatLong" plug-in.Was also used:RE:Flex Morph was used to create animated loops of the greenscreen footage to fit duration.RE:Map UV was used to texture map the monitors.RE:Match Color was used to match a plate that wasn't color balanced.Video stitched with VideoStitch and PTGui.3D set made in Maya, rendered in Mental Ray.Assembled in After EffectsIn this tutorial, we will see how to use your virtual set and re-use it with RE:Lens.
13 layers composited in equirectangular space with RE:Lens "To LatLong" plug-in.
RE:Flex Morph was used to create animated loops of the greenscreen footage to fit duration.RE:Map UV was used to texture map the monitors.RE:Match Color was used to match a plate that wasn't color balanced.Video stitched with VideoStitch and PTGui.3D set made in Maya, rendered in Mental Ray.Assembled in After Effects
This Tutorial Includes
- Video