Find a Tutorial
 ARRI Film Lab
 Autograph
 Color Genius
 DEFlicker
 RE:Fill
 RE:Grade
 RE:Lens
 REZup
REZup


-
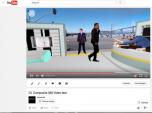
Uploading 360 Video to YouTube, Facebook and other players
See TutorialDescription
In this tutorial, you will learn how to upload 360º Video to YouTube and Facebook. Go to this url for step-by-step instructions..https://support.google.com/youtube/answer/6178631?hl=enhttp://www.revisionfx.com/products/relens/In this tutorial, you will learn how to upload 360º Video to YouTube and Facebook. Go to this url for step-by-step instructions..https://support.google.com/youtube/answer/6178631?hl=en
Also, how to export your 360 video with proper metadata, directly from Premiere Pro and After Effects.
This Tutorial Includes
- Video
-
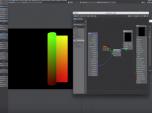
Export UV maps out of 3DS Max or Maya using Mental Ray or V-Ray
See TutorialDescription
This document outlines how to generate UV maps out of 3DS Max and Maya using Mental RAY (MR) and VRAY with reference renders and reference scenes and screenshots showing the settings. The intent is then use RE:Map UV or RE:Map Inverse UV in your compositing program.
We would like to thank Chad Capeland (https://indicated.co/) for helping us to document this process and testing the best approaches.
Note if you use V-Ray in Cinema 4D for example, you might want to also check our video tutorial using Cinema 4D Renderer ( http://help.revisionfx.com/task/22/#/tutorial-150) ).
This Tutorial Includes
- Web Pages
- ZIP Files
-
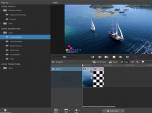
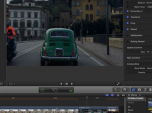
Twixter Overview in Sony Catalyst Edit
See TutorialDescription
This tutorial shows how to do a simple speed-up and slow-down using Twixtor in Sony Catalyst EditSpecial Thanks to Mark Tekushan www.mfxs.com for allowing us to use his sailing footage.This tutorial shows how to do a simple speed-up and slow-down using Twixtor in Sony Catalyst Edit
Special Thanks to Mark Tekushan www.mfxs.com for allowing us to use his sailing footage.This Tutorial Includes
- Video
-
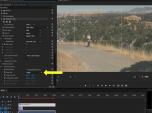
Quick Tip - Setting Color Correction Window
See TutorialDescription
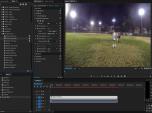
Description:This tutorial covers the best practices and tips for using DE:Flicker in Premiere Pro to get the best results. This complements our other tutorials about specific features of the product that work the same in all applicationsThis tutorial covers the best practices and tips for using DE:Flicker in Premiere Pro to get the best results. This complements our other tutorials about specific features of the product that work the same in all applications.Description:In this tutorial, you learn about the Window option for more precise color matching with RE:Match color. This complements our other tutorials about specific features of the product that work the same in all applications.
This tutorial covers the best practices and tips for using DE:Flicker in Premiere Pro to get the best results. This complements our other tutorials about specific features of the product that work the same in all applicationsIn this tutorial, you learn about the Window option for more precise color matching with RE:Match color. This complements our other tutorials about specific features of the product that work the same in all applications.This Tutorial Includes
- Video
-
Lightwave to AE: Deformers and RE:Map
See TutorialDescription
How to get a UV pass out of LightWave 3D, for use in After Effects using the RE:Map plugin with a few other tips along the way.
Check Mark Warner blog for other cool Lightwave tricks...
This Tutorial Includes
- Video
-
DEFlicker for Premiere Pro - Best Practices
See TutorialDescription
This tutorial covers the best practices and tips for using DE:Flicker in Premiere Pro to get the best results. This complements our other tutorials about specific features of the product that work the same in all applications.Author: Lori FreitagCompany: RE:Vision Effectslink: http://revisionfx.com/products/DEFlicker/This tutorial covers the best practices and tips for using DEFlicker in Premiere Pro to get the best results. This complements our other tutorials about specific features of the product that work the same in all applications.
This Tutorial Includes
- Video
-
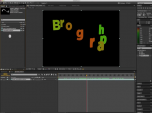
Brograph Tutorial 034 - C4D and RSMB Pro Vectors
See TutorialDescription
Thank you to "Brograph Tutorials".
In this tutorial, you will learn how to render out motion vector files in C4D and bring them into AE and use the RSMB plug in for motion blur.
*Note: The author forgot to set his project to 16 bpc of floating point which removes a lot the need the smooth the motion vector pass (why he uses a blur) particularly as resolution increases.
If you work in floating point in AE, you could also use shift channel instead of set matte.
You can also do all the MV pre-processing with RE:Fill Alpha or RE:Fill choke if you have that.This Tutorial Includes
- Video
-
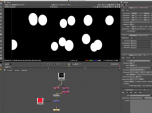
Post motion blur using RSMB motion vectors in Nuke from C4D
See TutorialDescription
Quick overview of how RSMB uses motion vectors in Nuke from a C4D motion vector pass.
Thanks to Impossible Engine for creating this tutorial.
This Tutorial Includes
- Video
-
DEFlicker for FCP X - Best practices
See TutorialDescription
This tutorial covers the best practices and tips for using DE:Flicker in FCP X to get the best results. This complements our other tutorials about specific features of the product that work the same in all applications.This tutorial covers the best practices and tips for using DEFlicker in FCP X to get the best results. This complements our other tutorials about specific features of the product that work the same in all applications.
This Tutorial Includes
- Video
-
HitFilm: Twixtor basics
See TutorialDescription
his tutorial covers the basic use of Twixtor in HitFilm to do a Speedup, a Slow down and an animated Speed Ramp.Special thanks to Rickard Bengston https://vimeo.com/rbengtsson for use of his footage.his tutorial covers the basic use of Twixtor in HitFilm to do a Speedup, a Slow down and an animated Speed Ramp.
Special thanks to Rickard Bengston for use of his footage.
This Tutorial Includes
- Video