
Find a Tutorial
 Autograph
 DEFlicker
 RE:Fill
 RE:Grade
 RE:Lens
 REZup
REZup


- Page:
- 1
- |
- 2
-
RE:Lens
See albumDescription
A series of tutorials using the RE:Lens plug-ins
Tutorials
- RE:Lens Defish and Superfish »
- Motion Graphics and RE:Lens »
- Tracking, Fisheye lenses and RE:Lens »
- RE:Lens - Stabilizing 360 VR footage »
- RE:Lens Project Example - Tips and Tricks »
- Using 360 Video as a second camera »
- RE:Lens in Scratch - Part 1 »
- RE:Lens in Scratch - Part 2 »
- RE:Lens - Shoot now, do the camera work later »
- RE:Lens - Advanced Stabilization Tips »
- RE:Lens Working with 360 Virtual Sets »
- Uploading 360 Video to YouTube, Facebook and other players »
- Premiere Pro to After Effects Workflow »
- RE:Lens for FCPX - Converting fisheye footage to 360 »
- RE:Lens - Stabilizing 360 VR in FCPX tutorial »
- Resolve - Handling Clips with different Input and Output size »
- Scratch - Setting up an effect in Scratch 9 and over - with different input/output resolutions »
- How to make a perfect stabilization VR 360 Hyperlapse video »
- Unwrapping iZugar MKX200 3.8mm fisheye with RE:Lens »
- Handling clips with different Input and Output sizes within Flame »
This Album Includes
- Videos

-
REZup Overview - Resize & Enhance Product: REZup
See TutorialDescription
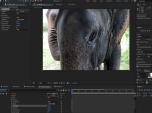
Timestamps:0:14 What is REZup?0:52 REZup Resize Workflow in After Effects.1:07 Example #1 - Scaling HD to UHD using REZup Resize.5:07 Example #2 - OFX Workflow using Autograph.6:56 Example #3 - REZup Enhance in After Effects.Description:In this tutorial, we will see two of our plugins, REZup Resize and Enhance. We see workflow examples in After Effects and in an OFX host, Autograph.REZup Enhance will increase your image quality. See new details that you did not know were available. REZup Resize will allow you to upscale your video without loss of quality.*To see Before/After results in detail please check the gallery https://revisionfx.com/gallery/#rezupTimestamps:
0:14 What is REZup?
0:52 REZup Resize Workflow in After Effects.
1:07 Example #1 - Scaling HD to UHD using REZup Resize.
5:07 Example #2 - OFX Workflow using Autograph.
6:56 Example #3 - REZup Enhance in After Effects.
Description:In this tutorial, we will see two of our plugins, REZup Resize and Enhance. We see workflow examples in After Effects and in an OFX host, Autograph.REZup Enhance will increase your image quality. See new details that you did not know were available. REZup Resize will allow you to upscale your video without loss of quality.
*To see Before/After results in detail please check the gallery https://revisionfx.com/gallery/#rezupThis Tutorial Includes
- Video
-
Twixtor, Time Remapping and Excel
See TutorialDescription
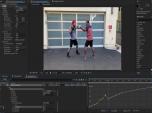
In this tutorial, you will see two different methods used to remap time, as well as a shortcut using an Excel spreadsheet. We also see a frame rate conversion.In this tutorial, you will see two different methods used to remap time, as well as a shortcut using an Excel spreadsheet. We also see a frame rate conversion.This Tutorial Includes
- Video
-
How to remove Rolling Bands with DEFlicker
See TutorialDescription
In this tutorial, you will learn the basic steps for using DEFlicker Rolling Bands in After Effects. You will see a few examples demonstrating different scenarios.06:56Effect here is the wagon-wheel effect - see these links tolearn more about wagon wheel effect:https://www.youtube.com/watch?v=VNftf5qLpiAhttps://www.youtube.com/watch?v=QOwzkND_ooUhttps://www.youtube.com/watch?v=6XwgbHjRo30https://www.youtube.com/watch?v=9MN5MF72PHsThank you to Anita Rizzano for the Rolling Bands footage.In this tutorial, you will learn the basic steps for using DEFlicker Rolling Bands in After Effects. You will see a few examples demonstrating different scenarios.
06:56See these links to learn more about wagon wheel effect:
https://www.youtube.com/watchv=VNftf5qLpiAhttps://www.youtube.com/watch?v=QOwzkND_ooU
https://www.youtube.com/watch?v=6XwgbHjRo30
https://www.youtube.com/watch?v=9MN5MF72PHs
Thank you to Anita Rizzano for the Rolling Bands footage.
This Tutorial Includes
- Video
-
Using Reel Smart Motion Blur with modo 701 outputs in Nuke & After Effects
See TutorialDescription
the use of motion vectors which modo can output at render time.You can access the sample files including the Nuke and After Effects files here9bstudios.com/modo70x/CrazyChicken.zipA video covering the use of Reel Smart Motion Blur to add motion blur to your images in the post process via the use of motion vectors which modo can output at render time.You can access the sample files including the Nuke and After Effects files here 9bstudios.com/modo70x/CrazyChicken.zip
Special Thanks to Yazan Malkosh 9bstudios.com for providing us with this tutorial. The 3D renderer is Modo luxology.com
This Tutorial Includes
- Video
-
Twixtor: When and How to use Tracking Points
See TutorialDescription
This Tutorial shows how to get better results using Tracking Points for more complex shots and to help get rid of warping or ghosting. Tracking Points are available in Twixtor Pro for AE, FCP (pre-FCPX), Premiere Pro, Nuke & OFX hosts such as Scratch & Composite.
This Tutorial Includes
- Video
-
Better Retiming using a Matte
See TutorialDescription
This Tutorial shows how to get better tracking using a matte to separate your footage into multiple layers. Multiple layers are available in Twixtor Pro for AE, FCP, Premiere Pro, and Twixtor for Smoke, Flame, Fusion, Nuke & OFX hosts such as Scratch & Composite.Author: Lori FreitagCompany: RE:Vision Effectslink: http://revisionfx.com/products/twixtor/This Tutorial shows how to get better tracking using a matte to separate your footage into multiple layers. Multiple layers are available in Twixtor Pro for AE, FCP, Premiere Pro, and Twixtor for Smoke, Flame, Fusion, Nuke & OFX hosts such as Scratch & Composite.
This Tutorial Includes
- Video
-
Frame Edge Issues and Twixtor
See TutorialDescription
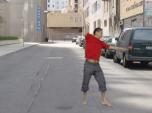
This Tutorial explains when it is appropriate to use Smart Blend and shows regular Twixtor with Inverse and with Forward Warping and compares a panning shot slowed down 10x with and without Smart Blend
Special Thanks to Mark Tekushan for allowing us to use the beach footage. www.mfxs.com
This Tutorial Includes
- Video
-
Twixtor - Fixing Unwanted Warping
See TutorialDescription
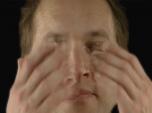
This Tutorial explains how to use Motion Sensitivity to avoid unwanted warping in your re-timed shot.
This Tutorial Includes
- Video
-
M1 and Rosetta 2
See TutorialDescription
This is a Sales support tutorial explaining M1 and Rosetta 2.*Note: There is a small typo at 00:20. It is x86-64 not x64-86Author: Lori FreitagCompany: RE:Vision EffectsThis is a Sales support tutorial explaining M1 and Rosetta 2.
*Note: There is a small typo at 00:20. It is x86-64 not x64-86This Tutorial Includes
- Video


- Page:
- 1
- |
- 2