
Find a Tutorial
 Autograph
 Color Genius
 DEFlicker
 RE:Fill
 RE:Grade
 RE:Lens
 REZup
REZup Da Vinci Resolve


- Page:
- 1
- |
- 2
-
Using Twixtor in Resolve Fusion
See TutorialDescription
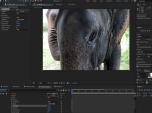
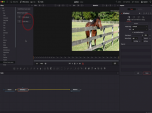
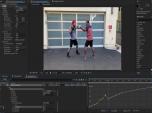
In this tutorial, you will see 4 methods to use Twixtor in Resolve Fusion. In addition, you will see a quick overview of using DEFlicker, REZup and Color Genius in the Cut and Edit pages.Timestamps:00:06 Introduction01:34 Start project02:01 Adding Effects in Cut/Edit pages02:47 Example adding DEFlicker03:01 Adding Twixtor for Speedup03:32 Adding Color Genius03:49 Adding Twixtor to reverse the timing04:20 Adding Twixtor for a slomo - Method 105:44 Adding Twixtor for a slomo - Method 206:10 Adding Twixtor for a slomo - Method 3 and REZup Resize08:45 Render in Place09:01 Adding Twixtor for a slomo - Method 409:31 The Don't09:57 RecapIn this tutorial, you will see 4 methods to use Twixtor in Resolve Fusion. In addition, you will see a quick overview of using DEFlicker, REZup and Color Genius in the Cut and Edit pages.
Timestamps:00:06 Introduction
01:34 Start project
02:01 Adding Effects in Cut/Edit pages
02:47 Example adding DEFlicker
03:01 Adding Twixtor for Speedup
03:32 Adding Color Genius
03:49 Adding Twixtor to reverse the timing
04:20 Adding Twixtor for a slomo - Method 1
05:44 Adding Twixtor for a slomo - Method 2
06:10 Adding Twixtor for a slomo - Method 3 and REZup Resize
08:45 Render in Place
09:01 Adding Twixtor for a slomo - Method 4
09:31 The Don't
09:57 Recap
This Tutorial Includes
- Video
-
How to use Color Genius plug-in version
See TutorialDescription
In this tutorial we will see how to use Color Genius plug-in version. This was created in Resolve but can be applied to any other host application.
This Tutorial Includes
- Video
-
REZup Overview - Resize & Enhance Product: REZup
See TutorialDescription
Timestamps:0:14 What is REZup?0:52 REZup Resize Workflow in After Effects.1:07 Example #1 - Scaling HD to UHD using REZup Resize.5:07 Example #2 - OFX Workflow using Autograph.6:56 Example #3 - REZup Enhance in After Effects.Description:In this tutorial, we will see two of our plugins, REZup Resize and Enhance. We see workflow examples in After Effects and in an OFX host, Autograph.REZup Enhance will increase your image quality. See new details that you did not know were available. REZup Resize will allow you to upscale your video without loss of quality.*To see Before/After results in detail please check the gallery https://revisionfx.com/gallery/#rezupTimestamps:
0:14 What is REZup?
0:52 REZup Resize Workflow in After Effects.
1:07 Example #1 - Scaling HD to UHD using REZup Resize.
5:07 Example #2 - OFX Workflow using Autograph.
6:56 Example #3 - REZup Enhance in After Effects.
Description:In this tutorial, we will see two of our plugins, REZup Resize and Enhance. We see workflow examples in After Effects and in an OFX host, Autograph.REZup Enhance will increase your image quality. See new details that you did not know were available. REZup Resize will allow you to upscale your video without loss of quality.
*To see Before/After results in detail please check the gallery https://revisionfx.com/gallery/#rezupThis Tutorial Includes
- Video
-
RE: Vision plugins in Resolve - Workarounds
See TutorialDescription
In this tutorial, we will see two new workarounds for using our OFX plug-ins with Resolve/Fusion. One of our workarounds is not working anymore in Fusion, so we will start with what “not to do”, and then show you the workarounds that do currently work.In this tutorial, we will see two new workarounds for using our OFX plug-ins with Resolve/Fusion. One of our workarounds is not working anymore in Fusion, so we will start with what “not to do”, and then show you the workarounds that do currently work.
This Tutorial Includes
- Video
-
Quick Tip Tutorial - Fusion and RE:Flex
See TutorialDescription
In this tutorial, we will see a quick tip on how to speed up interactivity within Fusion, while using RE:Flex Warp.Author: Lori FreitagCompany: RE:Vision Effectslink: http://revisionfx.com/products/REFlex/Footage provided by: Anthony Magliocco www.emtinfo.comIn this tutorial, we will see a quick tip on how to speed up interactivity within Fusion, while using RE:Flex Warp.
Author: Lori Freitag
Footage provided by: Anthony Magliocco www.emtminfo.com
This Tutorial Includes
- Video
-
RE:Map, Cryptomatte and Reusable 3D Renders
See TutorialDescription
In this tutorial, we will discuss a new accelerated workflow for motion graphics that has been developed in the last decade where 3D departments build motion graphics packages that can be used and reused just by changing out a few elements and re-rendering within the compositing software instead of the 3D package. You can go to the timestamp for the application that you are interested in for After Effects, Resolve Fusion or Autodesk Flame.In this tutorial, we will discuss a new accelerated workflow for motion graphics that has been developed in the last decade where 3D departments build motion graphics packages that can be used and reused just by changing out a few elements and re-rendering within the compositing software instead of the 3D package. You can go to the timestamp for the application that you are interested in for After Effects, Resolve Fusion or Autodesk Flame.
Timestamps:
0:00 Intro
0:52 Link to tutorial using C4D https://help.revisionfx.com/tutorial/150/
and part 2: https://help.revisionfx.com/search/?p=73
1:43 Prepping in Maya using the Arnold Renderer.
3:39 Compositing in AE using Cryptomatte and RE:Map UV
6:55 Compositing in Resolve Fusion using Cryptomatte and RE:Map UV
10:13 Compositing in Autodesk Flame using Cryptomatte and RE:Map UV
*You can go directly to Timestamps in YouTube
This Tutorial Includes
- Video
-
Twixtor, Time Remapping and Excel
See TutorialDescription
In this tutorial, you will see two different methods used to remap time, as well as a shortcut using an Excel spreadsheet. We also see a frame rate conversion.In this tutorial, you will see two different methods used to remap time, as well as a shortcut using an Excel spreadsheet. We also see a frame rate conversion.This Tutorial Includes
- Video
-
DEFlicker and Timelapse
See TutorialDescription
In this tutorial, you will see the workflow used to get rid of Flicker in a Sunset, Time-lapse video shot at a low frame rate with DEFlicker Time-lapse. Download footage here: https://vimeo.com/436250814/34a2feb04e
This Tutorial Includes
- Video
-
How to remove Rolling Bands with DEFlicker
See TutorialDescription
In this tutorial, you will learn the basic steps for using DEFlicker Rolling Bands in After Effects. You will see a few examples demonstrating different scenarios.06:56Effect here is the wagon-wheel effect - see these links tolearn more about wagon wheel effect:https://www.youtube.com/watch?v=VNftf5qLpiAhttps://www.youtube.com/watch?v=QOwzkND_ooUhttps://www.youtube.com/watch?v=6XwgbHjRo30https://www.youtube.com/watch?v=9MN5MF72PHsThank you to Anita Rizzano for the Rolling Bands footage.In this tutorial, you will learn the basic steps for using DEFlicker Rolling Bands in After Effects. You will see a few examples demonstrating different scenarios.
06:56See these links to learn more about wagon wheel effect:
https://www.youtube.com/watchv=VNftf5qLpiAhttps://www.youtube.com/watch?v=QOwzkND_ooU
https://www.youtube.com/watch?v=6XwgbHjRo30
https://www.youtube.com/watch?v=9MN5MF72PHs
Thank you to Anita Rizzano for the Rolling Bands footage.
This Tutorial Includes
- Video
-
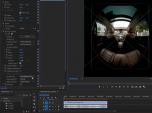
Unwrapping iZugar MKX200 3.8mm fisheye with RE:Lens
See TutorialDescription
RE:Lens tutorial using Izugar 200 mm fisheye - MKX200 is very distortion free
https://www.izugar.com/shop/product/mkx200/Compatible with ZCAM E2, and can also be used on Sony E-Mount and Nikon Z mounts with adapter ringsThis Tutorial Includes
- Video


- Page:
- 1
- |
- 2