Find a Tutorial
 Autograph
 DEFlicker
 RE:Fill
 RE:Grade
 RE:Lens
 REZup
REZup


-
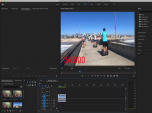
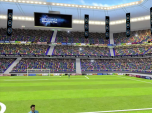
Video Fields for Millennials - Gen Alpha's
See TutorialDescription
In this tutorial, we use both After Effects and Premiere Pro. We use Adobe Media Encoder, Premiere Export and AE Render Cue. This tutorial will help you, if you need to prepare motion graphics alone or combined with live action and deliver your results in 1080i. We see two different workflows.In this tutorial, we use both After Effects and Premiere Pro. We use Adobe Media Encoder, Premiere Export and AE Render Queue. This tutorial will help you, if you need to prepare motion graphics alone or combined with live action and deliver your results in 1080i. We see two different workflows.
This Tutorial Includes
- Video
-
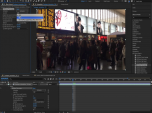
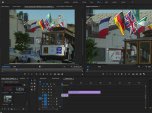
Multi-Frame Rendering - Variables that affect processing time
See TutorialDescription
In this tutorial, we discuss some variables that can affect rendering speed given the new context of Multi-Frame Rendering.**This tutorial uses After Effects 18 public beta, the methods we describe are subject to change.**Note: Known issue, if you see artifacts on certain systems with dual GPU, note that to benefit from 2 or more GPU with our tools you might need to turn off the Hardware acceleration checkbox in Import Preferences. Also Note: Preferences are not carried over with project settings if you render on a different machine.In this tutorial, we discuss some variables that can affect rendering speed given the new context of Multi-Frame Rendering.
** This tutorial uses After Effects 18 public beta, the methods we describe are subject to change.** Upcoming update in AE 22 coming soon as some of the UI changed from the public beta.
** Note: Known issue, if you see artifacts on certain systems with dual GPU, note that to benefit from 2 or more GPU with our tools you might need to turn off the Hardware acceleration checkbox in Import Preferences. Also Note: Preferences are not carried over with project settings if you render on a different machine.
This Tutorial Includes
- Video
-
Multi-Frame Rendering and Video Gogh
See TutorialDescription
This tutorial explains what to do if you are using Video Gogh and working with a version of After Effects that has the ability to do Multi-Frame Rendering.This tutorial uses After Effects 18 public beta, the method we describe is subject to change.This tutorial explains what to do if you are using Video Gogh and working with a version of After Effects that has the ability to do Multi-Frame Rendering.
**This tutorial uses After Effects v22 public beta, the method we describe is subject to change.
This Tutorial Includes
- Video
-
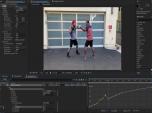
Quick Tip Tutorial - Fusion and RE:Flex
See TutorialDescription
In this tutorial, we will see a quick tip on how to speed up interactivity within Fusion, while using RE:Flex Warp.Author: Lori FreitagCompany: RE:Vision Effectslink: http://revisionfx.com/products/REFlex/Footage provided by: Anthony Magliocco www.emtinfo.comIn this tutorial, we will see a quick tip on how to speed up interactivity within Fusion, while using RE:Flex Warp.
Author: Lori Freitag
Footage provided by: Anthony Magliocco www.emtminfo.com
This Tutorial Includes
- Video
-
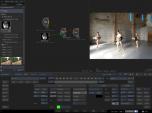
RE:Map, Cryptomatte and Reusable 3D Renders
See TutorialDescription
In this tutorial, we will discuss a new accelerated workflow for motion graphics that has been developed in the last decade where 3D departments build motion graphics packages that can be used and reused just by changing out a few elements and re-rendering within the compositing software instead of the 3D package. You can go to the timestamp for the application that you are interested in for After Effects, Resolve Fusion or Autodesk Flame.In this tutorial, we will discuss a new accelerated workflow for motion graphics that has been developed in the last decade where 3D departments build motion graphics packages that can be used and reused just by changing out a few elements and re-rendering within the compositing software instead of the 3D package. You can go to the timestamp for the application that you are interested in for After Effects, Resolve Fusion or Autodesk Flame.
Timestamps:
0:00 Intro
0:52 Link to tutorial using C4D https://help.revisionfx.com/tutorial/150/
and part 2: https://help.revisionfx.com/search/?p=73
1:43 Prepping in Maya using the Arnold Renderer.
3:39 Compositing in AE using Cryptomatte and RE:Map UV
6:55 Compositing in Resolve Fusion using Cryptomatte and RE:Map UV
10:13 Compositing in Autodesk Flame using Cryptomatte and RE:Map UV
*You can go directly to Timestamps in YouTube
This Tutorial Includes
- Video
-
RE:Vision Effects Licensing Overview
See TutorialDescription
0:22 Licensing options1:03 What if you need to deactivate Non-Floating license keys if you want to transfer from one machine to another?1:55 What are Floating Licenses?3:30 Interactive GUI vs. Render only - for more information https://helpx.adobe.com/after-effects/user-guide.html/after-effects/using/automated-rendering-network-rendering.ug.html4:36 What works in which application?5:20 Special cases: Fusion and Flame5:39 What about version mismatches?6:47 Do we offer discounts or sales?07:27 Newsletter sign-up link: https://visitor.r20.constantcontact.com/manage/optin?v=001S9i1fVV620XU-v1tU_F25ypW09daZBO8ePExKTm0SH1HOdR-4u53NX7d1LBVFkjf29efetX76CxPoWvC4hdZqh-vQpYRohUXI7UAEryV5gY%3D0:22 Licensing options
1:03 What if you need to deactivate Non-Floating license keys if you want to transfer from one machine to another?
1:55 What are Floating Licenses?
3:30 Interactive GUI vs. Render only - for more information https://helpx.adobe.com/after-effects/user-guide.html/after-effects/using/automated-rendering-network-rendering.ug.html
4:36 What works in which application?
5:20 Special cases: Fusion and Flame
5:39 What about version mismatches?
6:47 Do we offer discounts or sales?
7:27 Newsletter sign-up link: https://visitor.r20.constantcontact.com/manage/optin?v=001S9i1fVV620XU-v1tU_F25ypW09daZBO8ePExKTm0SH1HOdR-4u53NX7d1LBVFkjf29efetX76CxPoWvC4hdZqh-vQpYRohUXI7UAEryV5gY%3D
This Tutorial Includes
- Video
-
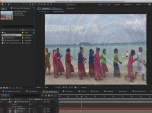
FieldsKit and Premiere Pro
See TutorialDescription
In this tutorial, will see how FieldsKit can help deinterlace your interlaced footage in order to upload to online, social media platforms and what tools we have for great results.In this tutorial, will see how FieldsKit can help deinterlace your interlaced footage in order to upload to online, social media platforms and what tools we have for great results.This Tutorial Includes
- Video
-
Handling clips with different Input and Output sizes within Flame
See TutorialDescription
In this tutorial, will see how to handle clips with different input and output sizes using Batch in Flame with a RE:Lens plugin.
This Tutorial Includes
- Video
-
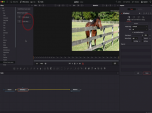
Twixtor, Time Remapping and Excel
See TutorialDescription
In this tutorial, you will see two different methods used to remap time, as well as a shortcut using an Excel spreadsheet. We also see a frame rate conversion.In this tutorial, you will see two different methods used to remap time, as well as a shortcut using an Excel spreadsheet. We also see a frame rate conversion.This Tutorial Includes
- Video
-
DEFlicker and Timelapse
See TutorialDescription
In this tutorial, you will see the workflow used to get rid of Flicker in a Sunset, Time-lapse video shot at a low frame rate with DEFlicker Time-lapse. Download footage here: https://vimeo.com/436250814/34a2feb04e
This Tutorial Includes
- Video