Find a Tutorial
- Page:
- 1
- |
- 2
-
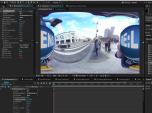
Working with LatLong Projections in RE:Lens
See TutorialDescription
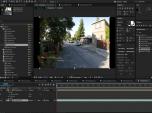
In this tutorial we are focusing on LatLong Projections, which are commonly used for VR360 and 180 workflows, and we show how to reframe, reformat and creatively repurpose footage using RE:Lens.In this tutorial we are focusing on LatLong Projections, which are commonly used for VR360 and 180 workflows, and we show how to reframe, reformat and creatively repurpose footage using RE:Lens.This Tutorial Includes
- Video
-
RE:Lens and Fisheye 2025
See TutorialDescription
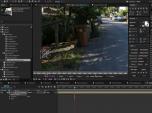
Title: RE:Lens in Fisheye 2025Product: RE:LensHost used for tutorial: AE,PP,ResolveDescription:Shoot with super-wide fisheye lenses and animate orientation, stabilize and zoom (focal length) using RE:Lens Superfish with very high res video.Great for narrow places, non-scripted, non-predictable shoots and extra POV wide-angle cameras, PTZ in post.*Resolve tends to change a lot, version used: v.20.2.3Cameras used:Ex. 1 - Canon c500 with the HAL 220 lensEx. 2 - Panasonic GH5 + Entaniya 250° lensEx. 3 - RED Monstro camera with a HAL 200 6.0mmEx. 4 - Sony Mirrorless camera with HAL 200Put the cameras used in description at what resolution to help get more repostsand #tag them too#lumix #red #sony #canon #entaniyaShoot with super-wide fisheye lenses and animate orientation, stabilize and zoom (focal length) using RE:Lens Superfish with very high res video.Great for narrow places, non-scripted, non-predictable shoots and extra POV wide-angle cameras, PTZ in post. *Resolve tends to change a lot, version used: v.20.2.3
Cameras used:Ex. 1 - Canon c500 with the HAL 220 lensEx. 2 - Panasonic GH5 + Entaniya 250° lensEx. 3 - RED Monstro camera with a HAL 200 6.0mmEx. 4 - Sony Mirrorless camera with HAL 200
This Tutorial Includes
- Video
-
How to make a perfect stabilization VR 360 Hyperlapse video
See TutorialDescription
Andrii Shramko demos a useful feature in RE:Lens spherical stabilizer allowing you to handle real hard shots by masking areas of the source. You can also use this feature on fisheye stabilization where there is moving junk (light flares and leaks) outside of the image circle that affects the tracking, as well as in stitched videos where a camera is moving indepedently from the rest of the rig (which confuses any tracker).
https://www.facebook.com/shramko360/This Tutorial Includes
- Video
-
Premiere Pro to After Effects Workflow
See TutorialDescription
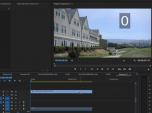
In this tutorial, we will see three examples showing the workflow from Premiere Pro to After Effects using Dynamic link. Examples include use of Twixtor, RE:Match and RE:Lens plugins.In this tutorial, we will see three examples showing the workflow from Premiere Pro to After Effects using Dynamic link. Examples include use of Twixtor, RE:Match and RE:Lens plugins.
This Tutorial Includes
- Video
-
Using 360 Video as a second camera
See TutorialDescription
In this Overview, we discuss using a 360 camera rig as second video camera to cut to. In this project we met different challenges and see how we solved them provided using RE:Vision Effects plug-ins.Camera used:GoPro Omni 360, GoPro Karma droneSoftware used: Stitching done in GoPro Kolor (Autopano), RE:Lens From LatLong (for 360 source), RE:Lens DeFish to flatten the drone movie, Twixtor to time synch the drone movie.Special Thanks to credit Camera tech: Andrew GanzonIn this Overview, we discuss using a 360 camera rig as second video camera to cut to. In this project we met different challenges and see how we solved them provided using RE:Vision Effects plug-ins.
Camera used:GoPro Omni 360, GoPro Karma droneSoftware used: Stitching done in GoPro Kolor (Autopano), RE:Lens From LatLong (for 360 source), RE:Lens DeFish to flatten the drone movie, Twixtor to time synch the drone movie.
Camera tech: Andrew Ganzon
This Tutorial Includes
- Video
-
Tracking, Fisheye lenses and RE:Lens
See TutorialDescription
Description:In this tutorial, you will see a workflow example of tracking a flat graphic to footage that was shot using a Full Frame Fisheye Lens. Lens used: Panasonic Lumix 8mm fisheye on GH4 Full Frame Fisheye and RE:Lens DEFishAuthor: Lori FreitagCompany: RE:Vision Effectslink: http://revisionfx.com/products/RELens/Description:In this tutorial, you will see a workflow example of tracking a flat graphic to footage that was shot using a Full Frame Fisheye Lens. Lens used: Panasonic Lumix 8mm fisheye on GH4 Full Frame Fisheye and RE:Lens DEFish
This Tutorial Includes
- Video
-
RE:Lens Defish and Superfish
See TutorialDescription
In this tutorial, you will see several examples where you will see different kinds of lens and which RE:Lens tool to use for what purpose.
Cameras and lenses used:
Ex. 1) - (00:15) Wide-angle lens used on GH4: Panasonic 7-14mm f/4
Beating the edge of frame over-stretching with Defish
Ex. 2) - (01:29) Anamorphic Lens used on GH 4: SLR Magic Anamorphic-Cine 2X 50mm T2.8 MFT
Non-Square Pixel Aspect Ratio, Anamorphic process
Ex. 2.A) - GoPro Hero 4 Black Superview Mode
Ex. 3) - (06:05) Full Frame Fisheye project-Lens used: Panasonic Lumix 8mm fisheye on GH4
Full Frame Fisheye and RE:Lens Defish
Ex. 4) - (07:06) Circular Fisheye - Lens: Sigma 4.5mm f 2.8 DC HSM Fisheye for Canon
Circular Fisheye lenses and RE:Lens Superfish
Ex. 4.A) - With Kipon Adapter
Ex. 4.B) - With Metabones Adapter
Ex. 5) - (11:10) Super Fisheye Lenses - Lens: Superfish lens by Entanya Entapano 280deg. on Back-Bone Ribcage
- Superfish Lenses
This Tutorial Includes
- Video
-
Motion Graphics and RE:Lens
See TutorialDescription
In this tutorial, we will see how to use motion graphics, text and AE Paint with RE:Lens.
This Tutorial Includes
- Video
-
RE:Lens Working with 360 Virtual Sets
See TutorialDescription
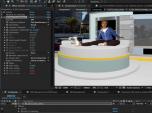
In this tutorial, we will see how to use your virtual set and re-use it with RE:Lens.13 layers composited in equirectangular space with RE:Lens "To LatLong" plug-in.Was also used:RE:Flex Morph was used to create animated loops of the greenscreen footage to fit duration.RE:Map UV was used to texture map the monitors.RE:Match Color was used to match a plate that wasn't color balanced.Video stitched with VideoStitch and PTGui.3D set made in Maya, rendered in Mental Ray.Assembled in After EffectsIn this tutorial, we will see how to use your virtual set and re-use it with RE:Lens.
13 layers composited in equirectangular space with RE:Lens "To LatLong" plug-in.
RE:Flex Morph was used to create animated loops of the greenscreen footage to fit duration.RE:Map UV was used to texture map the monitors.RE:Match Color was used to match a plate that wasn't color balanced.Video stitched with VideoStitch and PTGui.3D set made in Maya, rendered in Mental Ray.Assembled in After Effects
This Tutorial Includes
- Video
-
Uploading 360 Video to YouTube, Facebook and other players
See TutorialDescription
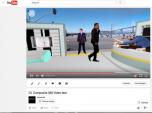
In this tutorial, you will learn how to upload 360º Video to YouTube and Facebook. Go to this url for step-by-step instructions..https://support.google.com/youtube/answer/6178631?hl=enhttp://www.revisionfx.com/products/relens/In this tutorial, you will learn how to upload 360º Video to YouTube and Facebook. Go to this url for step-by-step instructions..https://support.google.com/youtube/answer/6178631?hl=en
Also, how to export your 360 video with proper metadata, directly from Premiere Pro and After Effects.
This Tutorial Includes
- Video
- Page:
- 1
- |
- 2

 RE:Lens
 All Products
 ARRI Film Lab
 Autograph
 Color Genius
 DE:Noise
 DEFlicker
 Effections
 FieldsKit
 PV Feather
 RE:Fill
 RE:Flex
 RE:Grade
 RE:Map
 RE:Match
 REZup
REZup RSMB
RSMB Shade/Shape
 SmoothKit
 Twixtor
 Video Gogh
 Premiere Pro


