Find a Tutorial
 Autograph
 Color Genius
 DEFlicker
 RE:Fill
 RE:Grade
 RE:Lens
 REZup
REZup


-
RE:Fill in AE and Premiere
See albumDescription
A series of tutorials using RE:Fill in After Effects and Premiere
Tutorials
This Album Includes
- Videos

-
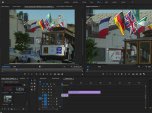
Premiere Pro - Proxy Workflow Tips and Our Plug-Ins
See TutorialDescription
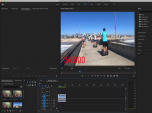
This is an example of another method besides using Render Effects, to have smooth editing with high resolution files. We use proxy mode with Twixtor so you can dynamically change the video speed with our tools without pre-rendering previews every time, while editing.**Note: One reason we use proxies here is that the footage is 4K and Twixtor is not a real-time effect in Premiere, so at 4K, you might have non-responsive playback even with GPU on.This is an example of another method besides using Render Effects, to have smooth editing with high resolution files. We use proxy mode with Twixtor so you can dynamically change the video speed with our tools without pre-rendering previews every time, while editing.
**Note: One reason we use proxies here is that the footage is 4K and Twixtor is not a real-time effect in Premiere, so at 4K, you might have non-responsive playback even with GPU on.This Tutorial Includes
- Video
-
Workaround for Premiere Color Shift Issue
See TutorialDescription
In this tutorial, we will see a quick workaround. In the latest version of Premiere, they added Auto-Tone Map Media which is a check box in the sequence settings, and it is checked on by default. We will see a workaround for this issue.
This Tutorial Includes
- Video
-
REZup Overview - Resize & Enhance Product: REZup
See TutorialDescription
Timestamps:0:14 What is REZup?0:52 REZup Resize Workflow in After Effects.1:07 Example #1 - Scaling HD to UHD using REZup Resize.5:07 Example #2 - OFX Workflow using Autograph.6:56 Example #3 - REZup Enhance in After Effects.Description:In this tutorial, we will see two of our plugins, REZup Resize and Enhance. We see workflow examples in After Effects and in an OFX host, Autograph.REZup Enhance will increase your image quality. See new details that you did not know were available. REZup Resize will allow you to upscale your video without loss of quality.*To see Before/After results in detail please check the gallery https://revisionfx.com/gallery/#rezupTimestamps:
0:14 What is REZup?
0:52 REZup Resize Workflow in After Effects.
1:07 Example #1 - Scaling HD to UHD using REZup Resize.
5:07 Example #2 - OFX Workflow using Autograph.
6:56 Example #3 - REZup Enhance in After Effects.
Description:In this tutorial, we will see two of our plugins, REZup Resize and Enhance. We see workflow examples in After Effects and in an OFX host, Autograph.REZup Enhance will increase your image quality. See new details that you did not know were available. REZup Resize will allow you to upscale your video without loss of quality.
*To see Before/After results in detail please check the gallery https://revisionfx.com/gallery/#rezupThis Tutorial Includes
- Video
-
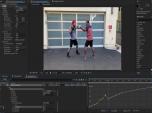
RSMB Pro - Mattes and Track Points
See TutorialDescription
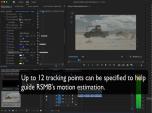
Description:In this tutorial, we will see two examples showing some advanced features for RSMB Pro. You will see an example using a matte to separate foreground from background and also how to use point tracking to guide RSMB's image tracking on problematic footage.Up to 12 tracking points can be specified to help guide RSMB Pro's motion estimation.Credits:Thank you to Mark Tekushan for the use of theNYC footage we used for the first example.www.mfxs.comThank you to Avi Cohen for the use of thefootage for the second example.www.AviCohen.tvIn this tutorial, we will see two examples showing some advanced features for RSMB Pro. You will see an example using a matte to separate foreground from background and also how to use point tracking to guide RSMB's image tracking on problematic footage.Up to 12 tracking points can be specified to help guide RSMB Pro's motion estimation.
Credits:
Thank you to Mark Tekushan for the use of theNYC footage we used for the first example. www.mfxs.com
Thank you to Avi Cohen for the use of the footage for the second example. www.AviCohen.tvThis Tutorial Includes
- Video
-
RE:Fill Added Features
See TutorialDescription
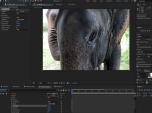
In this tutorial, we will see some new features in RE:Fill version 3.0. We will see one example using RE:Fill Offset and a second example using the RE:Fill Seamless Blend. In this version of RE:Fill we have added support for M1, Multi-Frame Rendering, added new features for RE:Fill Offset as well as a new plug-in called RE:Fill Seamless Blend.*Note: You need to be on RE:Fill v3 for this tutorialIn this tutorial, we will see some new features in RE:Fill version 3.0. We will see one example using RE:Fill Offset and a second example using the RE:Fill Seamless Blend. In this version of RE:Fill we have added support for M1, Multi-Frame Rendering, added new features for RE:Fill Offset as well as a new plug-in called RE:Fill Seamless Blend.
*Note: You need to be on RE:Fill v3 for this tutorial
This Tutorial Includes
- Video
-
Video Fields for Millennials - Gen Alpha's
See TutorialDescription
In this tutorial, we use both After Effects and Premiere Pro. We use Adobe Media Encoder, Premiere Export and AE Render Cue. This tutorial will help you, if you need to prepare motion graphics alone or combined with live action and deliver your results in 1080i. We see two different workflows.In this tutorial, we use both After Effects and Premiere Pro. We use Adobe Media Encoder, Premiere Export and AE Render Queue. This tutorial will help you, if you need to prepare motion graphics alone or combined with live action and deliver your results in 1080i. We see two different workflows.
This Tutorial Includes
- Video
-
FieldsKit and Premiere Pro
See TutorialDescription
In this tutorial, will see how FieldsKit can help deinterlace your interlaced footage in order to upload to online, social media platforms and what tools we have for great results.In this tutorial, will see how FieldsKit can help deinterlace your interlaced footage in order to upload to online, social media platforms and what tools we have for great results.This Tutorial Includes
- Video
-
Twixtor, Time Remapping and Excel
See TutorialDescription
In this tutorial, you will see two different methods used to remap time, as well as a shortcut using an Excel spreadsheet. We also see a frame rate conversion.In this tutorial, you will see two different methods used to remap time, as well as a shortcut using an Excel spreadsheet. We also see a frame rate conversion.This Tutorial Includes
- Video
-
DEFlicker and Timelapse
See TutorialDescription
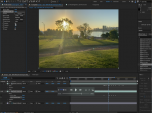
In this tutorial, you will see the workflow used to get rid of Flicker in a Sunset, Time-lapse video shot at a low frame rate with DEFlicker Time-lapse. Download footage here: https://vimeo.com/436250814/34a2feb04e
This Tutorial Includes
- Video