Find a Tutorial
 Autograph
 DEFlicker
 RE:Fill
 RE:Grade
 RE:Lens
 REZup
REZup


-
Twixtor 7 in Premiere Pro and AE 2020-Review and Whats New-Part 2
See TutorialDescription
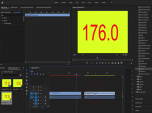
In this tutorial, you will see part 2 which picks up where part 1 leaves off, covering new features in Twixtor 7, running on Premiere Pro and AE 2020. You will want to watch part 1 first for the rest of the new features. You will want to download the latest version of Twixtor to follow along with this tutorial. Features covered in this tutorial:00:27 - InFPS = OutFPS.01:25 - Converting 25FPS to 23.976 FPS and keeping the audio in sync.03:13 - 360 Video checkbox03:22 - Twixtor Pro - RGB+AIn this tutorial, you will see part 2 which picks up where part 1 leaves off, covering new features in Twixtor 7, running on Premiere Pro and AE 2020. You will want to watch part 1 first for the rest of the new features. You will want to download the latest version of Twixtor to follow along with this tutorial. Features covered in this tutorial:
00:27 - InFPS = OutFPS.
01:25 - Converting 25FPS to 23.976 FPS and keeping the audio in sync.
03:13 - 360 Video checkbox
03:22 - Twixtor Pro - RGB+A
This Tutorial Includes
- Video
-
Twixtor 7 in Premiere Pro and AE 2020-Review and Whats New-Part 1
See TutorialDescription
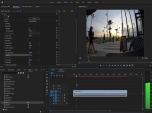
In this tutorial, you will see part 1 which covers some of the new features in Twixtor 7, running on Premiere Pro and AE 2020. You will want to watch part 2 for the rest of the new features. You will want to download the latest version of Twixtor to follow along with this tutorial.Music: YouTube Audio LibraryAuthor: Lori FreitagCompany: RE:Vision Effectslink: http://revisionfx.com/products/Twixtor/In this tutorial, you will see part 1 which covers some of the new features in Twixtor 7, running on Premiere Pro and AE 2020. You will want to watch part 2 for the rest of the new features. You will want to download the latest version of Twixtor to follow along with this tutorial.
This Tutorial Includes
- Video
-
Dead pixel, Hot pixel, Stuck pixel removal with RE:Fill
See TutorialDescription
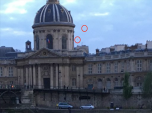
In this tutorial, you will see how to use RE:Fill Area Fill to get rid of Dead, Hot or Stuck pixels. This is just one use for RE:Fill Area Fill. You can check our documentation and other tutorials for other uses.In this tutorial, you will see how to use RE:Fill Area Fill to get rid of Dead, Hot or Stuck pixels. This is just one use for RE:Fill Area Fill. You can check our documentation and other tutorials for other uses.This Tutorial Includes
- Video
-
DEFlicker HighSpeed Footage in Premiere
See TutorialDescription
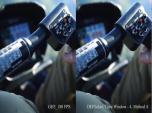
In this tutorial, we will use the DEFlicker Highspeed plugin, to see how to remove flicker on high speed footage.credits:camera used: Panasonic GH5 1080P at 180 FPSSource footage provided by Chris FarroInstagram | @chrisfarroYouTube | youtube.com/ChristopherFarroIn this tutorial, we will use the DEFlicker Highspeed plugin, to see how to remove flicker on high speed footage.
credits:camera used: Panasonic GH5 1080P at 180 FPS Source footage provided by Chris Farro Instagram | @chrisfarroYouTube | youtube.com/ChristopherFarroThis Tutorial Includes
- Video
-
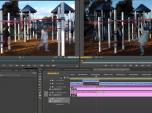
Using 360 Video as a second camera
See TutorialDescription
In this Overview, we discuss using a 360 camera rig as second video camera to cut to. In this project we met different challenges and see how we solved them provided using RE:Vision Effects plug-ins.Camera used:GoPro Omni 360, GoPro Karma droneSoftware used: Stitching done in GoPro Kolor (Autopano), RE:Lens From LatLong (for 360 source), RE:Lens DeFish to flatten the drone movie, Twixtor to time synch the drone movie.Special Thanks to credit Camera tech: Andrew GanzonIn this Overview, we discuss using a 360 camera rig as second video camera to cut to. In this project we met different challenges and see how we solved them provided using RE:Vision Effects plug-ins.
Camera used:GoPro Omni 360, GoPro Karma droneSoftware used: Stitching done in GoPro Kolor (Autopano), RE:Lens From LatLong (for 360 source), RE:Lens DeFish to flatten the drone movie, Twixtor to time synch the drone movie.
Camera tech: Andrew Ganzon
This Tutorial Includes
- Video
-
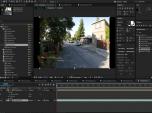
RE:Lens Defish and Superfish
See TutorialDescription
In this tutorial, you will see several examples where you will see different kinds of lens and which RE:Lens tool to use for what purpose.
Cameras and lenses used:
Ex. 1) - (00:15) Wide-angle lens used on GH4: Panasonic 7-14mm f/4
Beating the edge of frame over-stretching with Defish
Ex. 2) - (01:29) Anamorphic Lens used on GH 4: SLR Magic Anamorphic-Cine 2X 50mm T2.8 MFT
Non-Square Pixel Aspect Ratio, Anamorphic process
Ex. 2.A) - GoPro Hero 4 Black Superview Mode
Ex. 3) - (06:05) Full Frame Fisheye project-Lens used: Panasonic Lumix 8mm fisheye on GH4
Full Frame Fisheye and RE:Lens Defish
Ex. 4) - (07:06) Circular Fisheye - Lens: Sigma 4.5mm f 2.8 DC HSM Fisheye for Canon
Circular Fisheye lenses and RE:Lens Superfish
Ex. 4.A) - With Kipon Adapter
Ex. 4.B) - With Metabones Adapter
Ex. 5) - (11:10) Super Fisheye Lenses - Lens: Superfish lens by Entanya Entapano 280deg. on Back-Bone Ribcage
- Superfish Lenses
This Tutorial Includes
- Video
-
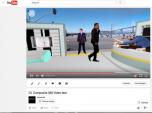
Uploading 360 Video to YouTube, Facebook and other players
See TutorialDescription
In this tutorial, you will learn how to upload 360º Video to YouTube and Facebook. Go to this url for step-by-step instructions..https://support.google.com/youtube/answer/6178631?hl=enhttp://www.revisionfx.com/products/relens/In this tutorial, you will learn how to upload 360º Video to YouTube and Facebook. Go to this url for step-by-step instructions..https://support.google.com/youtube/answer/6178631?hl=en
Also, how to export your 360 video with proper metadata, directly from Premiere Pro and After Effects.
This Tutorial Includes
- Video
-
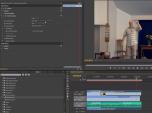
RE:Match Non-matching Cameras in Premiere Pro
See TutorialDescription
In this tutorial, Andrew Devis demonstrates a relatively new plug-in by RE:Vision Effects called RE:Match and how it can very quickly and accurately deal with the very common problem of non-matching cameras in Premiere Pro.
This Tutorial Includes
- Video
-
Introduction to RE:Match Stereo
See TutorialDescription
Description:This tutorial covers the basic concepts and use for RE:Match Stereo
Credits:We would like to thank the following for providing footage:
Jaime Fernández Miranda - jim-box.com.Some material was licensed from Mammoth HD - mammothhd-3d.com/
Thank you to Werner Bloos info@digi-dat.de for providingFootage
OriginalMusic by Bob Bralove, bobbralove.comAlso, thanks to Anthony Magliocco additional footage.
This Tutorial Includes
- Video
-
Introduction to RE:Match Color
See TutorialDescription
This tutorial covers the basic concepts and use for RE:Match MulticamCredits:We would like to thank the following for providing footage:Some material was licensed from Mammoth HD - mammothhd-3d.com/The horses are from Trey Ratcliff of stuckincustoms.comAnd also, thanks to Ami Sun for additional footage.Author: Lori FreitagCompany: RE:Vision Effectslink: http://revisionfx.com/products/rematch/This tutorial covers the basic concepts and use for RE:Match Color.
Credits:We would like to thank the following for providing footage:Some material was licensed from Mammoth HD - mammothhd-3d.com/The horses are from Trey Ratcliff of stuckincustoms.com
Also, thanks to Ami Sun for additional footage.
This Tutorial Includes
- Video