Find a Tutorial
-
Frame Rate Conversions in Twixtor within FCP X
See TutorialDescription
This tutorial shows how how to do a Frame rate conversion if the Input and the Output are both Progressive.Footage provided by Banditos Brothers - www.banditobrothers.comThis tutorial shows how how to do a Frame rate conversion including interlaced and progressive input and output settings. Use this tutorial for Twixtor v5.4 and up.
If you are using versions earlier than Twixtor v5.4, then watch this link: http://www.youtube.com/watch?v=vML1oHCbP-U&list=PL6259C7867889AC48
Footage provided by Banditos Brothers - www.banditobrothers.comThis Tutorial Includes
- Video
-
Twixtor: SpeedRamp & Fit-to-Fill in FCP X
See TutorialDescription
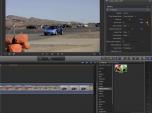
This screencast gives an overview of how to use Twixtor within Final Cut Pro X, to do a SpeedRamp and Fit-to-Fill. You will see an example of the Frame number and Speed option in Twixtor.
Special Thanks to Mark Tekushan for allowing us to use the sailing footage. www.mfxs.com
Special Thanks to Jesse James Jones for allowing us to use his car footage. www.Jesse.comThis Tutorial Includes
- Video
-
Twixtor Overview in FCP X
See TutorialDescription
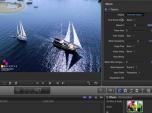
This tutorial shows how to do a simple speed-up and slow-down using Twixtor in FCPXSpecial Thanks to Mark Tekushan www.mfxs.com for allowing us to use his sailing footage.This tutorial shows how to do a simple speed-up and slow-down using Twixtor in FCP X.
Special Thanks to Mark Tekushan for allowing us to use the sailing footage. www.mfxs.comThis Tutorial Includes
- Video
-
Twixtor: When and How to use Tracking Points
See TutorialDescription
This Tutorial shows how to get better results using Tracking Points for more complex shots and to help get rid of warping or ghosting. Tracking Points are available in Twixtor Pro for AE, FCP (pre-FCPX), Premiere Pro, Nuke & OFX hosts such as Scratch & Composite.
This Tutorial Includes
- Video
-
Better Retiming using a Matte
See TutorialDescription
This Tutorial shows how to get better tracking using a matte to separate your footage into multiple layers. Multiple layers are available in Twixtor Pro for AE, FCP, Premiere Pro, and Twixtor for Smoke, Flame, Fusion, Nuke & OFX hosts such as Scratch & Composite.Author: Lori FreitagCompany: RE:Vision Effectslink: http://revisionfx.com/products/twixtor/This Tutorial shows how to get better tracking using a matte to separate your footage into multiple layers. Multiple layers are available in Twixtor Pro for AE, FCP, Premiere Pro, and Twixtor for Smoke, Flame, Fusion, Nuke & OFX hosts such as Scratch & Composite.
This Tutorial Includes
- Video
-
DE:Noise - Beyond the Basics
See TutorialDescription
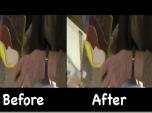
This tutorial shows how to use DE:Noise. It continues where the "Essentials" tutorial left off. This tutorial covers some of the more advanced settings to remove unwanted noise from your footage and gives examples so you can easily apply them to similar scenarios. The controls are the same in all supported applications except where I note differences.
Special Thanks to (in order of appearance) for providing and/or allowing us to use their footage for this tutorial: (1) Mark Tekushan for the Noisy Blue screen footage www.markfx.com (2) Sean Wheeler & Zander Schloss for allowing us to use the footage I shot of them playing www.facebook.com/SeanWheelerandZanderSchloss (3) Grant Davis www.vjculture.com (4) Jim Tierney for his whale footage www.whalewatcher.net (5) Michael Sayag for his black & white footage (6) AlFredo from BLT in Italy for the Italian Car footage www.blt.itt
This Tutorial Includes
- Video
-
DE:Noise - Essential Info
See TutorialDescription
This tutorial shows how to use DE:Noise. It covers the essential settings to remove unwanted noise from your footage and gives examples so you can easily apply them to similar scenarios. The controls are the same in all supported applications.Special Thanks to Michael Sayag for allowing us to use his black & white footage for this tutorial. We would also like to thank Ami Sun for the additional footage used for this tutorialAuthor: Lori FreitagCompany: RE:Vision Effectslink: http://www.revisionfx.com/products/denoise/This tutorial shows how to use DE:Noise. It covers the essential settings to remove unwanted noise from your footage and gives examples so you can easily apply them to similar scenarios. The controls are the same in all supported applications.
Special Thanks to Michael Sayag for allowing us to use his black & white footage for this tutorial. We would also like to thank Ami Sun for the additional footage used for this tutorialThis Tutorial Includes
- Video
-
Marking Edit Points with Twixtor in FCP
See TutorialDescription
This Tutorial shows how to mark segments in an edit in order to avoid warping across edits when speeding up or slowing down the overall edit.
A special thank you goes out to MarkEFXS for letting us use this footage.
This Tutorial Includes
- Video
-
RSMB 4.0 sample Projects for FCP
See tutorial -
How to make video look more like film
See TutorialDescription
How do I use RE:Vision Effects plugins to help make video look more like film?
This Tutorial Includes
- Web Pages

 All Products
 Autograph
 Color Genius
 DE:Noise
 DEFlicker
 Effections
 FieldsKit
 PV Feather
 RE:Fill
 RE:Flex
 RE:Grade
 RE:Lens
 RE:Map
 RE:Match
 REZup
REZup RSMB
RSMB Shade/Shape
 SmoothKit
 Twixtor
 Video Gogh
 Final Cut Pro


