
Search
Latest Tutorials
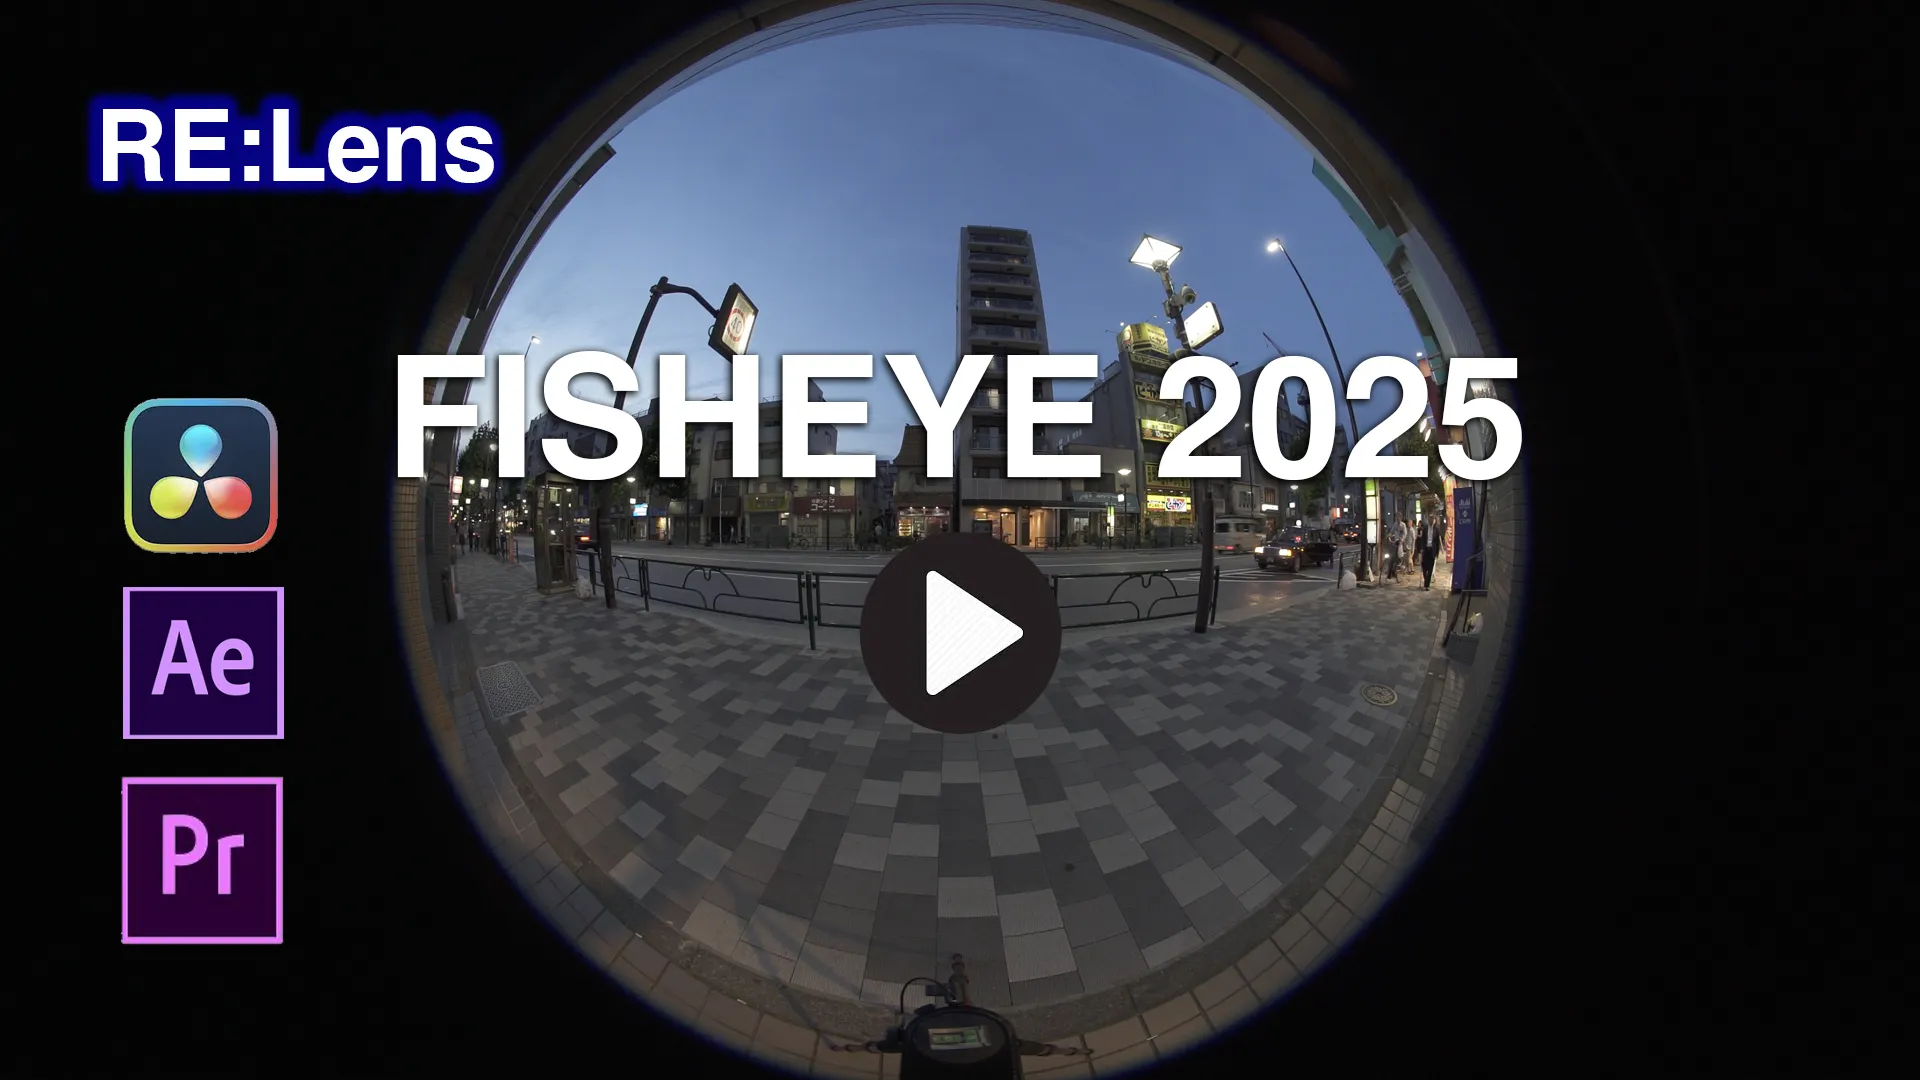
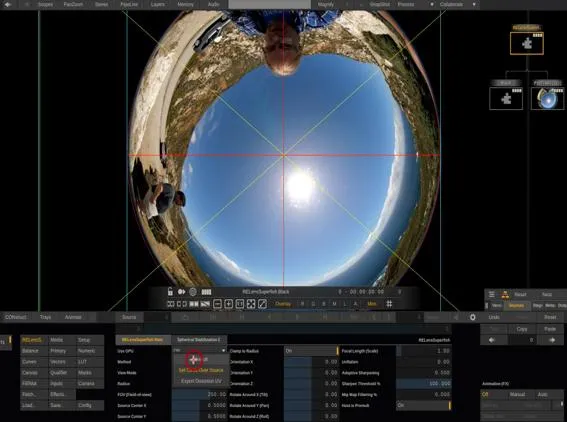
RE:Lens and Fisheye 2025
Updated

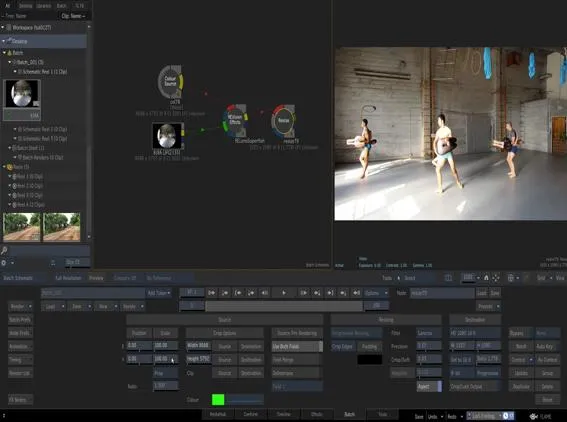
Our Plugins in Mistika Boutique
Updated
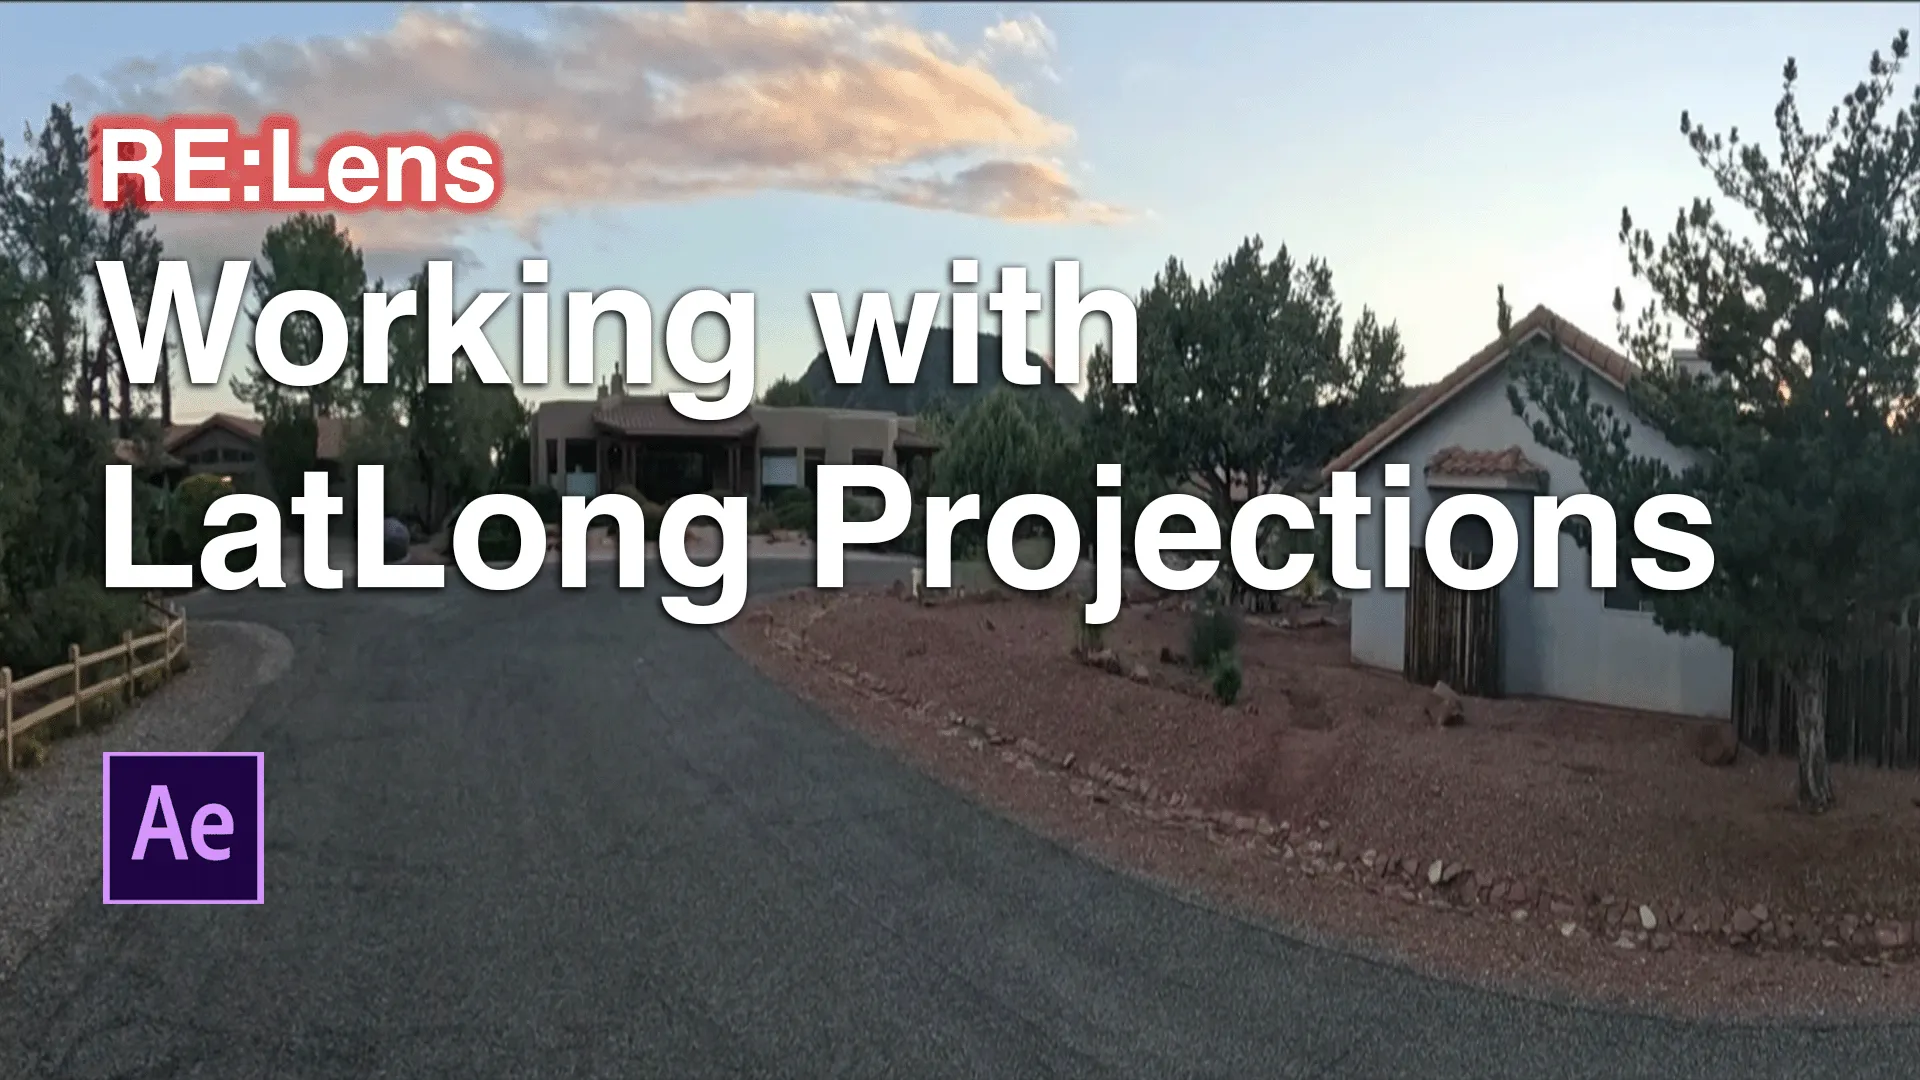
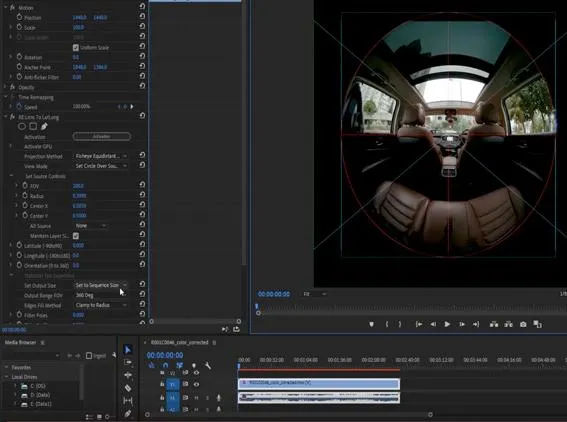
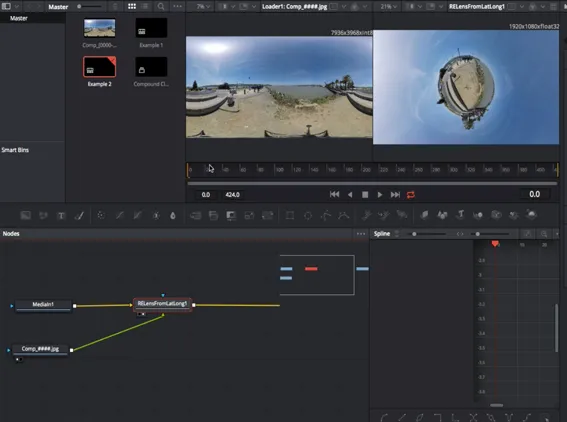
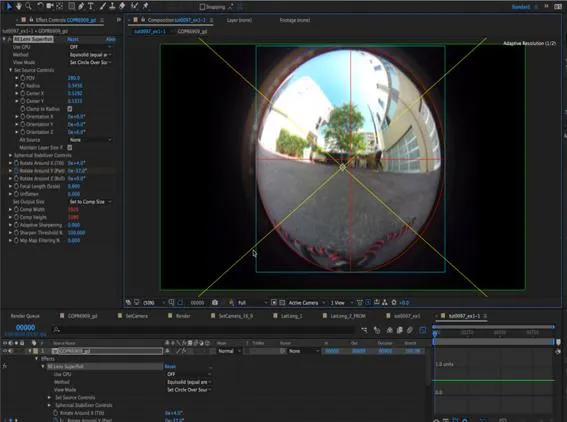
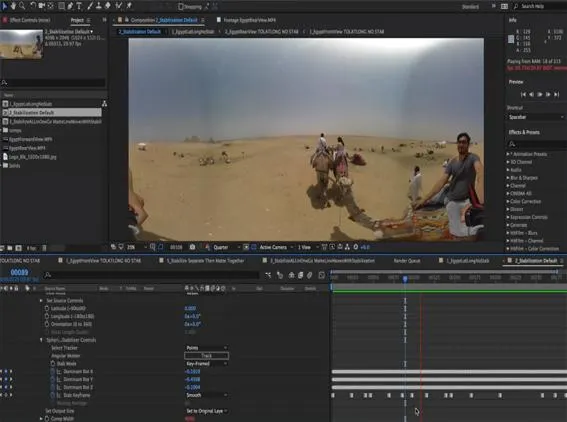
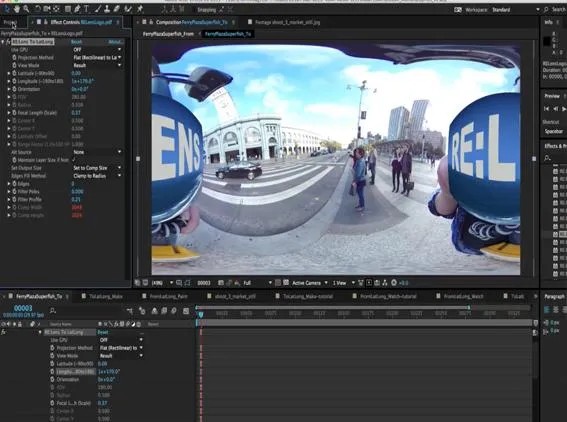
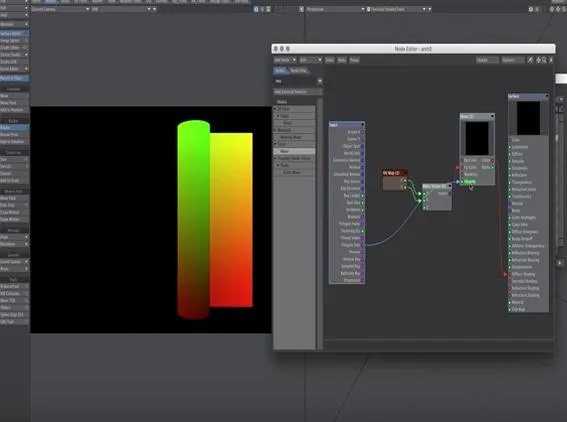
Working with LatLong Projections in RE:Lens
Updated
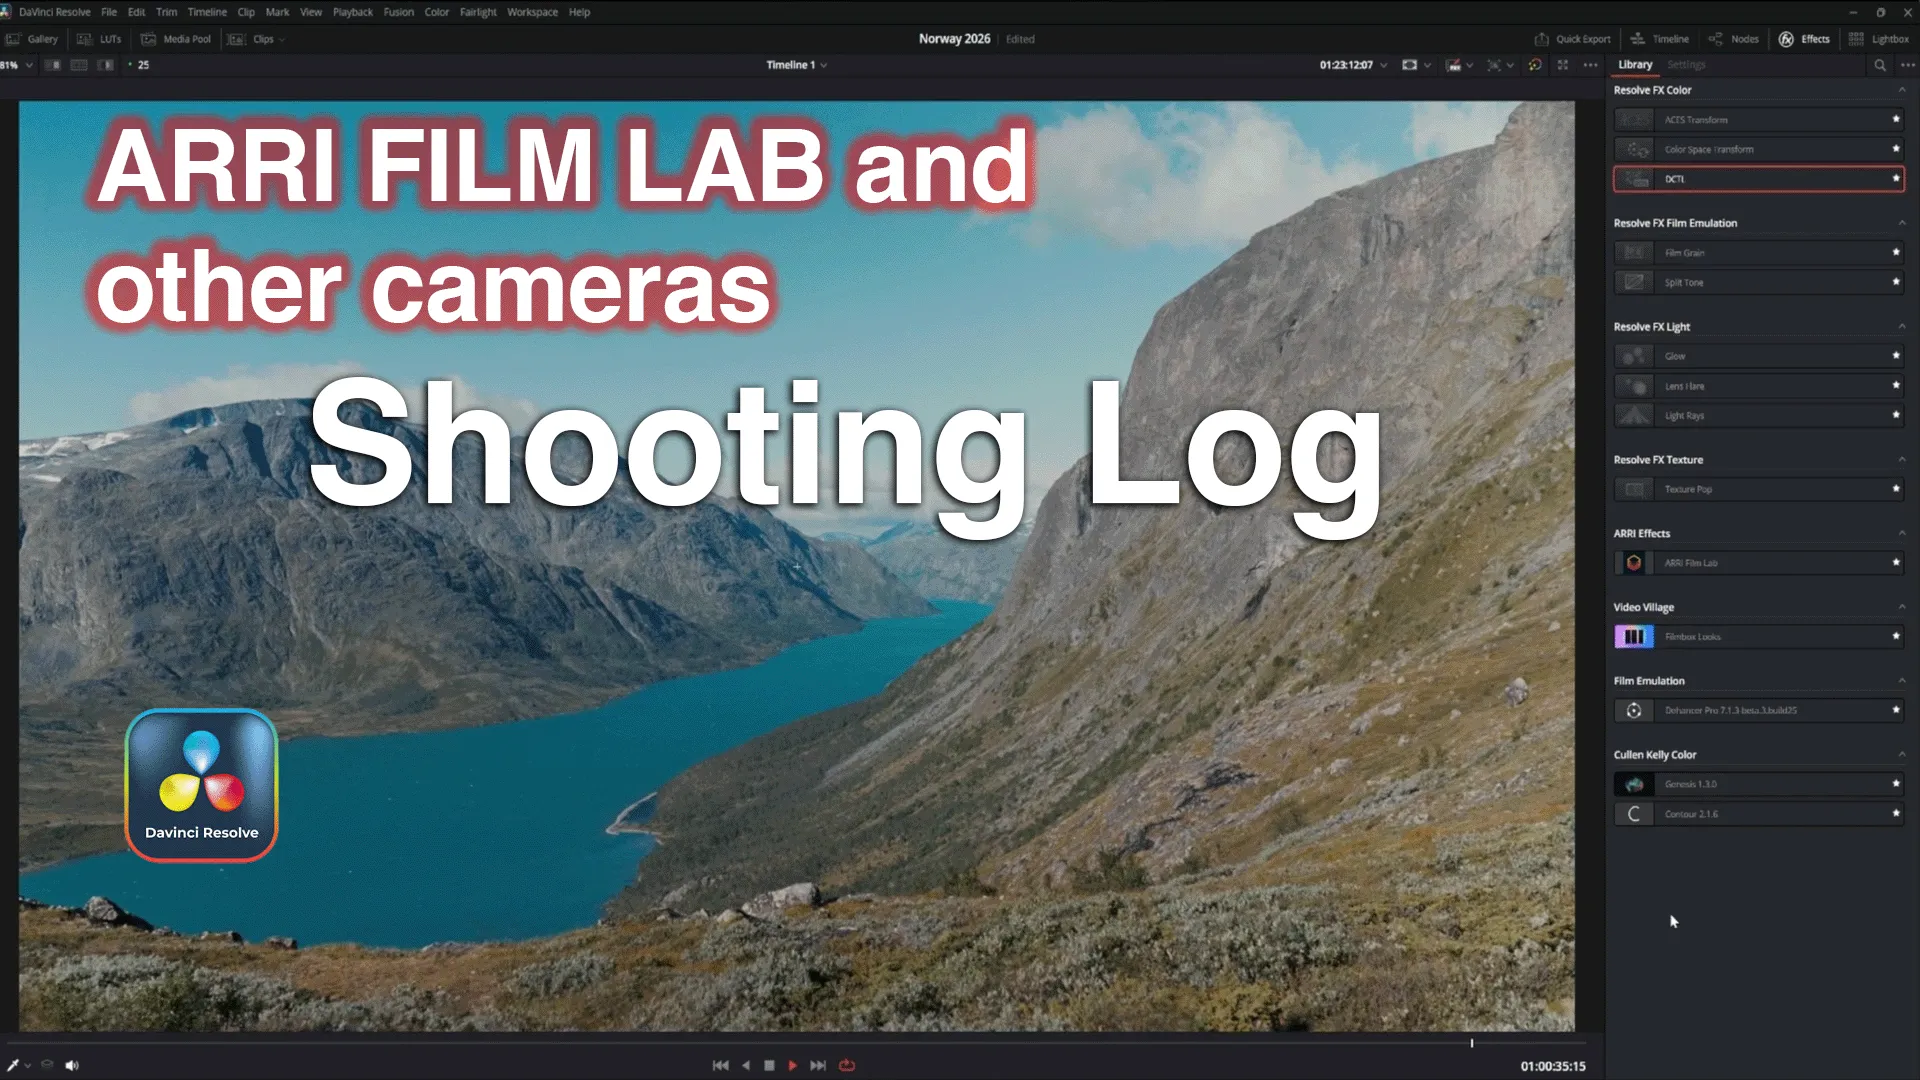
Shooting Log - ARRI Film Lab and other cameras
Updated
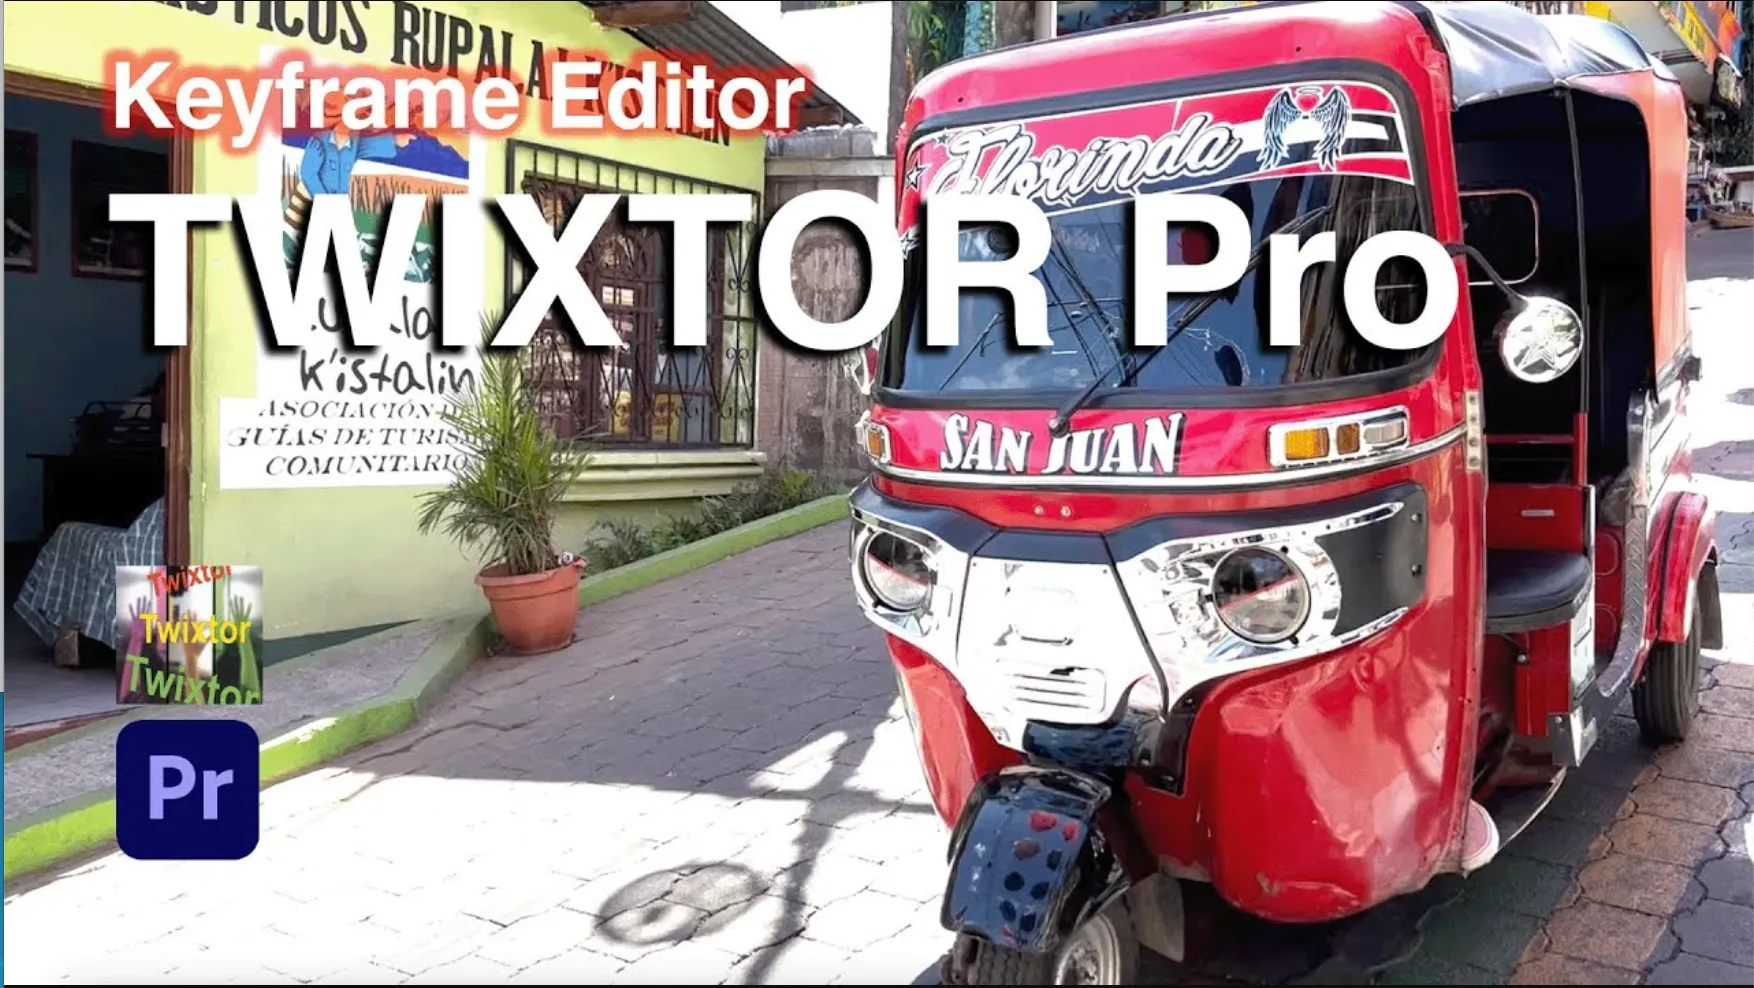
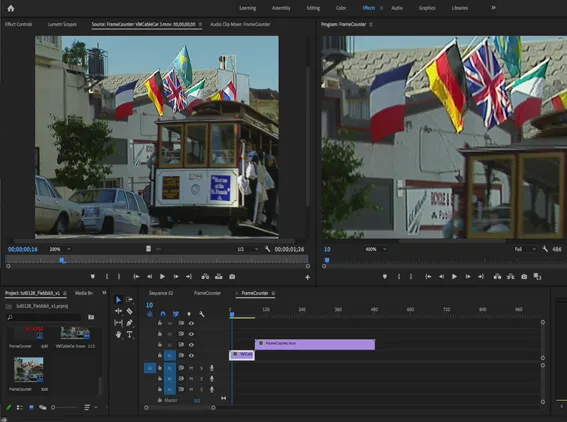
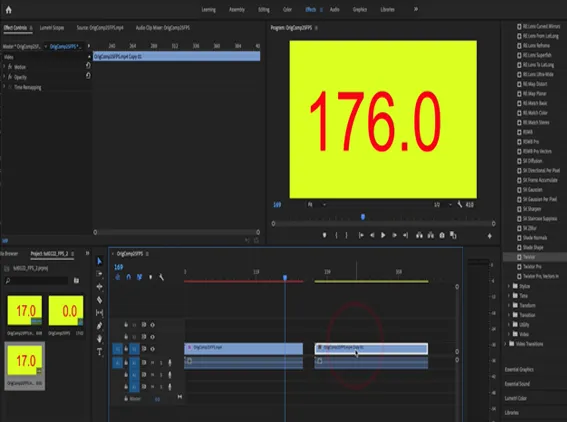
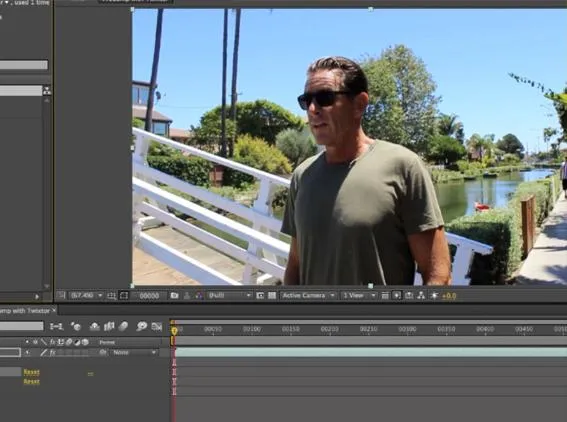
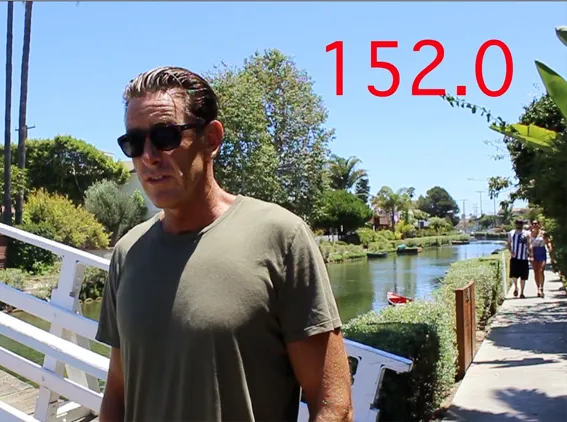
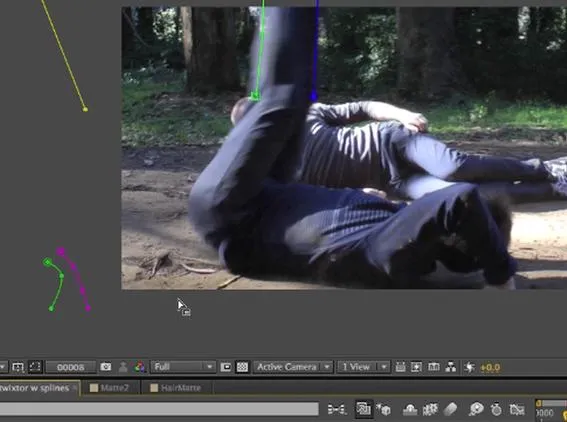
Premiere Pro - Keyframe Editor in Twixtor Pro
Updated

REZup in Resolve
Updated
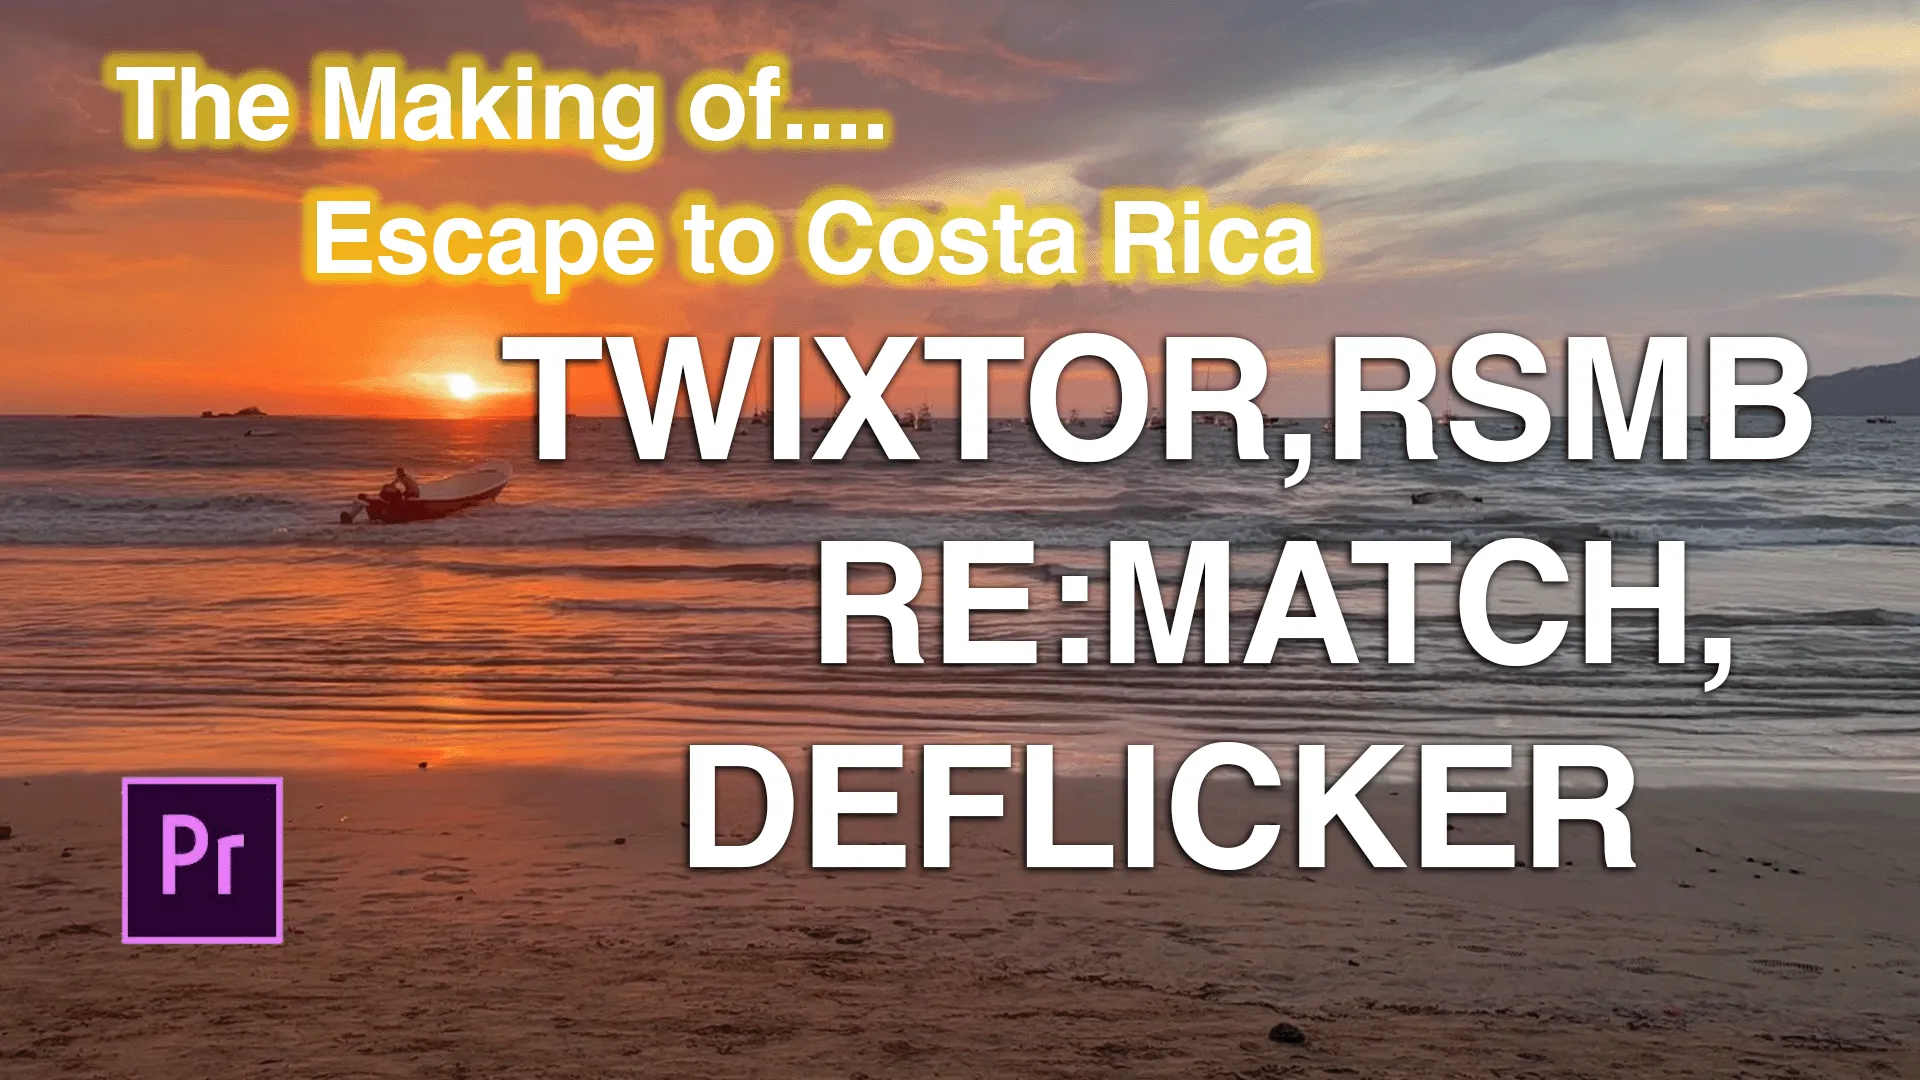
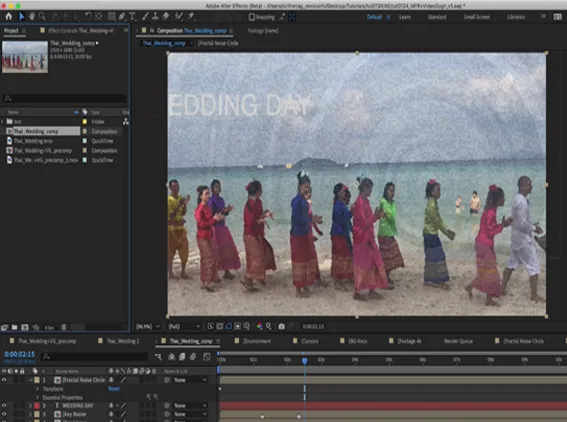
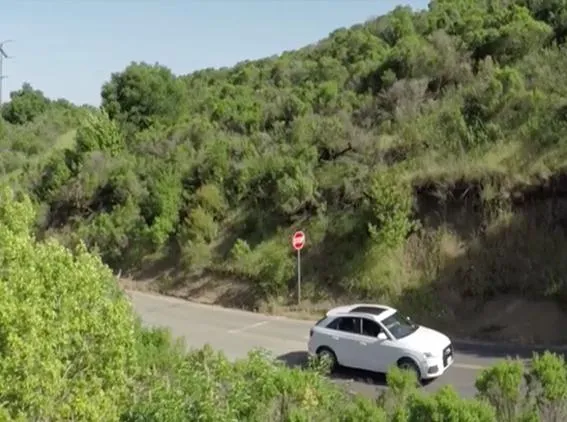
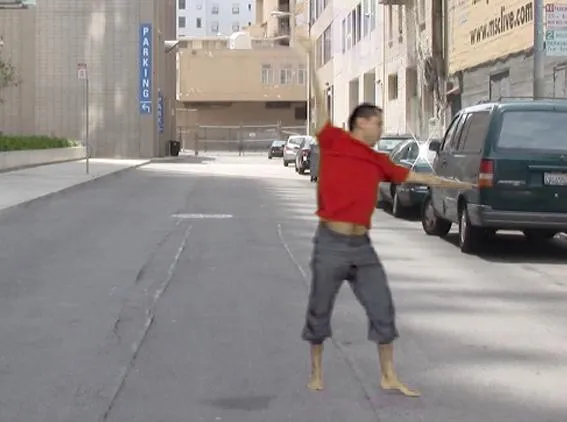
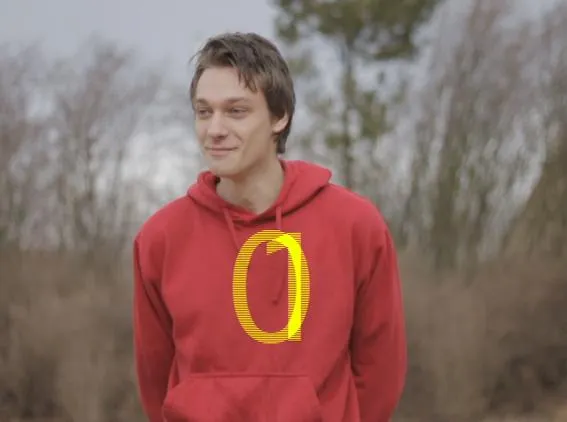
The Making of the Airbnb Promo
Updated
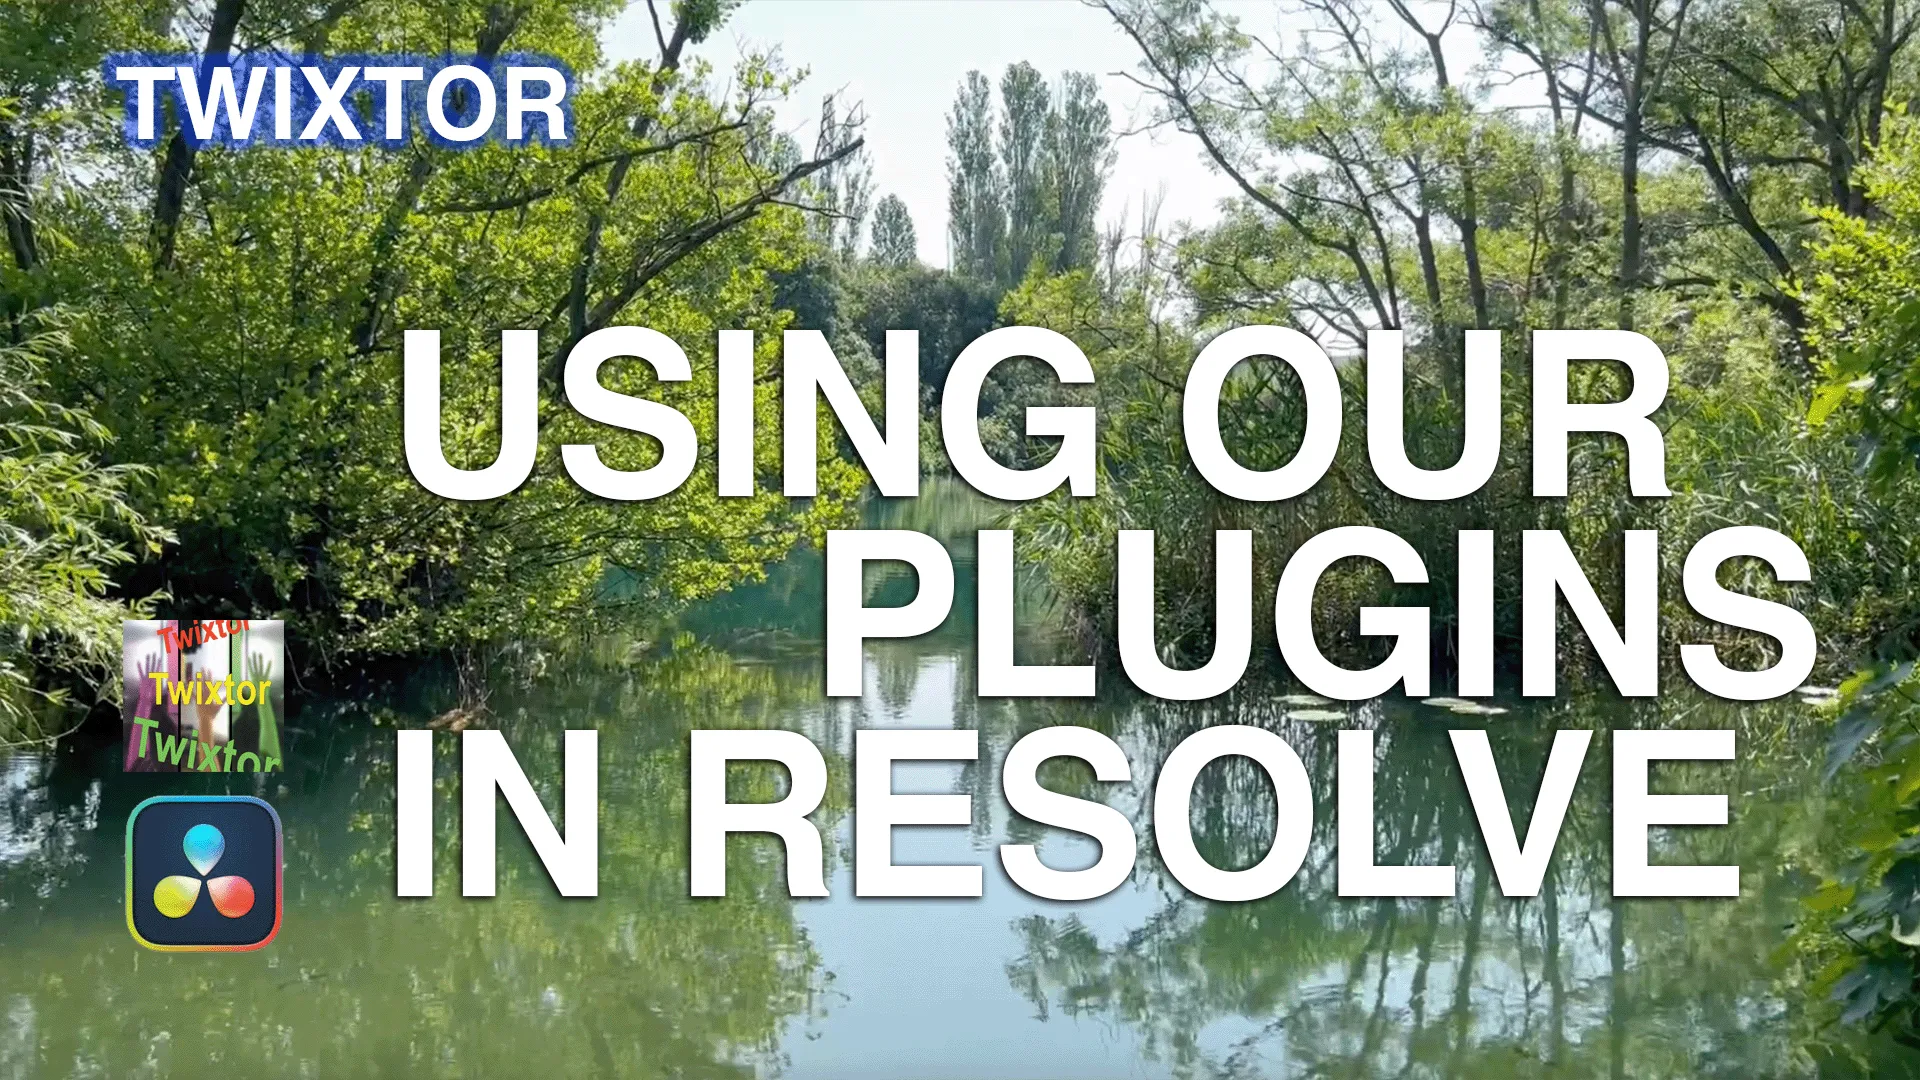
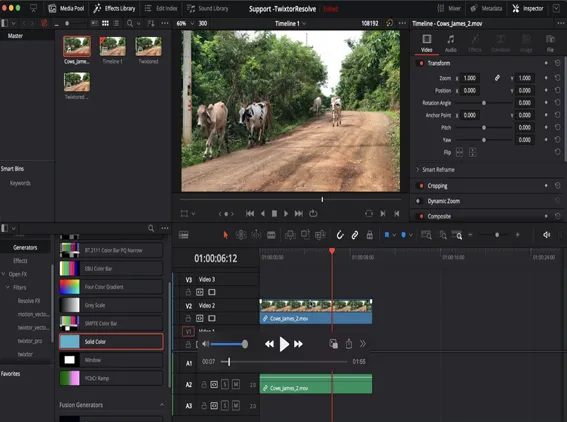
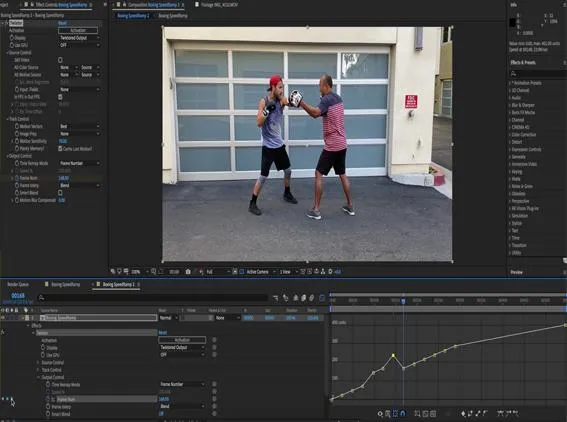
Using Twixtor in Resolve Fusion
Updated

How to use Color Genius plug-in version
Updated
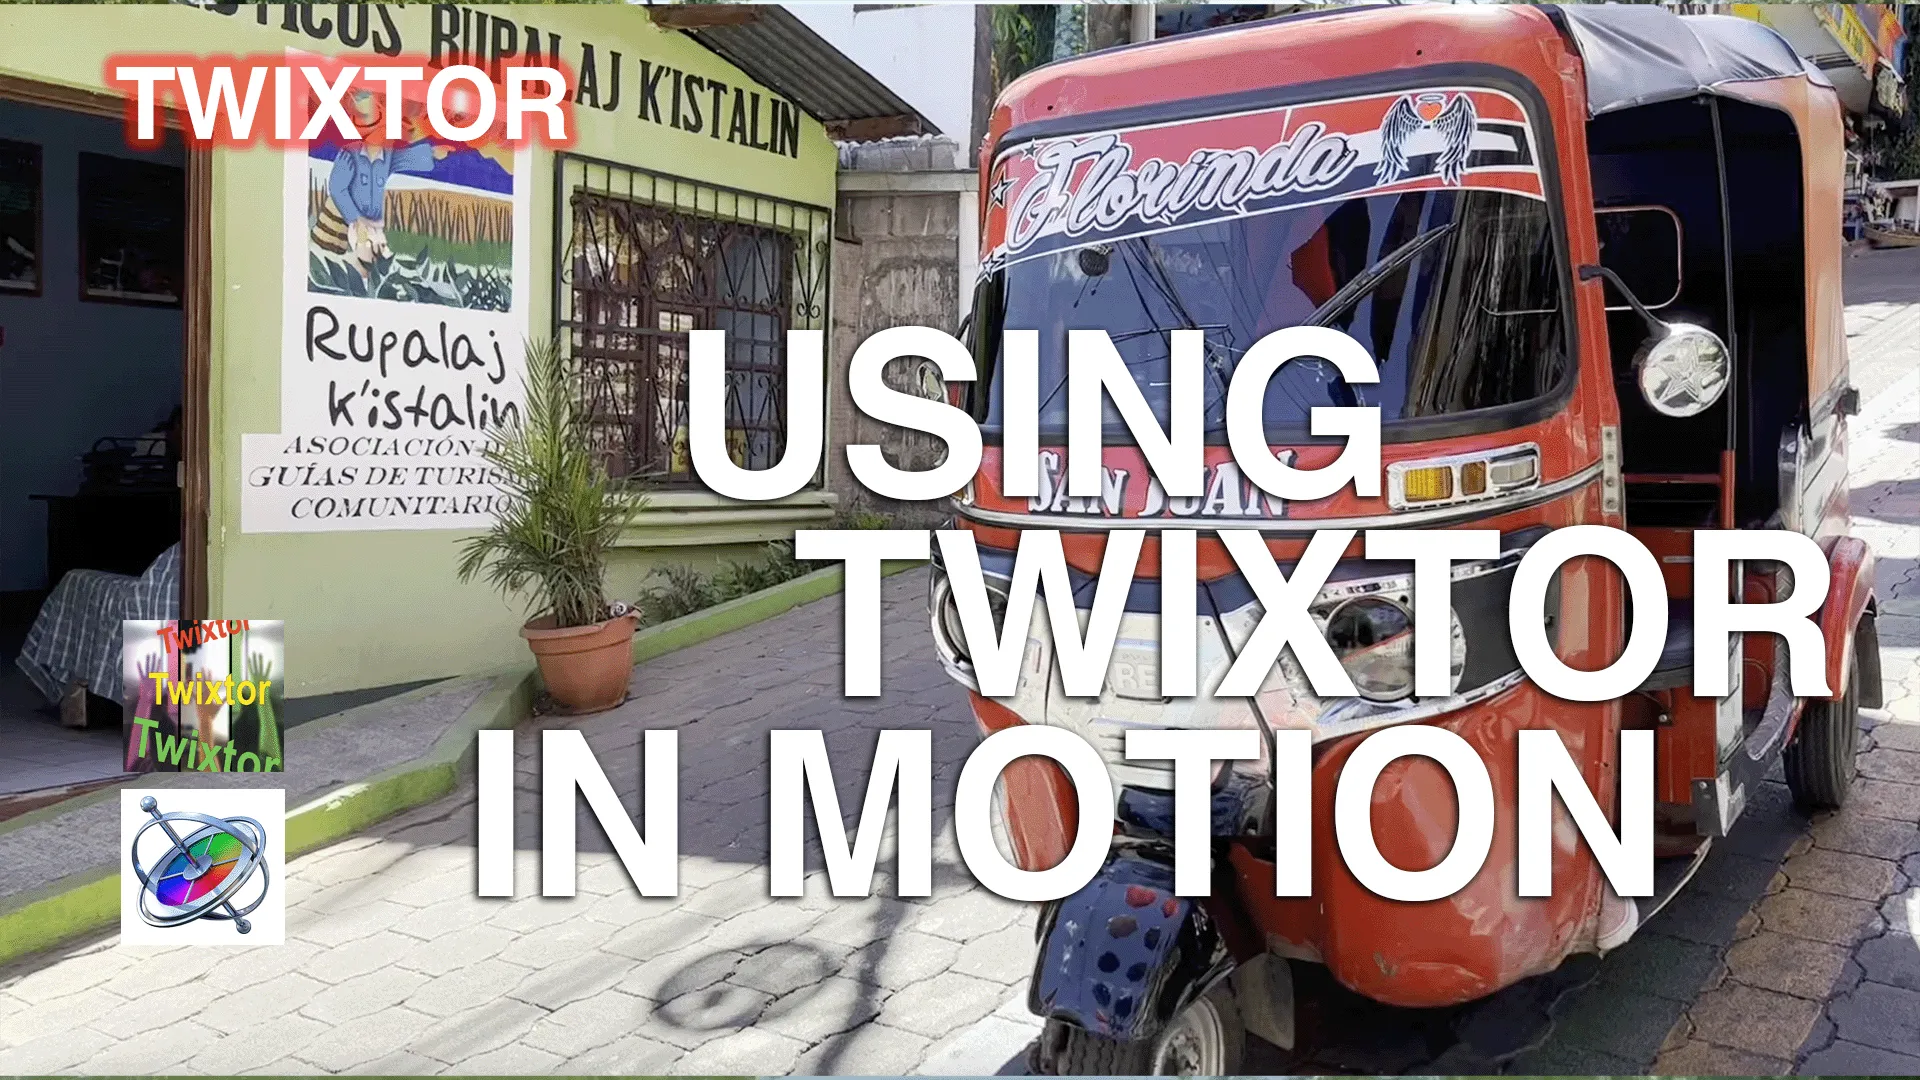
Twixtor in Motion
Updated
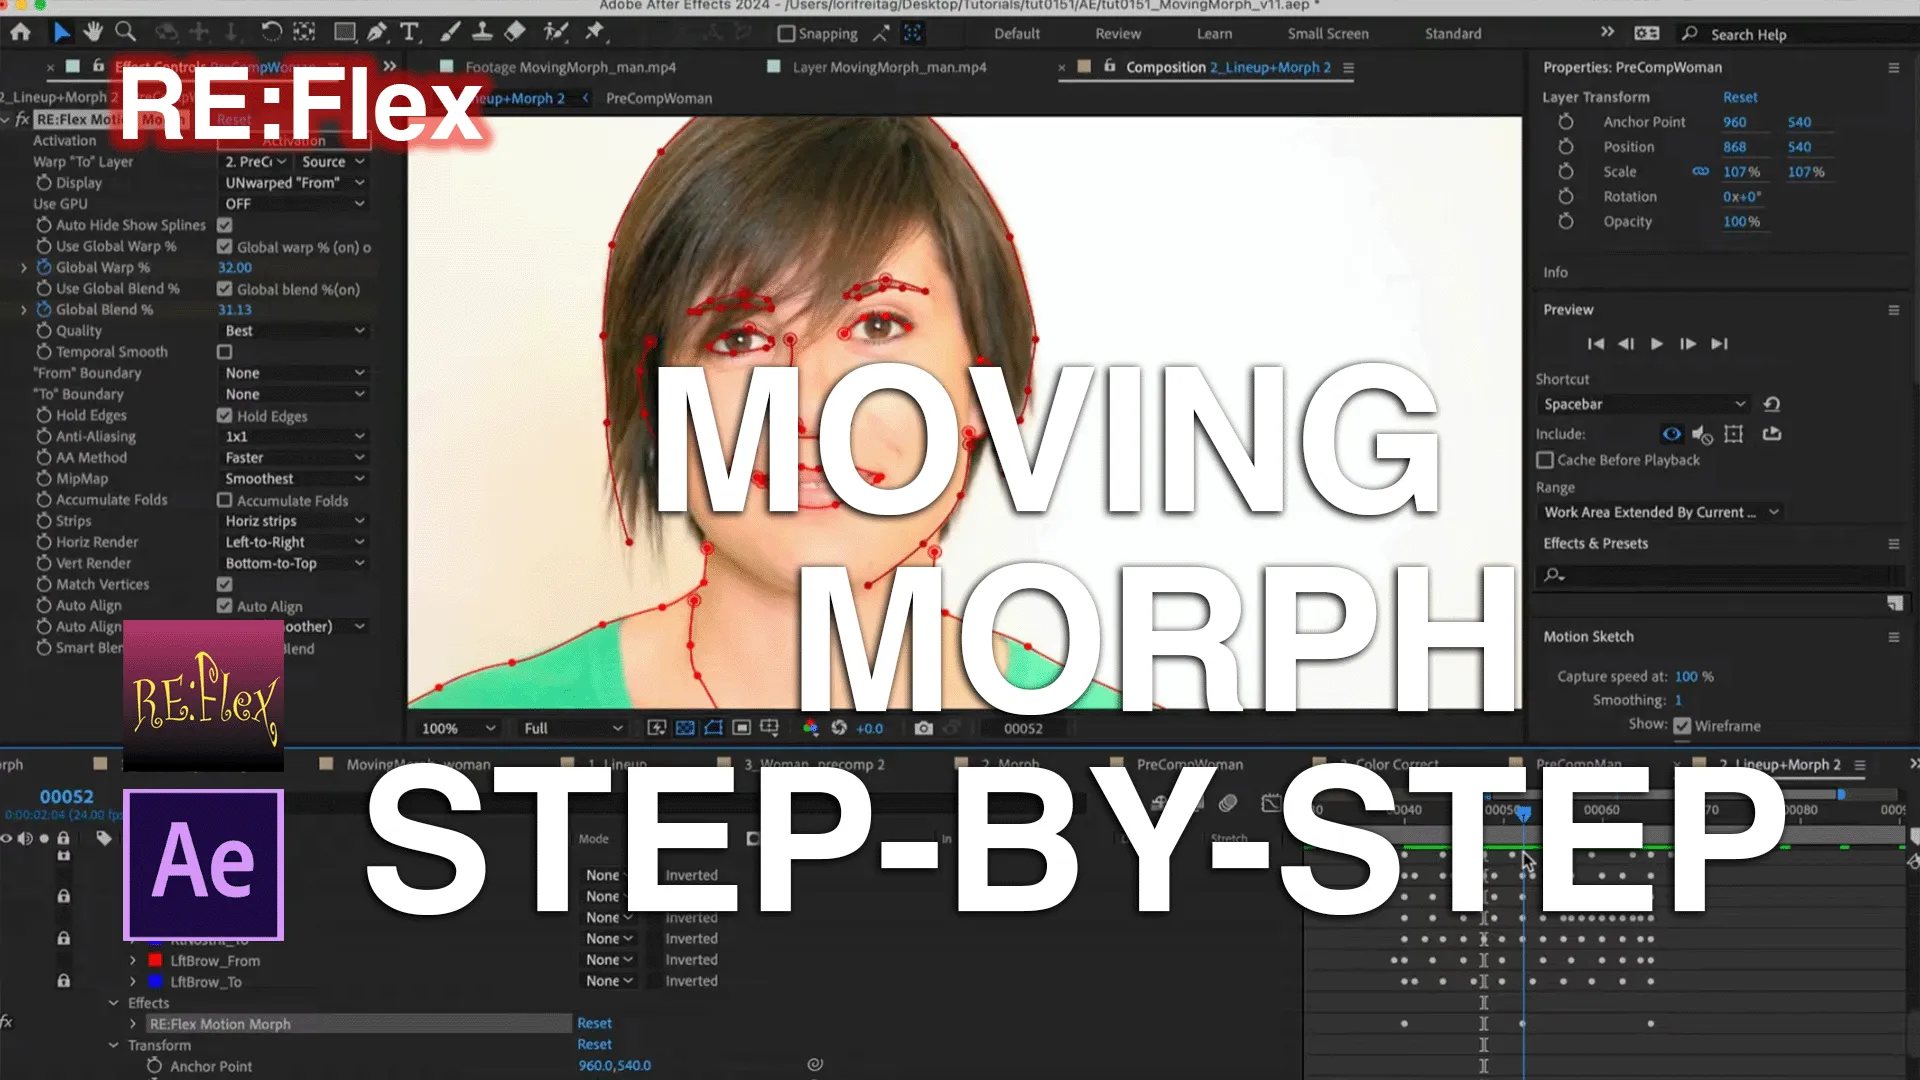
RE:Flex Moving Morph Step-by-Step
Updated

Premiere Pro - Proxy Workflow Tips and Our Plug-Ins
Updated
Latest Albums

Autograph
Updated

RE:Grade
Updated

RE:Fill in AE and Premiere
Updated

Our Plugins in Flame
A set of tutorials for our plugins in Flame
Updated

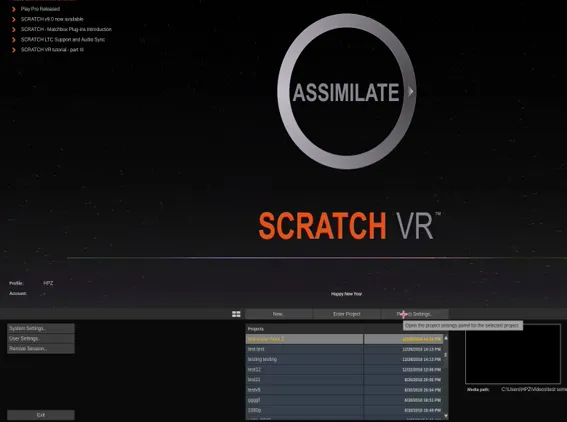
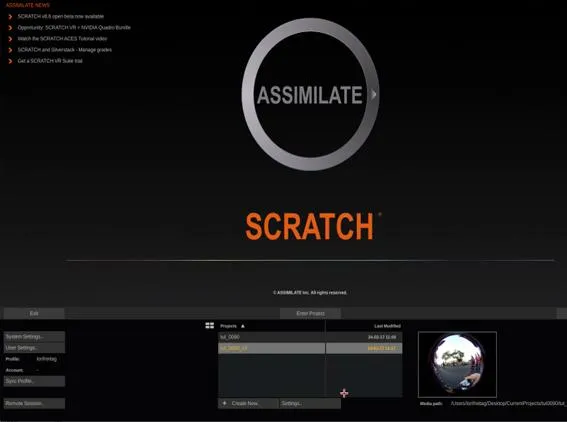
Our Plugins in Scratch
Updated

Our Plugins in Resolve
Updated
Latest Tasks

Sales Support
Updated

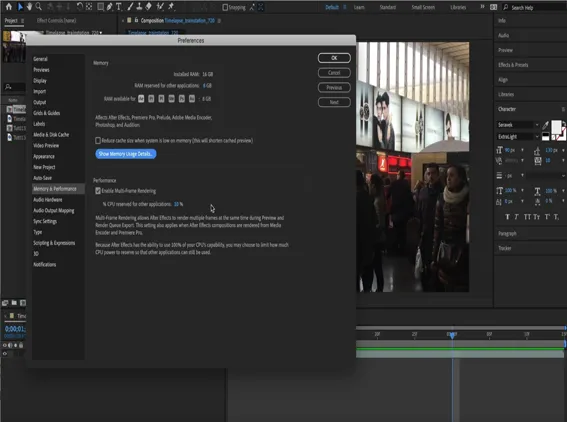
AE and Multi-Frame Rendering
Updated

Looks
This album collects different looks
Updated

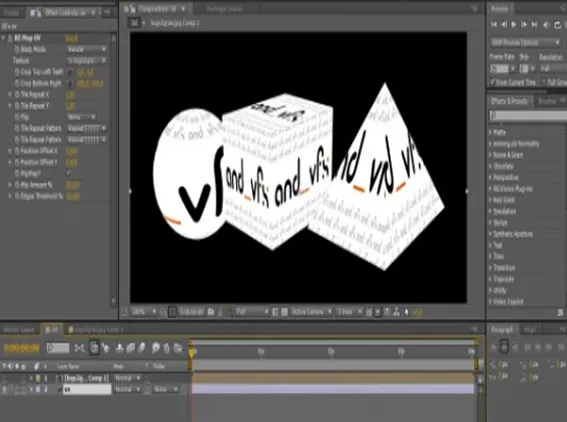
UV Maps
How to create UV maps
Updated

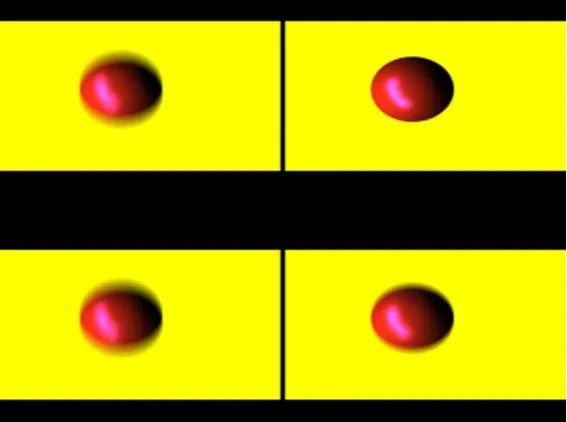
Motion Vectors
This set of Tutorials addresses Motion Vectors, what they mean, how to render them.
Updated
RE:Lens and Fisheye 2025
Updated
Our Plugins in Mistika Boutique
Updated
Working with LatLong Projections in RE:Lens
Updated
Shooting Log - ARRI Film Lab and other cameras
Updated
Premiere Pro - Keyframe Editor in Twixtor Pro
Updated
REZup in Resolve
Updated
The Making of the Airbnb Promo
Updated
Using Twixtor in Resolve Fusion
Updated
How to use Color Genius plug-in version
Updated
Twixtor in Motion
Updated
RE:Flex Moving Morph Step-by-Step
Updated
Premiere Pro - Proxy Workflow Tips and Our Plug-Ins
Updated
Workaround for Premiere Color Shift Issue
Updated
Fieldskit in Premiere Pro - 3:2 pulldown & Converting Interlaced to Progressive
Updated

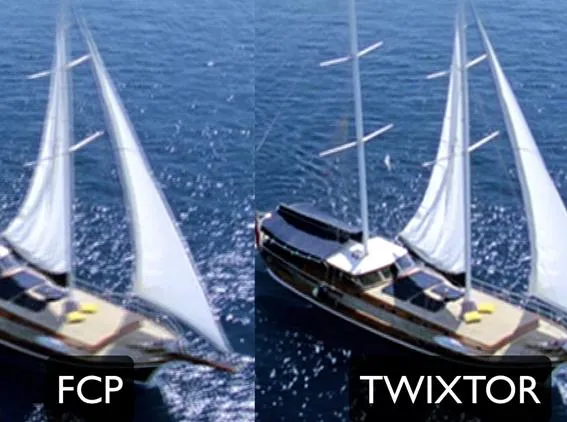
REZup - Resize workflow in FCP
Updated
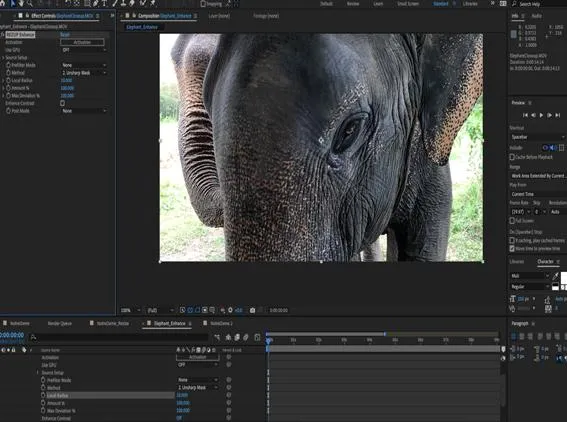
Instancer: Creating an Animated Rainbow Transition
Updated
Autograph: Getting Started
Updated
Instancer: Basic Principles and Concepts
Updated
REZup Overview - Resize & Enhance Product: REZup
REZup Overview - Resize & Enhance
Updated
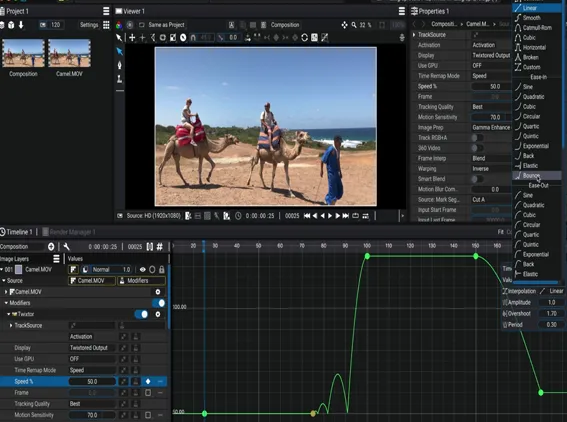
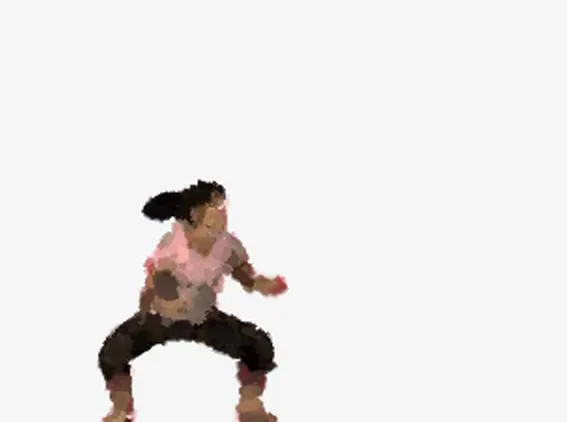
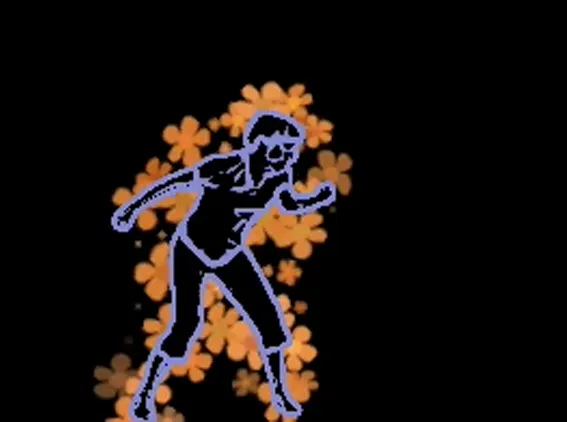
Twixtor in Autograph
Updated

Getting started in Autograph-Using our plugins
Updated

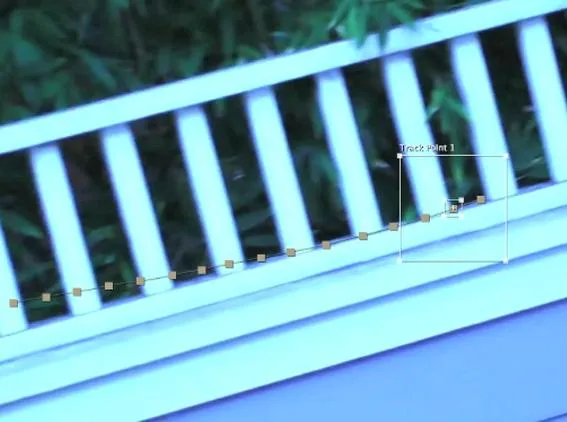
RSMB Pro - Mattes and Track Points
Updated
RE: Vision plugins in Resolve - Workarounds
Updated
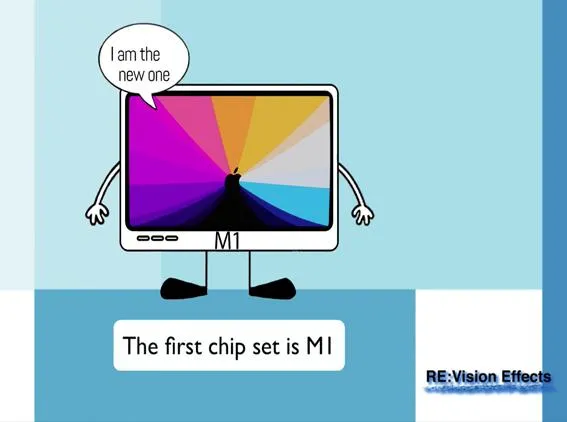
M1 and Rosetta 2
Updated

Managing your account - Moving a key-based license
Updated
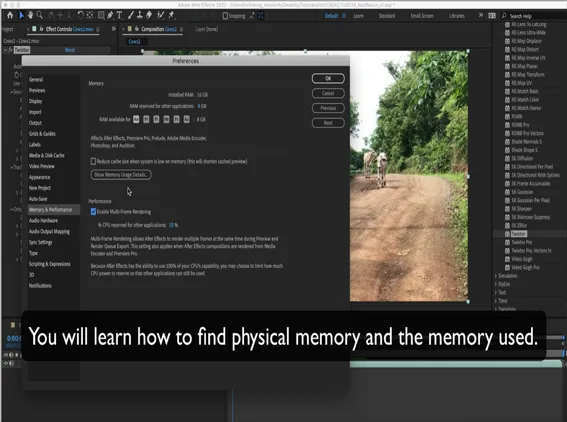
AE and MFR - Check your memory
Updated
AE and MFR - Real Basics
Updated
How to use V-Ray Velocity pass with RSMB
Updated
RE:Fill Added Features
Updated
Arnold Motion Vectors Settings
Updated
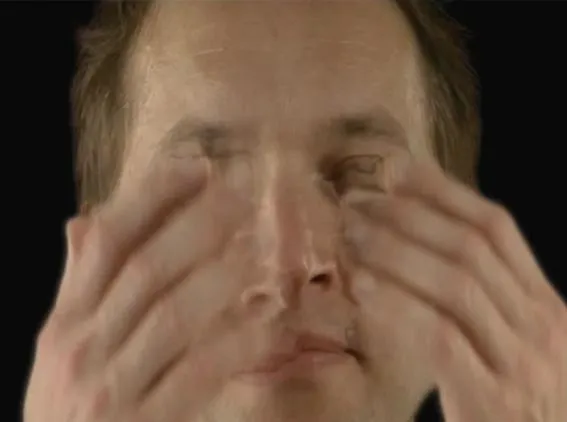
Video Fields for Millennials - Gen Alpha's
Updated
Multi-Frame Rendering - Variables that affect processing time
Updated
Multi-Frame Rendering and Video Gogh
Updated
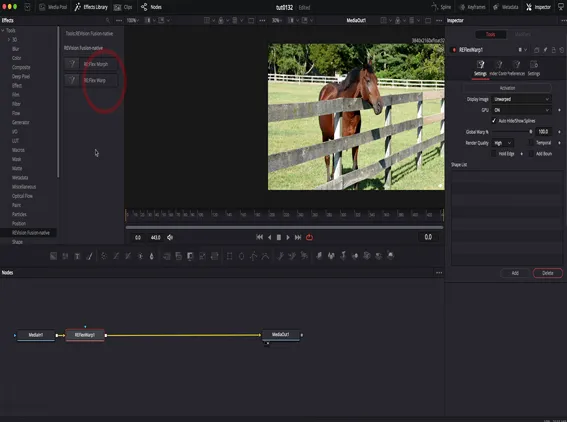
Quick Tip Tutorial - Fusion and RE:Flex
Updated
RE:Map, Cryptomatte and Reusable 3D Renders
Updated
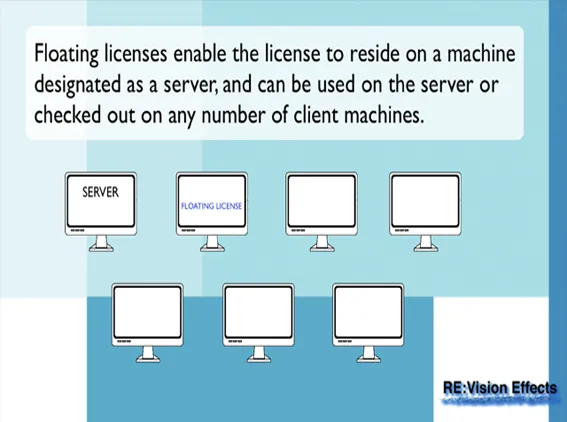
RE:Vision Effects Licensing Overview
Updated
FieldsKit and Premiere Pro
Updated
Handling clips with different Input and Output sizes within Flame
Updated
Twixtor, Time Remapping and Excel
Updated
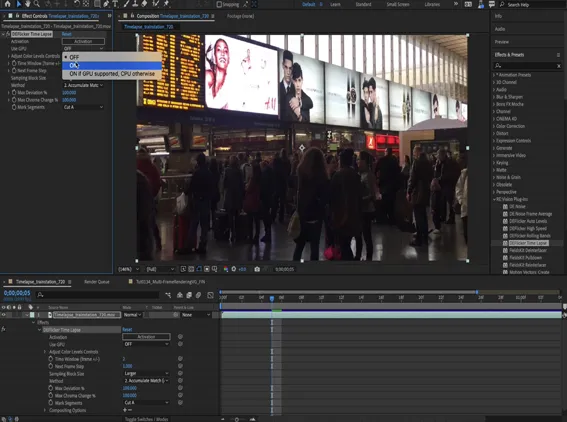
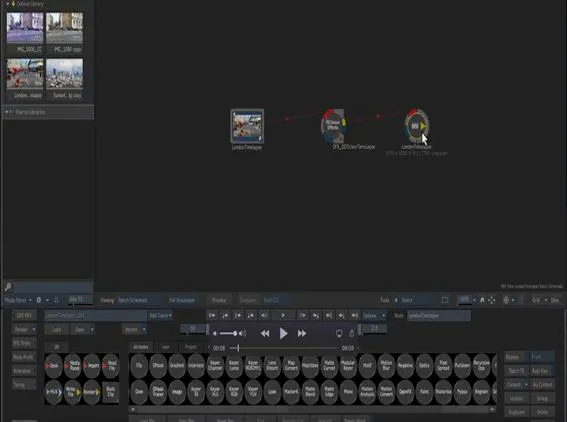
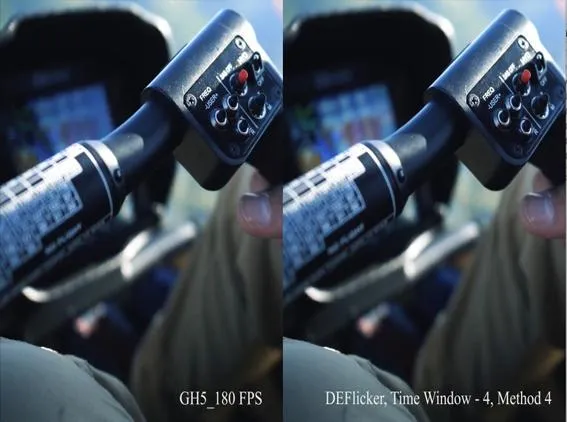
DEFlicker and Timelapse
Updated
How to remove Rolling Bands with DEFlicker
Updated
Unwrapping iZugar MKX200 3.8mm fisheye with RE:Lens
Updated
Twixtor 7 in Premiere Pro and AE 2020-Review and Whats New-Part 2
Updated
Twixtor 7 in Premiere Pro and AE 2020-Review and Whats New-Part 1
Updated
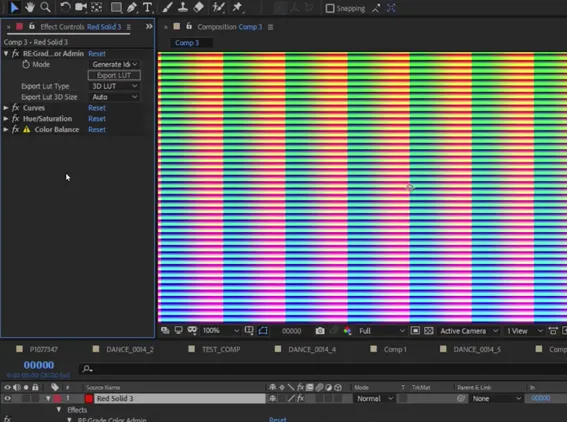
Color LUT in RE:Grade Basics
Updated
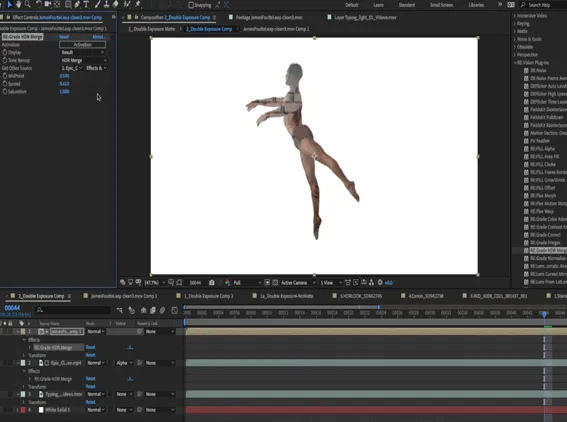
More than one way to blend - RE:Grade HDR Merge Part 2
Updated
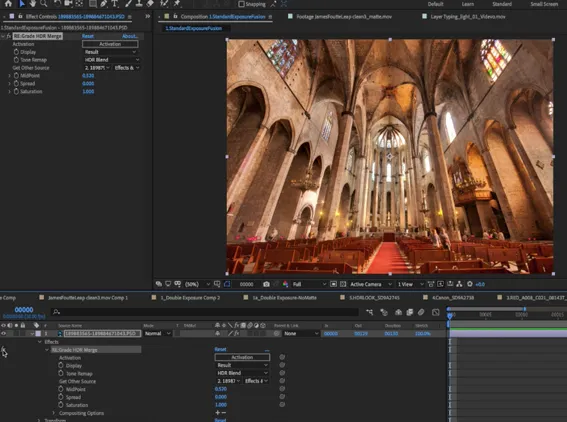
More than one way to blend - RE:Grade HDR Merge - Part 1
Updated
RE:Fill for Better Composites
Updated
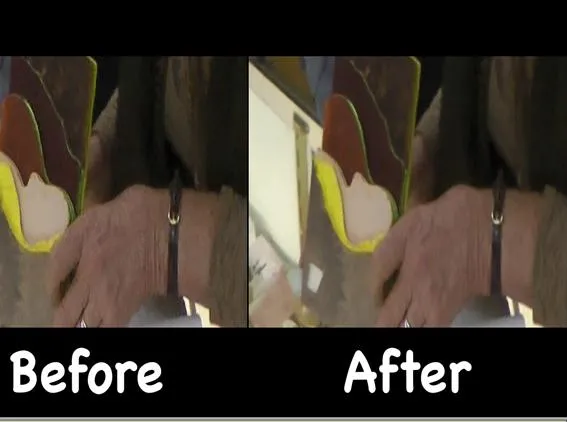
Dead pixel, Hot pixel, Stuck pixel removal with RE:Fill
Updated
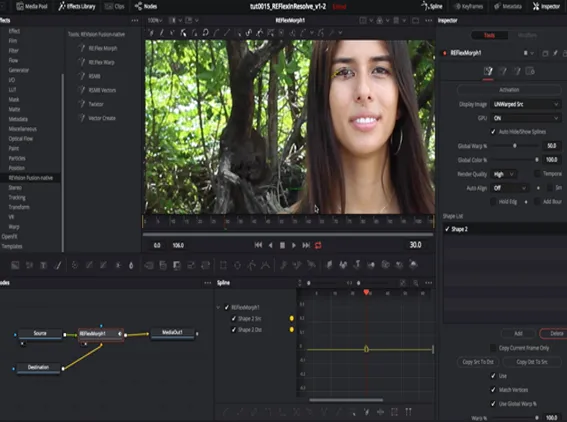
RE:Flex Morph in Resolve
Updated
Sparks vs. OFX in Flame
Updated
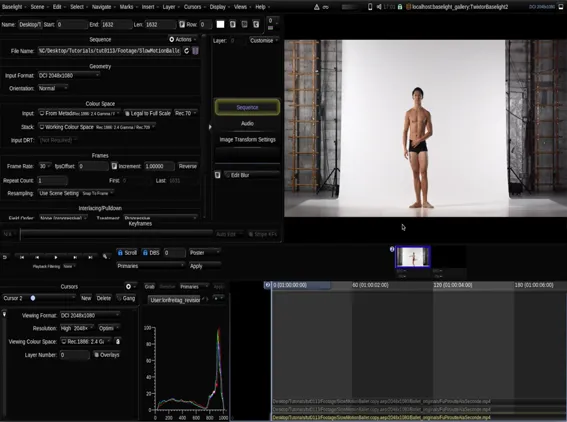
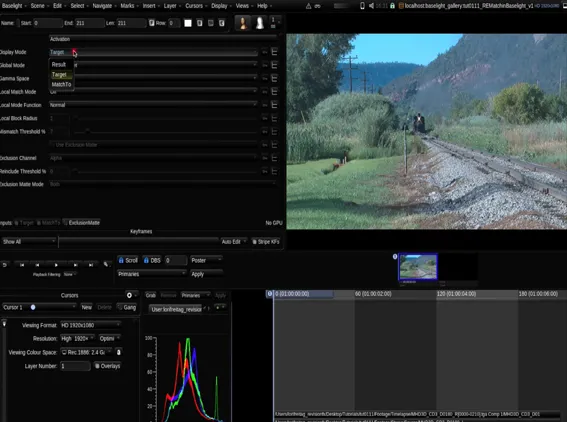
Twixtor in Baselight
Updated
RE:Vision Effects OFX Plugins in Flame and Flame Assist
RE:Vision Effects OFX Plugins in Flame and Flame Assist
Updated
RE:Vision Effects Plugins in Baselight
Updated

Scratch & Plugins
Updated

RE:Grade and Timelapse
Updated
MV out of Maya with Arnold
Updated
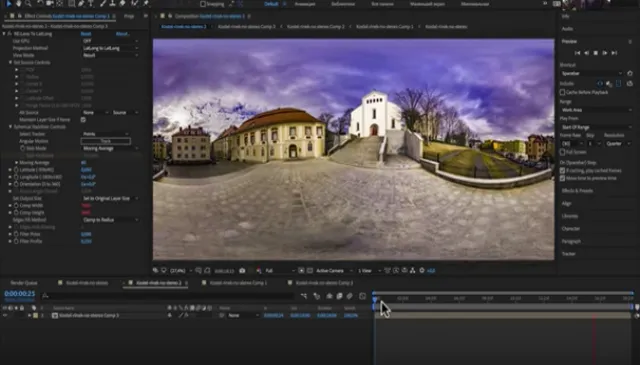
How to make a perfect stabilization VR 360 Hyperlapse video
Updated
Scratch - Setting up an effect in Scratch 9 and over - with different input/output resolutions
Updated
Resolve - Handling Clips with different Input and Output size
Updated
Resolve Tutorial 3 - Handling Multiple Clips
Updated
RE:Vision plugins in Resolve 2: Twixtor
Updated
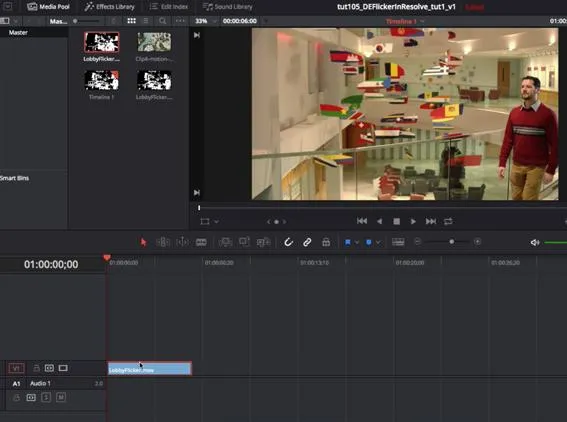
RE:Vision plugins in Resolve 1: DEFlicker
Updated
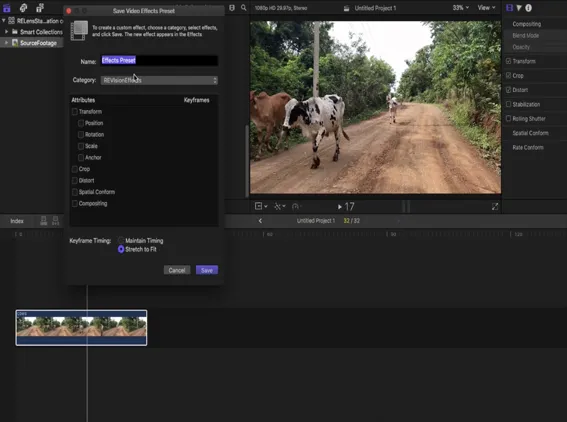
Saving Effects Presets in FCPX
Updated
Premiere Pro to After Effects Workflow
Updated
RE:Lens - Stabilizing 360 VR in FCPX tutorial
Updated
RE:Lens for FCPX - Converting fisheye footage to 360
Updated
RE:Lens - Shoot now, do the camera work later
Updated
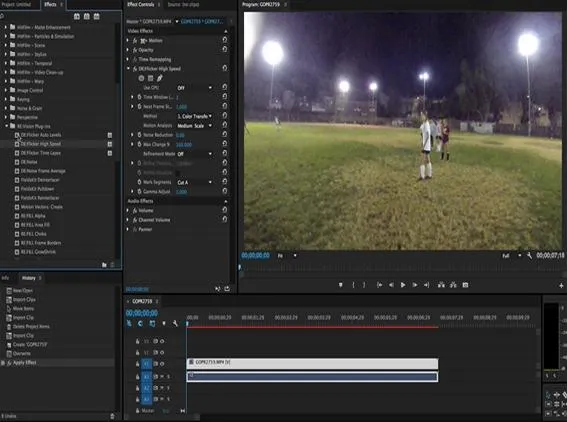
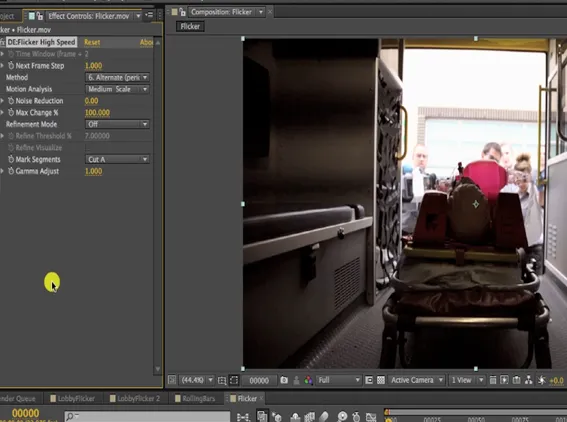
DEFlicker HighSpeed Footage in Premiere
Updated
RE:Lens in Scratch - Part 2
Updated
RE:Lens in Scratch - Part 1
Updated
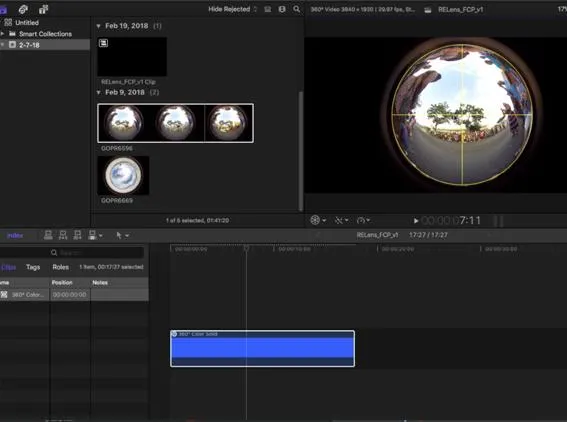
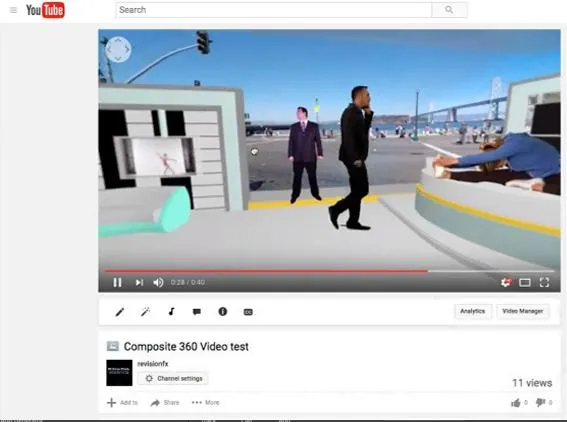
Using 360 Video as a second camera
Updated
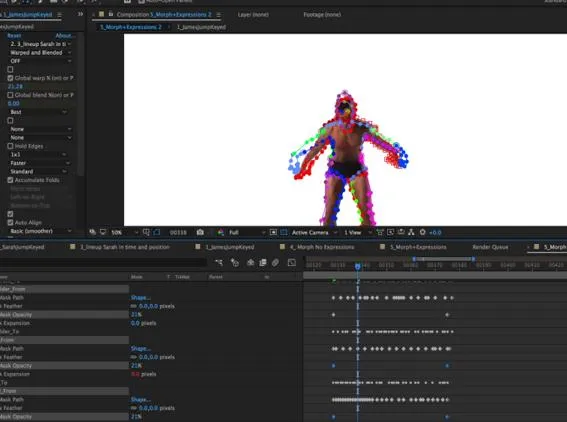
RE:Flex for AE - Moving Morph using per-spline blending and warping controls
Updated
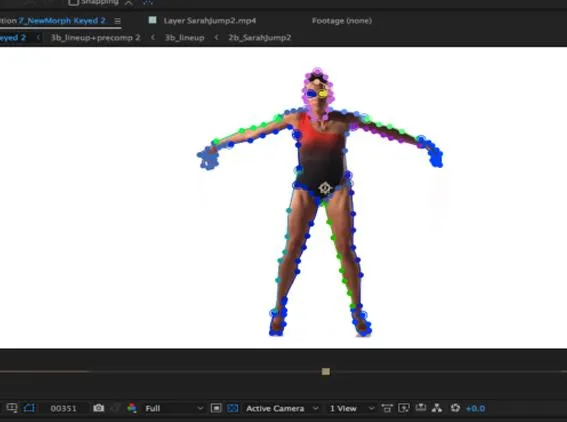
RE:Flex - Moving Morph:Morphing between Moving Images - ex.2
Updated
Setting up our plug-ins in Scratch when input and output resolution are different
Updated
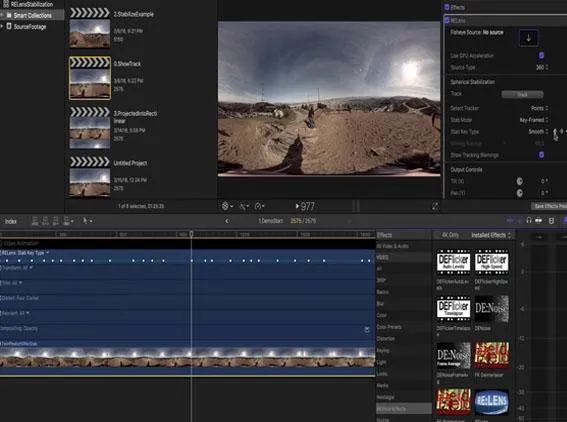
RE:Lens - Advanced Stabilization Tips
Updated
RE:Lens Project Example - Tips and Tricks
Updated
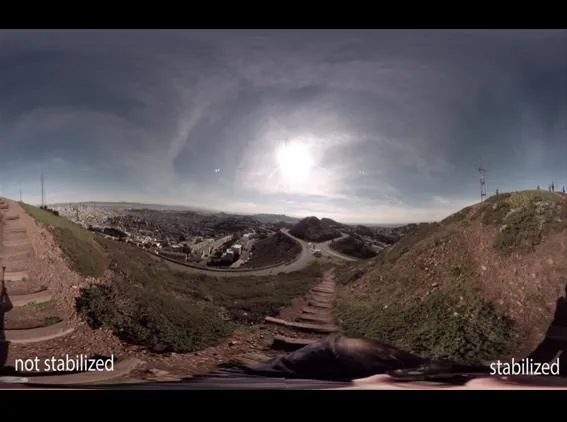
RE:Lens - Stabilizing 360 VR footage
Updated
Tracking, Fisheye lenses and RE:Lens
Updated
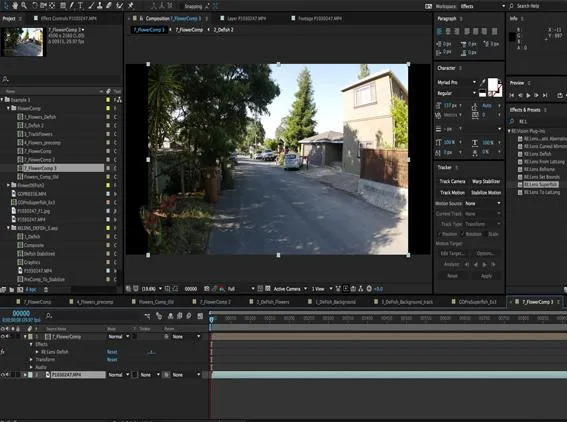
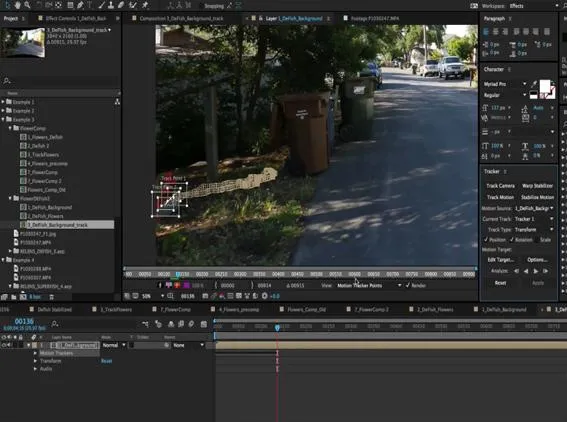
RE:Lens Defish and Superfish
Updated
Motion Graphics and RE:Lens
Updated
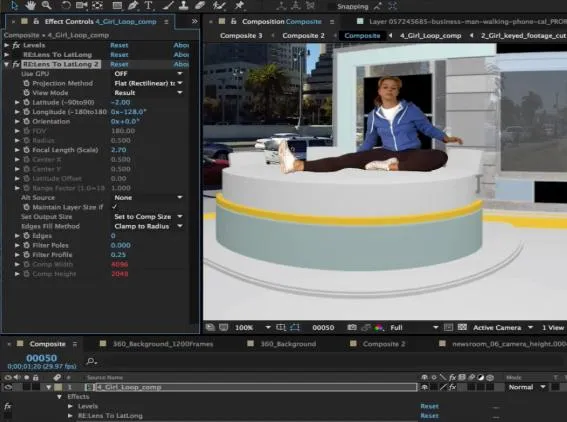
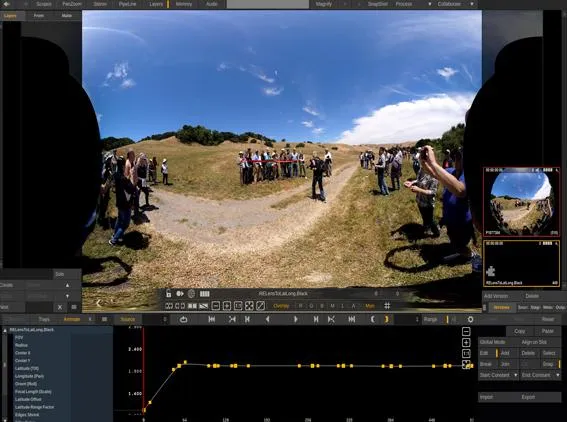
RE:Lens Working with 360 Virtual Sets
In this tutorial, we will see how to use your virtual set and re-use it with RE:Lens.
Updated
Uploading 360 Video to YouTube, Facebook and other players
Updated
Export UV maps out of 3DS Max or Maya using Mental Ray or V-Ray
How to setup Mental Ray and V-Ray to export UV Maps
Updated
Twixter Overview in Sony Catalyst Edit
Updated
Quick Tip - Setting Color Correction Window
Updated
Lightwave to AE: Deformers and RE:Map
Updated
DEFlicker for Premiere Pro - Best Practices
Updated
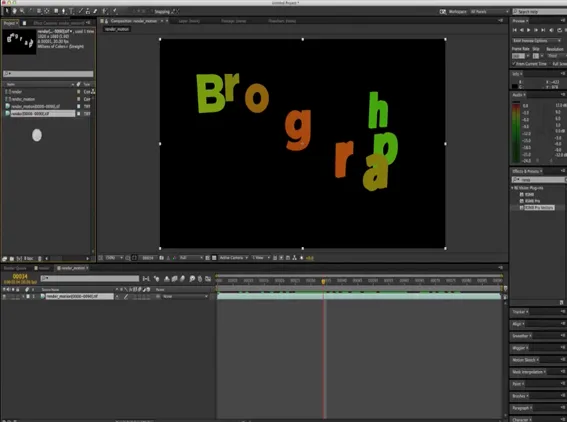
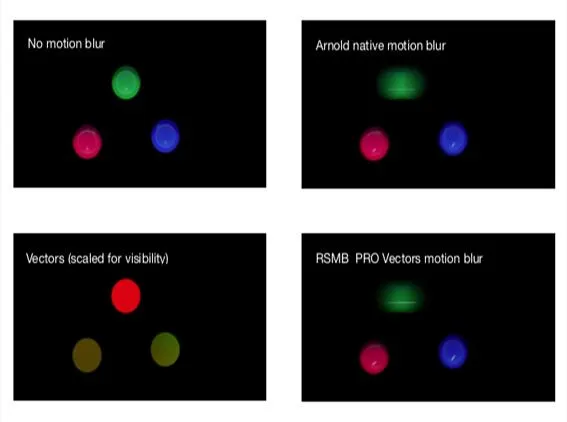
Brograph Tutorial 034 - C4D and RSMB Pro Vectors
Updated

Post motion blur using RSMB motion vectors in Nuke from C4D
Updated
DEFlicker for FCP X - Best practices
Updated
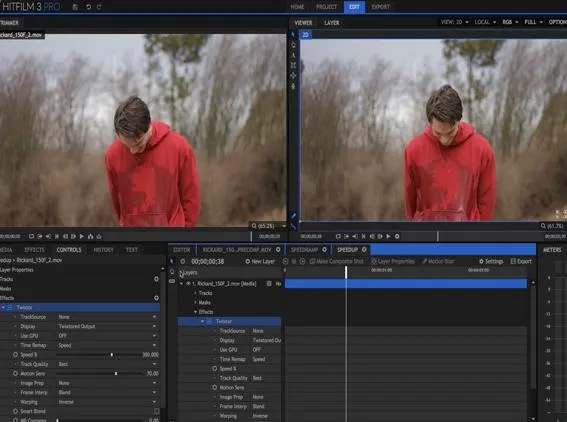
HitFilm: Twixtor basics
Updated
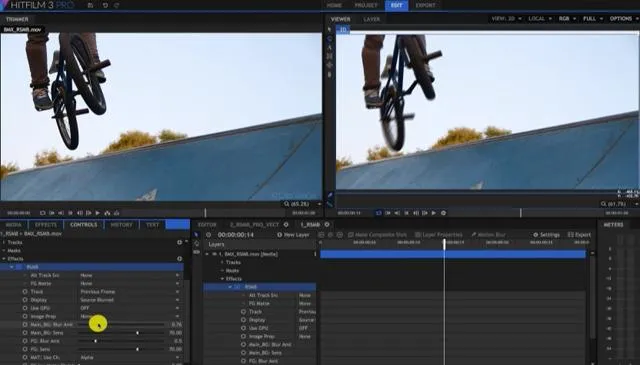
HitFilm: RSMB, Effects with two inputs
Updated
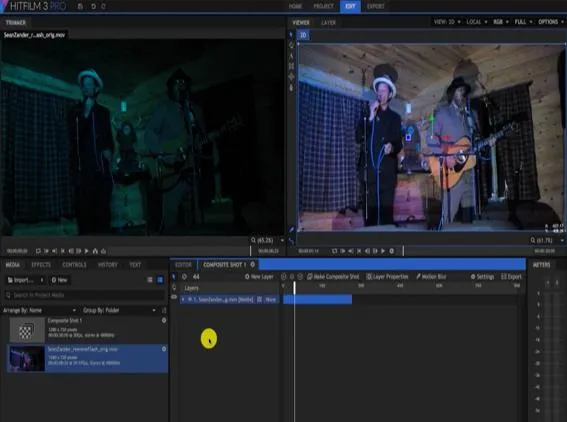
Our Plug-Ins in HitFilm - Intro
Our Plug-Ins in HitFilm-Intro
Updated
Twixtor, Particular and RE:Fill create a unique motion-based particle effect
Updated
Using Twixtor and After Effects to retime both audio and video
Updated
Using RE:Flex Warp with Mocha’s tracking of open splines
Updated
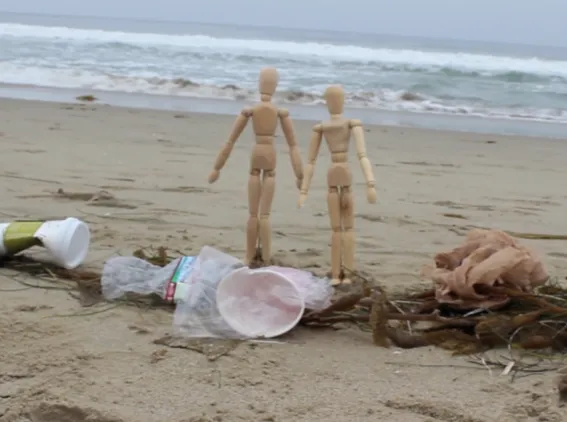
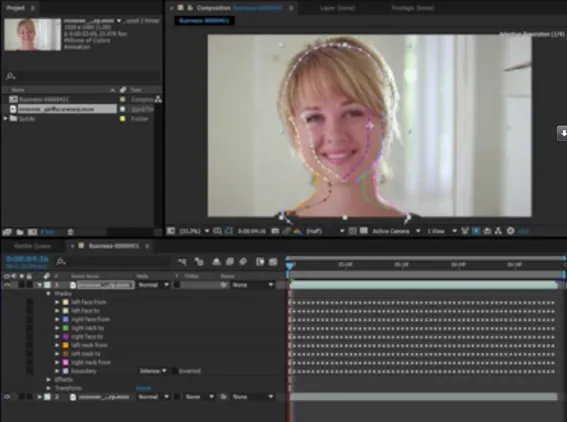
“Save our Beaches” – an example using multiple RE:Vision Effects plugins
Updated
RE:Vision FX and Premiere: Frame Rate Conversion and Mixed Formats
Updated
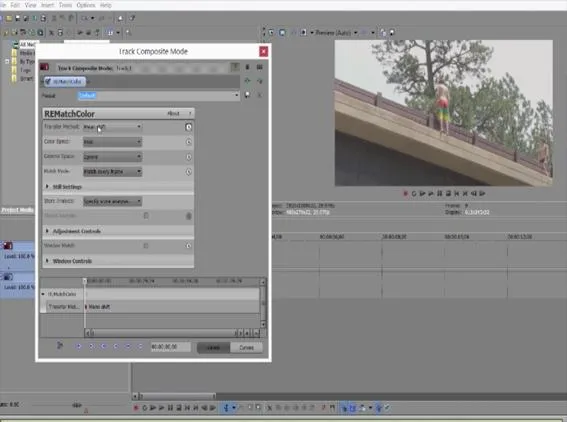
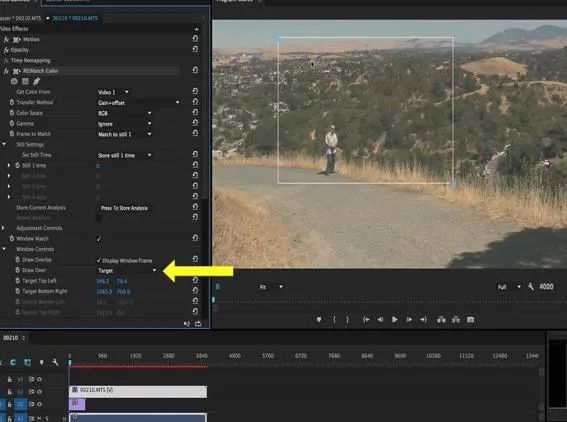
Intro to RE:Match Color in Vegas Pro
Updated
DEFlicker Exploring Features 2
Updated
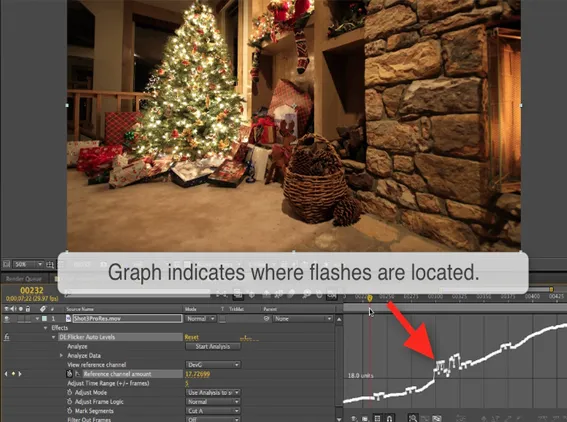
DEFlicker Intro to Auto Levels
Updated
DEFlicker Exploring Features
Updated
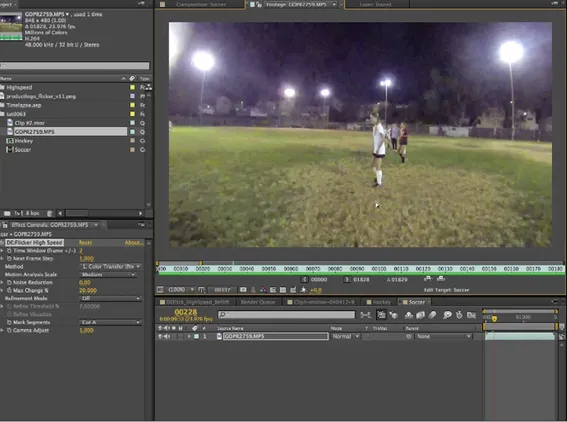
Intro to DEFlicker High Speed
Updated

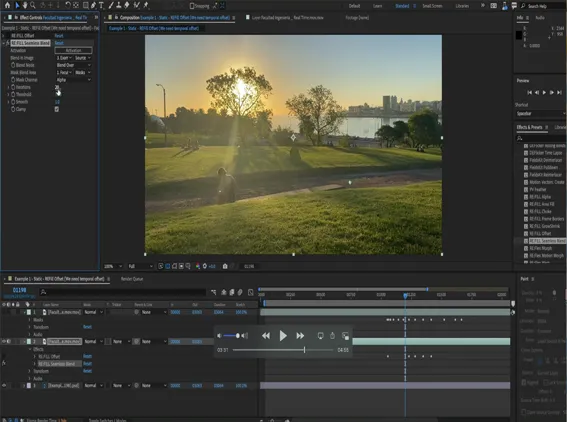
Intro to DEFlicker Time Lapse
Updated
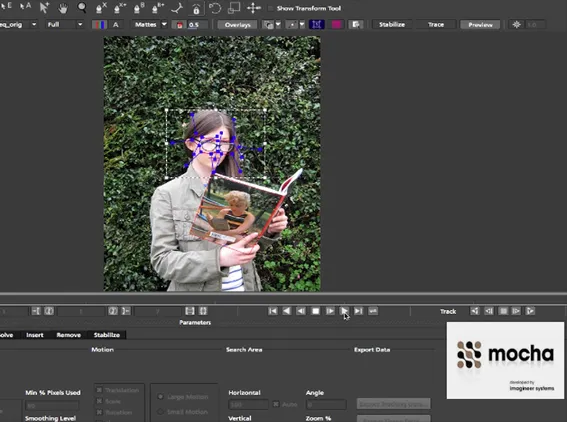
Our tools with Mocha - Guest appearance by Mask Avenger
Updated
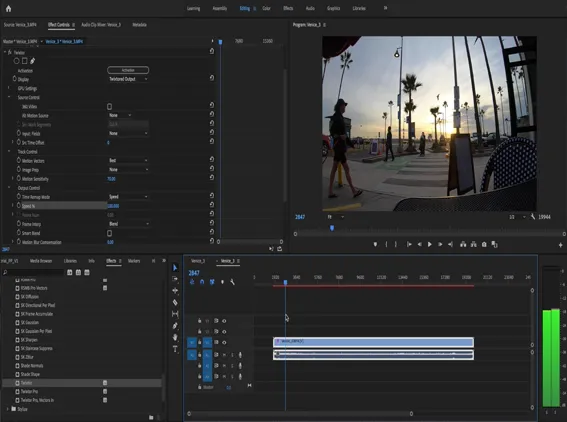
Twixtor Pro - Virtual Camera moves - multi-view interpolation
Multi-view interpolation
Updated
Exporting UV maps out of 3DS Max
Updated
Twixtor Pro Advanced Tools - Masks & Splines
Updated

Using Reel Smart Motion Blur with modo 701 outputs in Nuke & After Effects
Updated

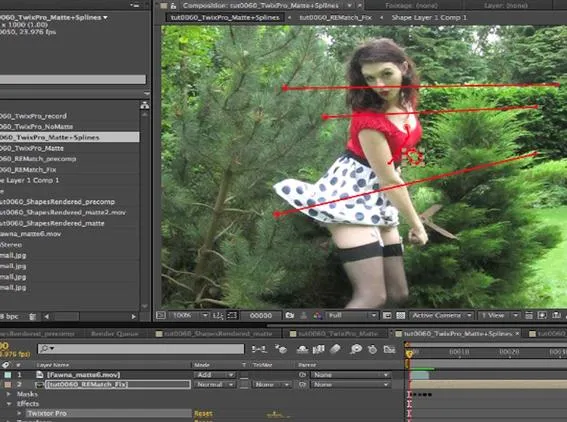
Advanced Twixtor Pro: better results using mattes and splines in After Effects
Updated
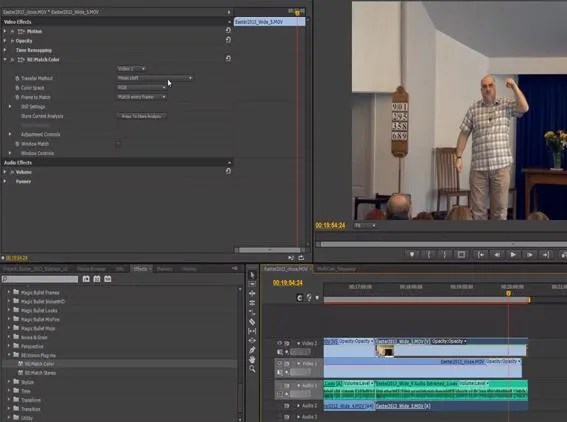
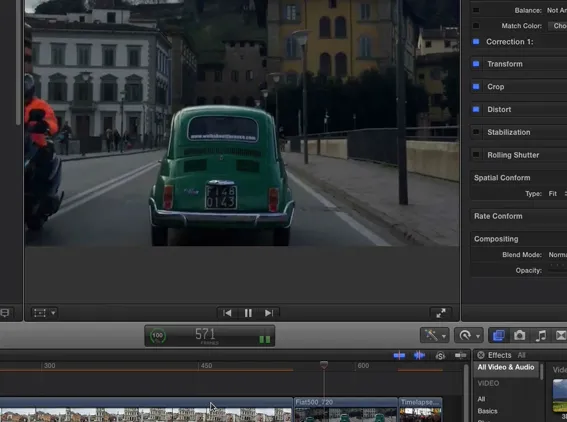
RE:Match Non-matching Cameras in Premiere Pro
Updated
Exporting 3D Renders out of C4D for our plugins: Part 2 - More Passes
RE:Vision Effects products with Cinema4D - Part 2
Updated
RE:Vision Effects products with Cinema4D
Updated
Introduction to RE:Match Stereo
Updated

Introduction to RE:Match Color
Updated

Exporting 3d renders out of C4D for our plugins : Part 1 - Motion Vectors and UV Maps
Updated

Lip-Synch with Twixtor in Final Cut Pro X- Key framed alignment of video to audio
Lip-Synch with Twixtor in Final Cut Pro X- Key framed alignment of video to audio.
Updated
Frame Rate Conversions in Twixtor within Premiere Pro (done in CS5)
Updated

Frame Rate Conversions in Twixtor within FCP X
Updated
RE:Map UVW Multipass
Updated
Twixtor: SpeedRamp & Fit-to-Fill in FCP X
Updated
Twixtor Overview in FCP X
Updated

RSMB Vectors from C4D to AE
Updated
Twixtor Pro: Better Retiming using a Matte
Better Retiming using a Matte
Updated
Twixtor Pro: When and How to use Tracking Points
Updated
Twixtor: When and How to use Tracking Points
Updated
Better Retiming using a Matte
Updated
Twixtor in Avid MC: Frame Rate Conversions
Updated

Twixtor in Avid MC: Progressive to Interlaced and Vice Versa
Updated

Twixtor Basics in Avid Media Composer
Updated
Twixtor - Working with Edits in Vegas Pro
Updated

Frame Edge Issues and Twixtor
Updated
Twixtor - Fixing Unwanted Warping
Updated
Frames Rates & DeInterlacing in Vegas Pro
Updated

Red/Blue frames & Pan/Crop in Vegas Pro
Updated

Twixtor Basics in Vegas Pro
This tutorial shows The Basics on how to use Twixtor in Vegas Pro. It covers the basic retiming concepts as well as animating keyframes.
Updated

DE:Noise - Beyond the Basics
Updated

RSMB for Maya users
four-part tutorial about adding motion blur to a Maya render by Jake Dean
Updated

RSMB for CInema 4D users
Tutorial about Motion Blur for Cinema 4D users
Updated
DE:Noise - Essential Info
Updated

Twixtor in Smoke
Updated

Marking Edit Points with Twixtor in FCP
This Tutorial shows how to mark segments in an edit in order to avoid warping across edits when speeding up or slowing down the overall edit.
Updated

RE:Flex for AE - Creating Seamless Transitions
Updated

RE:Flex Morph - Morphing between moving images
Updated

RE:Flex for AE - Morphing to replace missing frames
Updated
RE:Flex for AE - Morph with Auto Align and Smart Blend
Updated
Twixtor 5 for Fusion
Updated
RE:Flex for AE - Morphing in layers for better results
Updated
RE:Flex for AE - Cross Morphed Dissolves
Updated
RE:Flex for AE - Morph using Varying Dissolve Rates
Updated
RE:Flex Morph Still-To-Still in AE
This screencast covers the basics on morphing between still images within After Effects.
Updated
RE:Flex Warp Moving Imagery in AE
This screencast covers the basics of setting up a warp using open and closed splines on moving imagery within After Effects.
Updated

RE:Flex Warper Basics in AE - part 2
This screencast covers the basics on how to set up a simple warp using multiple open splines within After Effects. It is part 2 of 2 (part 1 covers a closed spline).
Updated
RE:Flex Warper Basics in AE - part 1
This screencast covers the basics on how to set up a simple warp using a closed spline within After Effects in Part 1 and Part 2 covers the basics on how to set up a simple warp using multiple open splines within After Effects.
Updated

Shade/Shape - Latex Letter Example
Updated

Shade/Shape - Movies in Users' Manual
Updated

RSMB 3.0 Tutorial for Autodesk Softimage 7 or later
Updated

RSMB 3.0 Tutorial for Shake
Updated

RSMB 4.0 sample Projects for FCP
Updated
Trackers and RSMB in Fusion
Updated

RSMB 3.0 Tutorial for Fusion 5.01 and up
Updated
RSMB 3.0 Vectors-Tutorial for Sparks
Updated
RSMB Sample Projects for AE compatible apps
Updated
RE:Flex 3 for Shake 4
Updated
RE:Flex 3 for Combustion 4 projects
Updated
RE:Flex for Combustion
Step-by-Step Combustion Tutorial
Updated
RE:Flex 3 for Autodesk (Sparks)
Updated
Trackers and RE:Vision Fusion plugins
Updated
Twixtor 4 for Fusion
Updated
Twixtor for FCE
Updated

How to make video look more like film
How do I use RE:Vision Effects plugins to help make video look more like film?
Updated
How do I get UV rendered images out of my 3D system ?
There are different ways to generate UV Maps (index into texture space).
Updated
How do I perform frame rate conversion in FCP?
This FAQ explains how to perform frame rate conversion within FCP using the FxPlug version of Twixtor.
Updated
How do I get motion vectors out of my 3D system?
Different ways to get Motion Vectors out of a 3D renderer
Updated
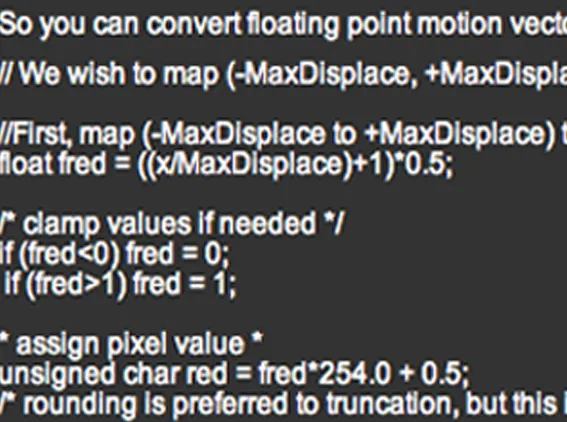
I'd like to see the math behind your motion vectors
The Motion Vectors Math
Updated
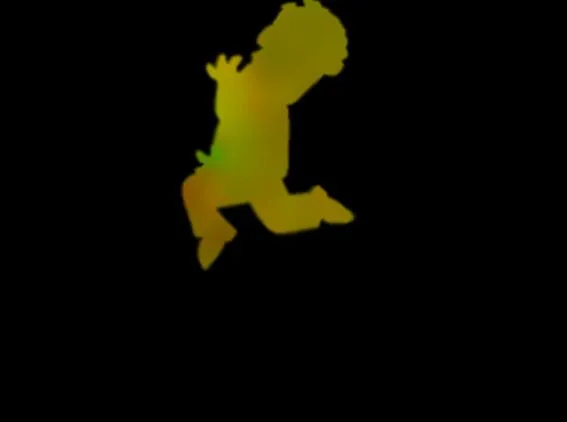
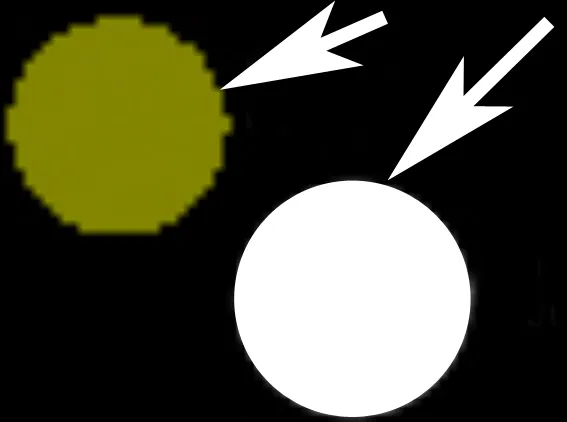
How is alpha used in your motion vectors?
The need for alpha in motion vectors.
Updated

What is the motion vector format for RE:Vision Effects' products?
Motion Vectors Format Explained
Updated
How La Maison's Mental Ray plugin works with RE:Vision Effects plugins
Mental Ray shader that can be used to output vectors for RE:Vision Effects plugins
Updated
Motion Vectors Out of Maya - video 1 to 4
Motion Vectors out of Maya is a set of 4 tutorials prepared by Arkadiy Demchenko
Updated
Converting NTSC to PAL (or vice-versa) in AE
Step by step NTSC to PAL and vice-versa in After Effects
Updated
RE:Flex 3 Sample Projects
Updated

RE:Flex v4 and v5 Sample Projects
Updated
Handling Twixtor Artifacts in Premiere Pro
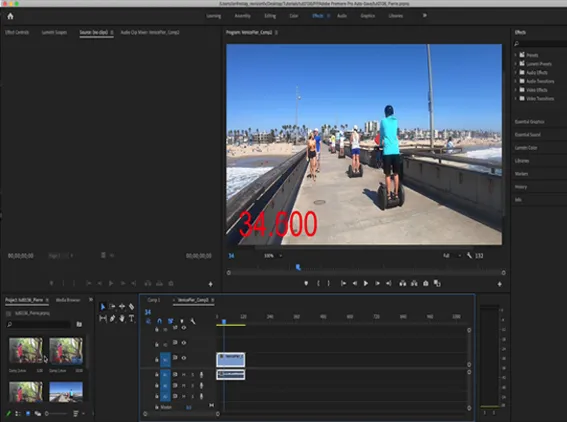
Handling Twixtor Artifacts in Premiere Pro product: Twixtor Premiere Pro compatible host used for tutorial: Premiere Pro
Updated

LipSynch with Twixtor in Premiere Pro
Updated
Speed Ramp in Premiere Pro with Twixtor
Updated
Twixtor Overview within Premiere Pro
Updated
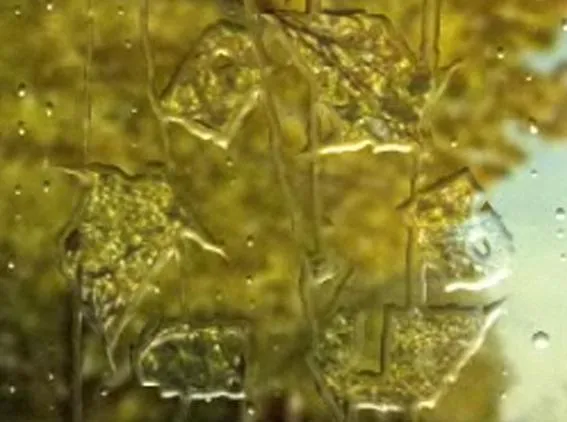
Shade/Shape - Rendering Realistic Water Droplets
This post covers a digital video compositing technique for rendering photo-realistic water droplets moving on glass surfaces.
Updated
RE:Map - How to Export UV Maps out of Cinema 4D
A short movie that shows how to export UV maps out of Cinema 4D
Updated
RE:Map Understanding UV Images
Understanding UV images: how to generate and use them with RE:Map (for host apps Modo, Lightwave and Cinema 4D). Provided by Mylenium.
Updated
RE:Map Sample Projects
How to use RE:Map.
Updated

Staircase and aliasing reduction
In this example, we show SmoothKit Staircase Suppress and its ability to reduce "jaggies" without unnecessarily overblurring.
Updated
SmoothKit Diffusion, better median filtering
In this example, we explain how SmoothKit DIffusion works. A specific example is given showing how better median filtering can be accomplished.
Updated
Time lapse streaks
Create super long timelapse-like streaks using ReelSmart Motion Blur and SmoothKit Frame Accumulate.
Updated

Directional Blur using splines
SmoothKit Directional with Splines uses AE's masks or combustion's rotosplines to interactively control the direction of the blur at each pixel.
Updated

Directional Blur
Using SmoothKit Directional you can control the direction of a blur at each pixel independently.
Updated
Depth of Field
In these examples we show how to create depth-of-field effects using SmoothKit ZBlur using color and depth images rendered from a 3D system.
Updated
Vignetting and other per-pixel controlled blurs
SmoothKit's Gaussian filter can be used to control per-pixel blurring and vary the amount of detail on a per-pixel basis.
Updated

Processing footage for a stylized look with SmoothKit
Processing footage for a stylized look with SmoothKit.
Updated

Cleaning up blocky and noisy DV footage
In this tutorial it is our goal to demonstrate how to use SmoothKit to clean up problematic DV footage.
Updated

Blur without blurring over edges
Use SmoothKit's Gaussian Per-Pixel filter to Blur without blurring over the edges
Updated

Animated Impressionism
This tutorial covers a technique for animating paint strokes applied to a still image so that it appears to be a work of impressionistic art.
Updated
A visual example of "Kill immediate if Zero Alpha"
This Tutorial explains when to use the "Kill immediate if Zero Alpha" setting.
Updated
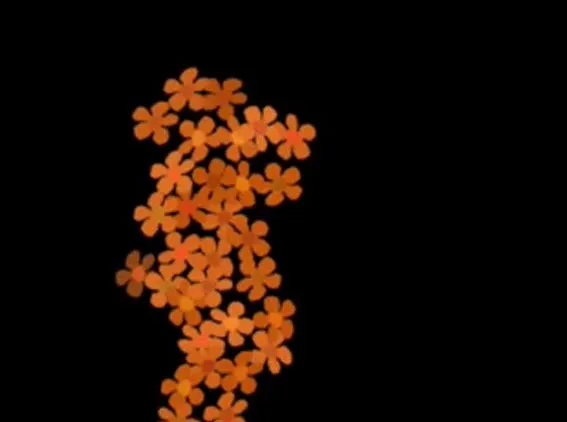
A visual example of birth and death rates
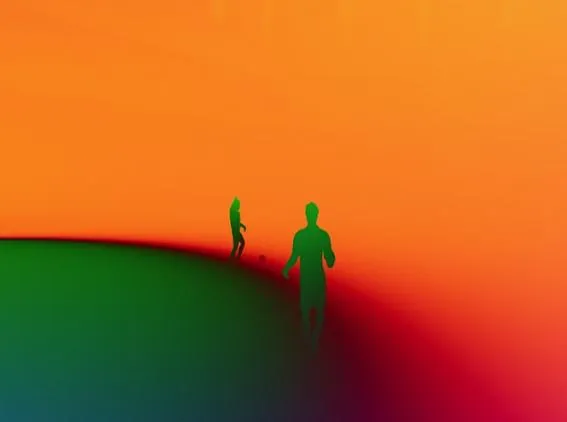
In another example ("Using Video Gogh to create a graphic style") we showed an example of creating some animated flowers.
Updated

Advanced User-Defined Brush Tutorial for Video Gogh
This tutorial expands material provided in the documentation with practical step by step examples on how to set up your own user-defined brushes.
Updated
Using Video Gogh to enhance a graphic style
This tutorial expands material provided in the documentation with practical step by step example on what might be a non-obvious use of Video Gogh that is more graphic in This tutorial expands material provided in the documentation with practical step by step example on what might be a non-obvious use of Video Gogh that is more graphic in nature, and uses custom brushes.
Updated

Using Multiple Layers of Video Gogh
In this tutorial we provide some notes for a more refined effect where you might want to use other effects in combination with Video Gogh. In addition we provide some reasons why you might want to apply Video Gogh in multiple passes
Updated
Twixtor 5 and 6 Sample Projects
Twixtor 5 sample projects (Mac/Windows)
Updated
Frame Rate Conversions in Twixtor within FCP
This Tutorial demonstrates how to do a frame rate conversion from 30fps to 24 fps, and also NTSC to PAL. Note these methods can be used as a base to convert from any progressive source to progressive destination material or interlaced NTSC to PAL frame rates.
Updated

What to do when you get unwanted warping with Twixtor within FCP
What to do when Twixtor produces unwanted warping.
Updated
Lip-Synch with Twixtor in FCP
This tutorial covers the basic concept of timewarping a video track to a different audio track using Twixtor. As example, we lip-synch an outdoor shoot to a studio recording. This method could also be used to sync video to another video track.
Updated
Frame Edges, Problems and Twixtor within FCP
This Tutorial explains when it is appropriate to use Smart Blend and shows Twixtor and Twixtor Pro with Smart Blend and compares a panning shot slowed down 10x with and without Smart Blend.
Updated
Twixtor, Trimming and Transitions in FCP
This screencast describes a bug that occurs in Final Cut Pro when using Twixtor and how to work around it to do trims and transitions.
Updated

Twixtor for FCP SpeedRamp
This screencast gives an overview of how to use Twixtor within Final Cut Pro, to do a speed ramp using two different methods. You will see an example of the Frame number and Speed option to do a speed ramp in Twixtor.
Updated
Fit to Fill in FCP Using Twixtor
This screencast gives an overview of how to use Twixtor within Final Cut Pro, in order to lengthen or shorten a sequence to fit into a specified gap using the frame number option in Twixtor.
Updated
Twixtor Overview for FCP
This screencast gives an overview of how to use Twixtor within Final Cut Pro, including how to apply Twixtor, how to speed up and slow down using Twixtor, and special considerations needed.
Updated
Better Retiming with Twixtor within FCP
This screencast shows a comparison between the speed tools in FCP and using Twixtor withing FCP. You will see that the Twixtor result is much better.
Updated
What to do when Twixtor produces unwanted warping in AE
This Tutorial explains how to use Motion Sensitivity to avoid unwanted warping in your re-timed shot.
Updated
Frame Edge Problems and Twixtor in AE
This Tutorial explains when it is appropriate to use Smart Blend and shows Twixtor and Twixtor Pro with Smart Blend and compares a panning shot slowed down 10x with and without Smart Blend.
Updated
Frame Rate Conversions with Twixtor in AE
This Tutorial demonstrates how to do a frame rate conversion from 30fps to 24 fps. This tutorial specifically using footage from the Canon 5D Mark II but this method can be applied to any frame rate conversion using Twixtor.
Updated
Marking Edit Points with Twixtor in AE
This Tutorial shows how to mark segments in an edit in order to avoid warping across edits when speeding up or slowing down the overall edit.
Updated
Twixtor 4 sample projects
Twixtor sample projects (download)
Updated
Lip Synching with Twixtor in AE
This tutorial covers the basic concept of timewarping a video track to a different audio track using Twixtor. As example, we lip-synch an outdoor shoot to a studio recording.
Updated
Speed Ramping with Twixtor in AE
This Tutorial covers the basics on how to do a simple Speed Ramp effect using Twixtor in After Effects.
Updated
Twixtor in AE Overview
This screencast gives an overview of how to use Twixtor within After Effects, including how to apply Twixtor, how to speed up and slow down using Twixtor, and special considerations needed.
Updated
Test Tutorial 1
A test local-only tutorial by Gary
Autograph
Updated
RE:Grade
Updated
RE:Fill in AE and Premiere
Updated
Our Plugins in Flame
A set of tutorials for our plugins in Flame
Updated
Our Plugins in Scratch
Updated
Our Plugins in Resolve
Updated

RE:Lens
Updated

Our Plugins in Sony Catalyst Edit
Updated

DEFlicker
Updated

DEFlicker for Premiere Pro
DE:Flicker for Premiere Pro
Updated

DEFlicker for FCP X
Updated

Our Plugins in HitFilm
A series of tutorials for HitFilm using our products
Updated

Real World Projects
Updated

DEFlicker for AE
DE:Flicker for AE
Updated

RE:Match
Updated

Twixtor for Final Cut Pro X
Updated

Twixtor for Avid Media Composer
Updated

Twixtor for Vegas Pro
Twixtor For Vegas Pro
Updated

DE:Noise
DE:Noise Tutorials
Updated

RE:Flex After Effects
RE:Flex for After Effects
Updated

Twixtor for Premiere Pro Screencasts
Updated

Twixtor for Final Cut Pro Screencasts
Updated

Twixtor After Effects Screencasts
Screencasts for Twixtor on Adobe After Effects
Updated

RE:Match for Vegas Pro
Sales Support
Updated
AE and Multi-Frame Rendering
Updated
Looks
This album collects different looks
Updated
UV Maps
How to create UV maps
Updated
Motion Vectors
This set of Tutorials addresses Motion Vectors, what they mean, how to render them.
Updated