Find a Tutorial
 Autograph
 Color Genius
 DEFlicker
 RE:Fill
 RE:Grade
 RE:Lens
 REZup
REZup


-
DEFlicker and Timelapse
See TutorialDescription
In this tutorial, you will see the workflow used to get rid of Flicker in a Sunset, Time-lapse video shot at a low frame rate with DEFlicker Time-lapse. Download footage here: https://vimeo.com/436250814/34a2feb04e
This Tutorial Includes
- Video
-
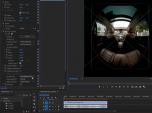
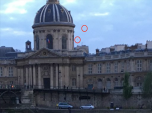
Unwrapping iZugar MKX200 3.8mm fisheye with RE:Lens
See TutorialDescription
RE:Lens tutorial using Izugar 200 mm fisheye - MKX200 is very distortion free
https://www.izugar.com/shop/product/mkx200/Compatible with ZCAM E2, and can also be used on Sony E-Mount and Nikon Z mounts with adapter ringsThis Tutorial Includes
- Video
-
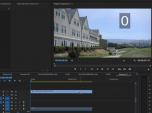
Twixtor 7 in Premiere Pro and AE 2020-Review and Whats New-Part 2
See TutorialDescription
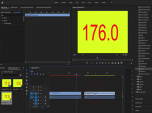
In this tutorial, you will see part 2 which picks up where part 1 leaves off, covering new features in Twixtor 7, running on Premiere Pro and AE 2020. You will want to watch part 1 first for the rest of the new features. You will want to download the latest version of Twixtor to follow along with this tutorial. Features covered in this tutorial:00:27 - InFPS = OutFPS.01:25 - Converting 25FPS to 23.976 FPS and keeping the audio in sync.03:13 - 360 Video checkbox03:22 - Twixtor Pro - RGB+AIn this tutorial, you will see part 2 which picks up where part 1 leaves off, covering new features in Twixtor 7, running on Premiere Pro and AE 2020. You will want to watch part 1 first for the rest of the new features. You will want to download the latest version of Twixtor to follow along with this tutorial. Features covered in this tutorial:
00:27 - InFPS = OutFPS.
01:25 - Converting 25FPS to 23.976 FPS and keeping the audio in sync.
03:13 - 360 Video checkbox
03:22 - Twixtor Pro - RGB+A
This Tutorial Includes
- Video
-
Twixtor 7 in Premiere Pro and AE 2020-Review and Whats New-Part 1
See TutorialDescription
In this tutorial, you will see part 1 which covers some of the new features in Twixtor 7, running on Premiere Pro and AE 2020. You will want to watch part 2 for the rest of the new features. You will want to download the latest version of Twixtor to follow along with this tutorial.Music: YouTube Audio LibraryAuthor: Lori FreitagCompany: RE:Vision Effectslink: http://revisionfx.com/products/Twixtor/In this tutorial, you will see part 1 which covers some of the new features in Twixtor 7, running on Premiere Pro and AE 2020. You will want to watch part 2 for the rest of the new features. You will want to download the latest version of Twixtor to follow along with this tutorial.
This Tutorial Includes
- Video
-
RE:Fill for Better Composites
See TutorialDescription
In this tutorial, you will see how to use RE:Fill Area Fill, Grow/Shrink, Choke and RE:Fill Alpha to create a better composite. You will see examples of how these RE:Fill plugins work together to give you better results.In this tutorial, you will see how to use RE:Fill Area Fill, Grow/Shrink, Choke and RE:Fill Alpha to create a better composite. You will see examples of how these RE:Fill plugins work together to give you better results.
Music: YouTube Audio Library
This Tutorial Includes
- Video
-
Dead pixel, Hot pixel, Stuck pixel removal with RE:Fill
See TutorialDescription
In this tutorial, you will see how to use RE:Fill Area Fill to get rid of Dead, Hot or Stuck pixels. This is just one use for RE:Fill Area Fill. You can check our documentation and other tutorials for other uses.In this tutorial, you will see how to use RE:Fill Area Fill to get rid of Dead, Hot or Stuck pixels. This is just one use for RE:Fill Area Fill. You can check our documentation and other tutorials for other uses.This Tutorial Includes
- Video
-
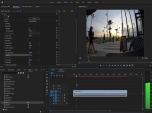
RE:Grade and Timelapse
See TutorialDescription
In this tutorial, you will see a few examples showing different methods of using REGrade to color correct a Time-lapse shot.
Description:In this tutorial, you will see a few examples showing different methods of using REGrade to color correct a Time-lapse shot.Timestamps:00:36 See steps to fixed washed out timelapse footage00:41 Adding RE:Grade Contrast00:56 Fine tuning and adjusting parameters in RE:Grade ContrastMusic: YouTube Audio Library (Virtual Light - Houses of Heaven)Author: Lori FreitagCompany: RE:Vision Effectslink: http://revisionfx.com/products/REGrade/In this tutorial, you will see a few examples showing different methods of using REGrade to color correct a Time-lapse shot.Music: YouTube Audio Library (Virtual Light - Houses of Heaven)This Tutorial Includes
- Video
-
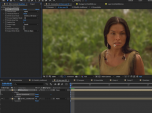
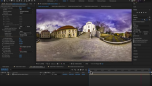
How to make a perfect stabilization VR 360 Hyperlapse video
See TutorialDescription
Andrii Shramko demos a useful feature in RE:Lens spherical stabilizer allowing you to handle real hard shots by masking areas of the source. You can also use this feature on fisheye stabilization where there is moving junk (light flares and leaks) outside of the image circle that affects the tracking, as well as in stitched videos where a camera is moving indepedently from the rest of the rig (which confuses any tracker).
https://www.facebook.com/shramko360/This Tutorial Includes
- Video
-
Premiere Pro to After Effects Workflow
See TutorialDescription
In this tutorial, we will see three examples showing the workflow from Premiere Pro to After Effects using Dynamic link. Examples include use of Twixtor, RE:Match and RE:Lens plugins.In this tutorial, we will see three examples showing the workflow from Premiere Pro to After Effects using Dynamic link. Examples include use of Twixtor, RE:Match and RE:Lens plugins.
This Tutorial Includes
- Video
-
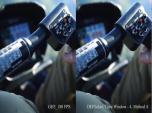
DEFlicker HighSpeed Footage in Premiere
See TutorialDescription
In this tutorial, we will use the DEFlicker Highspeed plugin, to see how to remove flicker on high speed footage.credits:camera used: Panasonic GH5 1080P at 180 FPSSource footage provided by Chris FarroInstagram | @chrisfarroYouTube | youtube.com/ChristopherFarroIn this tutorial, we will use the DEFlicker Highspeed plugin, to see how to remove flicker on high speed footage.
credits:camera used: Panasonic GH5 1080P at 180 FPS Source footage provided by Chris Farro Instagram | @chrisfarroYouTube | youtube.com/ChristopherFarroThis Tutorial Includes
- Video