Find a Tutorial
-
Exporting 3D Renders out of C4D for our plugins: Part 2 - More Passes
See TutorialDescription
This tutorial shows how how to set up a project in Cinema 4D to get the best results for use with RE:Map UV and RSMB Pro Vectors, Smoothkit ZBlur, RE:Fill and Shade Shape in After Effects (although you can use other host applications for compositing and some of this will apply to other plugins).Special Thanks to Patrick Goski at Maxon.net for creating & providing the C4D sample project and for his support 24/7.This tutorial shows how how to set up a project in Cinema 4D to get the best results for use with RE:Map UV and RSMB Pro Vectors, Smoothkit ZBlur, RE:Fill and Shade Shape in After Effects (although you can use other host applications for compositing and some of this will apply to other plugins).
Special Thanks to Patrick Goski at Maxon.net for creating & providing the C4D sample project and for his support 24/7.
This Tutorial Includes
- Video
-
RE:Vision Effects products with Cinema4D
See TutorialDescription
Assigning a Coverage Alpha Matte to the Control Source
Some of our products work from image data rendered from a 3D renderer. Here are notes about Motion Vectors but they apply as well to exporting surface normals or UV maps…
This Tutorial Includes
- Web Pages
-
Introduction to RE:Match Stereo
See TutorialDescription
Description:This tutorial covers the basic concepts and use for RE:Match Stereo
Credits:We would like to thank the following for providing footage:
Jaime Fernández Miranda - jim-box.com.Some material was licensed from Mammoth HD - mammothhd-3d.com/
Thank you to Werner Bloos info@digi-dat.de for providingFootage
OriginalMusic by Bob Bralove, bobbralove.comAlso, thanks to Anthony Magliocco additional footage.
This Tutorial Includes
- Video
-
Introduction to RE:Match Color
See TutorialDescription
This tutorial covers the basic concepts and use for RE:Match MulticamCredits:We would like to thank the following for providing footage:Some material was licensed from Mammoth HD - mammothhd-3d.com/The horses are from Trey Ratcliff of stuckincustoms.comAnd also, thanks to Ami Sun for additional footage.Author: Lori FreitagCompany: RE:Vision Effectslink: http://revisionfx.com/products/rematch/This tutorial covers the basic concepts and use for RE:Match Color.
Credits:We would like to thank the following for providing footage:Some material was licensed from Mammoth HD - mammothhd-3d.com/The horses are from Trey Ratcliff of stuckincustoms.com
Also, thanks to Ami Sun for additional footage.
This Tutorial Includes
- Video
-
Exporting 3d renders out of C4D for our plugins : Part 1 - Motion Vectors and UV Maps
See TutorialDescription
This tutorial shows how how to set up a project in Cinema 4D to get the best results for use with RE:Map UV and RSMB Pro Vectors in After Effects (although you can use other host applications for compositing and some of this will apply to other plugins). A Sample project is included using After Effects.Special Thanks to Patrick Goski at Maxon.net for creating & providing the C4D sample project and for his support 24/7.This tutorial shows how how to set up a project in Cinema 4D to get the best results for use with RE:Map UV and RSMB Pro Vectors in After Effects (although you can use other host applications for compositing and some of this will apply to other plugins). A Sample project is included using After Effects.
Special Thanks to Patrick Goski at Maxon.net for creating & providing the C4D sample project and for his support 24/7.This Tutorial Includes
- Video
- ZIP File
-
RE:Map UVW Multipass
See TutorialDescription
Joren Kandel (http://www.thepixellab.net/blog) has provided a Cinema 4D and After Effects tutorial where he shows you how to use RE:Map UV to replace a C4D UV pass with a 2D texture in After Effects.
This Tutorial Includes
- Video
-
RSMB Vectors from C4D to AE
See TutorialDescription
In this tutorial you will learn how to utilise a motion vector pass from Cinema 4D to introduce motion blur in to your final comp, with RE: Vision Effects Reel Smart Motion Blur Vectors Plugin.
If Play link does not work, try this external link
This Tutorial Includes
- Video
-
Twixtor: When and How to use Tracking Points
See TutorialDescription
This Tutorial shows how to get better results using Tracking Points for more complex shots and to help get rid of warping or ghosting. Tracking Points are available in Twixtor Pro for AE, FCP (pre-FCPX), Premiere Pro, Nuke & OFX hosts such as Scratch & Composite.
This Tutorial Includes
- Video
-
Better Retiming using a Matte
See TutorialDescription
This Tutorial shows how to get better tracking using a matte to separate your footage into multiple layers. Multiple layers are available in Twixtor Pro for AE, FCP, Premiere Pro, and Twixtor for Smoke, Flame, Fusion, Nuke & OFX hosts such as Scratch & Composite.Author: Lori FreitagCompany: RE:Vision Effectslink: http://revisionfx.com/products/twixtor/This Tutorial shows how to get better tracking using a matte to separate your footage into multiple layers. Multiple layers are available in Twixtor Pro for AE, FCP, Premiere Pro, and Twixtor for Smoke, Flame, Fusion, Nuke & OFX hosts such as Scratch & Composite.
This Tutorial Includes
- Video
-
DE:Noise - Beyond the Basics
See TutorialDescription
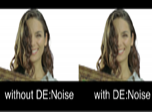
This tutorial shows how to use DE:Noise. It continues where the "Essentials" tutorial left off. This tutorial covers some of the more advanced settings to remove unwanted noise from your footage and gives examples so you can easily apply them to similar scenarios. The controls are the same in all supported applications except where I note differences.
Special Thanks to (in order of appearance) for providing and/or allowing us to use their footage for this tutorial: (1) Mark Tekushan for the Noisy Blue screen footage www.markfx.com (2) Sean Wheeler & Zander Schloss for allowing us to use the footage I shot of them playing www.facebook.com/SeanWheelerandZanderSchloss (3) Grant Davis www.vjculture.com (4) Jim Tierney for his whale footage www.whalewatcher.net (5) Michael Sayag for his black & white footage (6) AlFredo from BLT in Italy for the Italian Car footage www.blt.itt
This Tutorial Includes
- Video

 All Products
 ARRI Film Lab
 Autograph
 Color Genius
 DE:Noise
 DEFlicker
 Effections
 FieldsKit
 PV Feather
 RE:Fill
 RE:Flex
 RE:Grade
 RE:Lens
 RE:Map
 RE:Match
 REZup
REZup RSMB
RSMB Shade/Shape
 SmoothKit
 Twixtor
 Video Gogh
 After Effects


