Find a Tutorial
-
Processing footage for a stylized look with SmoothKit
See TutorialDescription
This tutorial may seem rather specific to creating a stylized look, but processing footage in this way can be useful for many tracking and keying jobs too.
This Tutorial Includes
- Video
-
Cleaning up blocky and noisy DV footage
See TutorialDescription
In this tutorial it is our goal to demonstrate how to use SmoothKit to clean up problematic DV footage.
This Tutorial Includes
- Web Pages
-
Blur without blurring over edges
See TutorialDescription
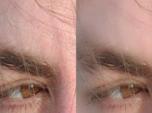
SmoothKit's Gaussian Per-Pixel filter's "maximum deviation" is explained with an example that retains fine hair detail while at the same time smoothing out blemishes in skin.
This Tutorial Includes
- Video
-
A visual example of "Kill immediate if Zero Alpha"
See TutorialDescription
This Tutorial explains when to use the "Kill immediate if Zero Alpha" setting.
This Tutorial Includes
- Web Pages
-
A visual example of birth and death rates
See TutorialDescription
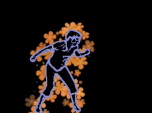
In another example ("Using Video Gogh to create a graphic style") we showed an example of creating some animated flowers. This tutorial shows the steps to create this effect.
This Tutorial Includes
- Web Pages
-
Advanced User-Defined Brush Tutorial for Video Gogh
See TutorialDescription
This tutorial expands material provided in the documentation with practical step by step examples on how to set up your own user-defined brushes.
This Tutorial Includes
- Web Pages
-
Using Video Gogh to enhance a graphic style
See TutorialDescription
This tutorial expands material provided in the documentation with practical step by step example on what might be a non-obvious use of Video Gogh that is more graphic in nature, and uses custom brushes.
This Tutorial Includes
- Web Pages
-
Using Multiple Layers of Video Gogh
See TutorialDescription
In this tutorial we provide some notes for a more refined effect where you might want to use other effects in combination with Video Gogh. In addition we provide some reasons why you might want to apply Video Gogh in multiple passes.
This Tutorial Includes
- Web Pages
-
Twixtor 5 and 6 Sample Projects
See tutorialDescription
Twixtor 5 sample projects for:
- Adobe After Effects 7.0 and later
- Final Cut Pro 6.03 or later.
- Premiere Pro
This Tutorial Includes
- DMG File
- ZIP File
-
Frame Rate Conversions in Twixtor within FCP
See TutorialDescription
This Tutorial demonstrates how to do a frame rate conversion from 30fps to 24 fps, and also NTSC to PAL. Note these methods can be used as a base to convert from any progressive source to progressive destination material or interlaced NTSC to PAL frame rates.
Footage provided by Banditos Brothers
This Tutorial Includes
- Video

 All Products
 Autograph
 Color Genius
 DE:Noise
 DEFlicker
 Effections
 FieldsKit
 PV Feather
 RE:Fill
 RE:Flex
 RE:Grade
 RE:Lens
 RE:Map
 RE:Match
 REZup
REZup RSMB
RSMB Shade/Shape
 SmoothKit
 Twixtor
 Video Gogh
 Final Cut Pro


